Saturday, June 26, 2010

Outrageous Brownies


Have you seen the movie Julie and Julia? You know, the movie where a woman named Julie cooks the recipes from Julia Child's cookbook for an entire year and blogs about it? Well, I'm beginning to think that my blog has become AJ and Ina. It seems like most of the recipes I've used involves Ina Garten. I don't know how many Ina Garten recipes I have used on this blog but it feels like every other blog post has been from Ina. Oh well, her food is delicious and that's all that matters.

So, this weeks creation was Brownies, specifically Ina Garten's Outrageous Brownies. I've been on the search for a great tasting brownie recipe for years now. Each time I made brownies from scratch, they don't exactly match my standards and by standards I mean the boxed brownie mixes. The boxed brownie mixes are the best. They are chewy, fudge-y, a little cake-like and chocolate-y. They just have a great overall taste to them. When you keep going back to a pan of brownies and slicing yourself a piece, you know it's great and that's what the boxed brownies do for me. With the different brownie recipes I have tried, such as Ghiradelli's and Hershey's recipes, I find that they are not chocolate-y enough and have a strange taste to them. I've wanted to try out Ina Garten's Outrageous Brownies for a couple of years now because of the great reviews but failed to do so because it requires a whole POUND of butter!! That's a crazy amount of butter and I didn't want to waste all that butter if the brownies turned out badly. So, I finally got the courage to make them by halving the recipe and just using two sticks of butter.

What's the result? I'm not that big of a fan. Sorry, Ina! So many people say these are the best but I don't think so. Compared to other brownie recipes from scratch, yes, these brownies are much better. Compared to the boxed brownie mix, the boxed brownie mix is much better in my opinion. Maybe I've just grown accustomed to the boxed brownies but for me, these did have a strong chocolate flavor but I feel as if the boxed version has more of a pleasant chocolate flavor, if that makes sense? Also, I didn't like the texture so much. These were like fudge so I was confused when eating them. I mean, I like them fudgey but I don't want to eat the fudge candy. I was somewhat disappointed by these. I think from now on, I will stick to the boxed version. But, I'm still going to be on the look out for a "from-scratch" version. What about you? What's your favorite "from-scratch" brownie recipe? Here's the recipe!

Outrageous Brownies (Makes 20 Large Brownies)
Ingredients
1 pound unsalted butter
1 pound plus 12 ounces semisweet chocolate chips
6 ounces unsweetened chocolate
6 extra-large eggs
3 tablespoons instant coffee granules
2 tablespoons pure vanilla extract
2 1/4 cups sugar
1 1/4 cups all-purpose flour
1 tablespoon baking powder
1 teaspoon salt
3 cups chopped walnuts

Directions
Preheat oven to 350 degrees F.

Butter and flour a 12 x 18 x 1-inch baking sheet.

Melt together the butter, 1 pound of chocolate chips, and the unsweetened chocolate in a medium bowl over simmering water. Allow to cool slightly. In a large bowl, stir (do not beat) together the eggs, coffee granules, vanilla, and sugar. Stir the warm chocolate mixture into the egg mixture and allow to cool to room temperature.

In a medium bowl, sift together 1 cup of flour, the baking powder, and salt. Add to the cooled chocolate mixture. Toss the walnuts and 12 ounces of chocolate chips in a medium bowl with 1/4 cup of flour, then add them to the chocolate batter. Pour into the baking sheet.

Bake for 20 minutes, then rap the baking sheet against the oven shelf to force the air to escape from between the pan and the brownie dough. Bake for about 15 minutes, until a toothpick comes out clean. Do not overbake! Allow to cool thoroughly, refrigerate, and cut into 20 large squares.

Killer Brownies on Foodista
-Aaron John
My Food Outings: AJ's Food Adventure
Facebook Fan Page

Tuesday, June 22, 2010

Strawberry Sauce


Ok, so this is the Strawberry Sauce I used for my Mini Cheesecakes. I really love strawberry cheesecake and so I thought I would make this sauce to top my cheesecakes, along with my Blueberry Sauce. This recipe is extremely simple. I adapted this recipe from Ina Garten's Raspberry Sauce. It only takes about 10 mins, or so to complete. This Strawberry Sauce is perfect on anything!! Pancakes, ice cream sundaes, maybe even use it to make strawberry milk instead of those artificially colored pink strawberry syrups you find in the ice cream topping section of grocery stores or what I used it for, cheesecake. It has a nice fresh strawberry flavor and it does taste a bit like the strawberry preserves so make sure you buy a strawberry preserve that you enjoy using. It's a very good go-to recipe if you have leftover strawberries as well! Here's the recipe!!

Strawberry Sauce (Makes about 3/4 cup)
Ingredients
1 cup of chopped fresh strawberries
1/4 cup sugar
2 tbsp water
1/4 cup Strawberry Preserves

Directions
Place the chopped strawberries, sugar and water into a small saucepan. Place it on the stove and cook over medium heat until it begins to boil. Then cook the strawberries for about 5 mins, or until the strawberries are almost completely broken down. Once broken down, pour the mixture into a food processor along with the 1/4 cup of Strawberry Preserves. Process the mixture until it is smooth. Pour the finished mixture into a bowl and let cool in the refrigerator.

Strawberry Sauce on Foodista
-Aaron John
My Food Outings: AJ's Food Adventure
Facebook Fan Page

Saturday, June 19, 2010

Mini Cheesecakes


From my personal experience, I've learned that you either love cheesecake or you hate it. For me personally, I actually dislike plain-old-cheesecake. However, once it is ice cold and topped with a flavorful sauce, perhaps a strawberry or BLUEBERRY SAUCE, it becomes tastier for me. Yes, that's right, you've waited long enough. I planned to use Ina Garten's Blueberry Sauce I made a week ago and froze, right here on this cheesecake. After a constant nagging from my brother to make cheesecake, I decided that I would. This was the first time making cheesecake so I searched the internet for the best cheesecake recipe. The recipe I ended up with came from Tyler Florence yet again. Remember what a flop of a recipe Tyler Florence's Blueberry Scones with Lemon Glaze came out to be for me? Well, hopefully Tyler Florence can redeem himself with this cheesecake recipe.

Now when making this cheesecake, I very well knew that I didn't have a spring form pan. I mean, I didn't want to go out and buy a new pan that was designated for a cheesecake so I decided to make mini cheesecakes by baking them in a cupcake pan. I thought this would be a great thing to do. It creates a great portion size and doesn't it just look, well, cool? Don't you just want to have one all for yourself? Plus, this way, you can make a bunch of Mini Cheesecakes with the same batter and change their flavors by the different toppings you can add. With this, you can offer your guests a variety of flavored Mini Cheesecakes instead of having one huge cheesecake that is flavored one way like what Tyler Florence's recipe suggests. So, I followed the recipe exactly and simply used a cupcake pan lined with cupcake papers. (When using the Mini Cheesecake method, it makes about 24). I added about 1 tbsp of the graham cracker mixture into the pan and flattened it out. Then I filled them almost to the top with the cheesecake batter. I then baked it in a water bath for about 22 minutes. It takes between 20 and 25 mins in the oven. It should be just set when you take it out of the oven. I then placed it into the refrigerator to finish setting up. After being in the refrigerator over night, I topped them with either the Blueberry Sauce, a home made Strawberry Sauce or Melted Chocolate. I then went overboard and put a bunch of home-made whipped cream on them that I made by HAND. Remember? I broke my mixer last week making Sticky Buns.....

These Mini Cheesecakes were actually really good! Tyler Florence redeemed himself. These were creamy, had the right amount of tang, a hint of lemon and vanilla flavor and the graham cracker crust had a nice hint of spice from the cinnamon and gave a great textural difference. Then, the different toppings really rounded out the flavors. Thumbs up to Tyler Floernce. I will be posting the recipe for the Strawberry Sauce in a couple of days so look out for that. Here's the cheesecake recipe!!

The Ultimate Cheesecake (6-8 servings)
Ingredients
Crust:
2 cups finely ground graham crackers (about 30 squares)
1/2 teaspoon ground cinnamon
1 stick unsalted butter, melted

Filling:
1 pound cream cheese, 2 (8-ounce) blocks, softened
3 eggs
1 cup sugar
1 pint sour cream
1 lemon, zested
1 dash vanilla extract
Warm Lemon Blueberry Topping, recipe follows

Directions
Preheat the oven to 325 degrees F.

In a mixing bowl, combine the crust ingredients with a fork until evenly moistened. Lightly coat the bottom and sides of an 8-inch springform pan with nonstick cooking spray. Pour the crumbs into the pan and, using the bottom of a measuring cup or the smooth bottom of a glass, press the crumbs down into the base and 1-inch up the sides. Refrigerate for 5 minutes.

For the Filling:

In the bowl of an electric mixer, beat the cream cheese on low speed for 1 minute until smooth and free of any lumps. Add the eggs, 1 at a time, and continue to beat slowly until combined. Gradually add sugar and beat until creamy, for 1 to 2 minutes. Add sour cream, lemon zest, and vanilla. Periodically scrape down the sides of the bowl and the beaters. The batter should be well mixed but not over-beaten. Pour the filling into the crust-lined pan and smooth the top with a spatula.

Set the cheesecake pan on a large piece of aluminum foil and fold up the sides around it. Place the cake pan in a large roasting pan. Pour boiling water into the roasting pan until the water is about halfway up the sides of the cheesecake pan; the foil will keep the water from seeping into the cheesecake. Bake for 45 minutes. The cheesecake should still jiggle (it will firm up after chilling), so be careful not to overcook. Let cool in pan for 30 minutes. Chill in the refrigerator, loosely covered, for at least 4 hours. Loosen the cheesecake from the sides of the pan by running a thin metal spatula around the inside rim. Unmold and transfer to a cake plate. Using a spatula spread a layer of Warm Lemon Blueberry topping over the surface.

Slice the cheesecake with a thin, non-serrated knife that has been dipped in hot water. Wipe dry after each cut.

Warm Lemon Blueberries
1 pint blueberries
1 lemon, zested and juiced
2 tablespoons sugar
In a small saucepan add all the ingredients and simmer over medium heat for 5 minutes or so until the fruit begins to break down slightly. Leave to cool before spreading on cheesecake.

Miniature Cheesecakes on Foodista
-Aaron John
My Food Outings: AJ's Food Adventure
Facebook Fan Page

Wednesday, June 16, 2010

Chocolate Covered Strawberries


Is there even a recipe needed for Chocolate Covered Strawberries? I don't think so. It should simply be, chocolate and strawberries. There are so many different variations on the chocolate for the strawberries that have me saying "Are you serious?". I mean there are all these "recipes" to put cream, half and half, liquors and flavorings in the chocolate that really takes away from the simplicity of a Chocolate Covered Strawberry. What is wrong with just melting chocolate and dipping strawberries into it? Nothing!! The simpler, the better. Plus, I enjoy that "snap" the chocolate has when you do nothing but melt it and dip strawberries into it. Once you dive into adding cream and half and half, it creates a soft chocolate exterior and really takes away from that textural difference between the chocolate and strawberry. These are super simple to make and yet, have a huge "WOW" factor. It's a tart, yet sweet, strawberry covered in chocolate, nothing wrong with that. Now if you really need a recipe, here it is. But do you really?

Chocolate Covered Strawberries
Ingredients
6 ounces milk chocolate chips
3 ounces white chocolate chips
1 pound strawberries, washed and dried very well

Directions
Put the milk chocolate chips and white chocolate chips into 2 separate microwave safe bowls. Microwave each bowl for about 1 min, stirring every 20/30 secs or so. Stir until smooth.

Once the chocolates are melted and smooth, line a sheet pan, cutting board, plate or whatever you have, with parchment or waxed paper. Holding the strawberry by the leaves or stem, dip the fruit into the melted milk chocolate, lift and twist slightly. Let any excess chocolate fall back into the bowl. Set strawberries on the parchment paper. Repeat with the rest of the strawberries. Dip a fork in the white chocolate and drizzle the white chocolate over the dipped strawberries.

Place the strawberries into the refrigerator until the chocolate sets, about 30 minutes.

Chocolate-Covered Strawberry on Foodista
-Aaron John
My Food Outings: AJ's Food Adventure
Facebook Fan Page

Saturday, June 12, 2010

Sticky Buns


I have always wanted to eat and make Sticky Buns. While growing up, the closest thing to Sticky Buns that I've had were Cinnamon Rolls from Cinnabon. YUM!! But, I always wondered what a Sticky Bun would taste like. Would it be too sweet? Would it be cinnamon-y? Would it be soft and fluffy? Would it taste like a regular old Cinnamon Roll? The more I type this, the more I wonder. Finally, I decided to make Sticky Buns. As I began my search for a recipe, I was trying to find the best one. Then it hit me! I remembered watching a Sticky Bun episode on "Throwdown with Bobby Flay". Joanne Chang supposedly has the best Sticky Buns in the country. That's a pretty big title to uphold. Since it's the best, I might as well try it, right? However, there has been different recipes that were posted of Joanne Chang's Sticky Buns so I had to choose which one. I just decided to use the Food Network recipe because that was the first place where I first saw Joanne Chang's Sticky Buns.

So, I got to work. I was shocked to find out that this recipe uses more than a pound of butter!! If it uses this much butter it better be good. Because of this, I decided to halve the recipe for the dough since the dough is a "double batch". This recipe definitely is time consuming, labor intensive and requires a ton of patience. The dough takes up most of the time whereas the "goo" and the Sticky Bun filling only took mere minutes to prepare. When making the dough, I practically did it all by hand. Talk about muscle power! I did it by hand because the dough burned out the motor in my mixer!! :'( I think my mixer is broken now..... After that ordeal, I put the dough in the refrigerator overnight. The next day, I started on the "goo". Super easy to do. Put everything in a pot and let it do its thing. When that was finished, I poured it into two 9-inch cake pans instead of the 9 x 13 baking pan. While that was cooling, I rolled out the dough, spread the filling, rolled it into a log and cut Sticky Buns out of it. I placed the Sticky Buns into the cake pans and let them proof. Then I baked them until golden brown.

When they came out of the oven they looked delicious and they made the house smell great!! I couldn't wait but I knew I had to. I find that when you make something like this, you have to let it cool, almost completely, or else the center has a "doughy" quality to it. It isn't until it cools that the center loses the "doughy" quality. I was patient and waited. When I took out the first Sticky Bun covered in the "goo", my jaw dropped! They looked decadent so I had to try it. The brioche was light and fluffy, the "goo" was sweet with the flavor of butterscotch and a floral note from the honey and the pecans gave a nice crunch and nutty-ness. YUM!! If you have a sweet tooth, this is for you! So, after 20 hrs of creating them, sore arms and a broken mixer. These were worth it. Well, let me take that back. It was worth it except for the BROKEN MIXER part!! Now I have to go and buy a new one!! :( Darn Sticky Buns!!! Here's the recipe!

Sticky Buns
Ingredients
Goo
3/4 cup (1 1/2 sticks; 170 grams, 6 ounces) unsalted butter
1 1/2 cups (345 grams) firmly packed light brown sugar
1/3 cup (110 grams) honey
1/3 cup (80 grams) heavy cream
1/3 cup (80 grams) water
1/4 teaspoon kosher salt

Basic Brioche Dough (recipe follows)

Filling
1/4 cup (55 grams) light brown sugar
1/4 cup (50 grams) granulated sugar
1/8 teaspoon ground cinnamon
1 cup (100 grams) pecan halves, toasted and chopped

Directions
First, make the goo. In a medium saucepan, melt the butter over medium heat. Whisk in the brown sugar and cook, stirring, to combine (it may look separated, that's ok). Remove from the heat and whisk in the honey, cream, water, and salt. Strain to remove any undissolved lumps of brown sugar. Let cool for about 30 minutes, or until cooled to room temperature. You should have about 3 cups. (The mixture can be made up to 2 weeks in advance and stored in an airtight container in the refrigerator.)

Divide the dough in half. Use half for this recipe and reserve the other half for another use.

On a floured work surface, roll out the brioche into rectangle about 12 by 16 inches and 1/4-inch thick. It will have the consistency of cold, damp Play-Doh and should be fairly easy to roll. Position the rectangle so a short side is facing you.

In a small bowl, stir together the brown sugar, granulated sugar, cinnamon, and half of the pecans. Sprinkle this mixture evenly over the entire surface of the dough. Starting from the short side farthest from you and working your way down, roll up the rectangle like a jelly roll. Try to roll tightly, so you have a nice round spiral. Trim off about 1/4- inch from each end of the roll to make them even.

Use a bench scraper or a chef's knife to cut the roll into 8 equal pieces, each about 1 1/2-inches wide. (At this point, the unbaked buns can be tightly wrapped in plastic wrap and frozen for up to 1 week. When ready to bake, thaw them, still wrapped, in the refrigerator overnight or at room temperature for 2 to 3 hours, then proceed as directed.)

Pour the goo into a 9 by 13-inch baking dish, covering the bottom evenly. Sprinkle the remaining pecans evenly over the surface. Arrange the buns, evenly spaced, in the baking dish. Cover with plastic wrap and put in a warm spot to proof until the dough is puffy, pillowy, and soft and the buns are touching-almost tripled in size, about 2 hours.

Position a rack in the center of the oven, and heat to 350 degrees F.

Bake until golden brown, about 35 to 45 minutes. Let cool in the dish on a wire rack for 20 to 30 minutes. One at a time, invert the buns onto a serving platter, and spoon any extra goo and pecans from the bottom of the dish over the top.

The buns are best served warm or within 4 hours of baking. They can be stored in an airtight container at room temperature for up to 1 day, and then warmed in a 325 degree F oven for 10 to 12 minutes before serving.

Brioche Dough
2 1/2 cups (350 grams) unbleached all-purpose flour, plus more if needed
2 1/4 cups (340 grams) bread flour
1 1/2 packages (3 1/4 teaspoons) active dry yeast or 1-ounce (28 grams) fresh cake yeast

1/3 cup plus 1 tablespoon (82 grams) sugar
1 tablespoon kosher salt
1/2 cup cold water
6 eggs
1 3/8 cups (2 3/4 sticks; 310 grams) unsalted butter, at room temperature, cut into 10 to 12 pieces

Using a stand mixer fitted with the dough hook, combine the all-purpose flour, bread flour, yeast, sugar, salt, water, and 5 of the eggs. Beat on low speed for 3 to 4 minutes, or until all the ingredients are combined. Stop the mixer, as needed, to scrape the sides and bottom of the bowl to make sure all the flour is incorporated into the wet ingredients. Once the dough has come together, beat on low speed for another 3 to 4 minutes. The dough will be very stiff and seem quite dry.

With the mixer on low speed, add the butter, 1 piece at a time, mixing after each addition until it disappears into the dough. Continue mixing on low speed for about 10 minutes, stopping the mixer occasionally to scrape the sides and bottom of the bowl. It is important for all the butter to be thoroughly mixed into the dough. If necessary, stop the mixer occasionally and break up the dough with your hands to help mix in the butter.

Once the butter is completely incorporated, turn up the speed to medium and beat until the dough becomes sticky, soft, and somewhat shiny, another 15 minutes. It will take some time to come together. It will look shaggy and questionable at the start and then eventually it will turn smooth and silky. Turn the speed to medium-high and beat for about 1 minute. You should hear the dough make a slap-slap-slap sound as it hits the sides of the bowl. Test the dough by pulling at it; it should stretch a bit and have a little give. If it seems wet and loose and more like a batter than a dough, add a few tablespoons of flour and mix until it comes together. If it breaks off into pieces when you pull at it, continue to mix on medium speed for another 2 to 3 minutes, or until it develops more strength and stretches when you grab it. It is ready when you can gather it all together and pick it up in 1 piece.

Put the dough in a large bowl or plastic container and cover it with plastic wrap, pressing the wrap directly onto the surface of the dough. Let the dough proof (that is, grow and develop flavor) in the refrigerator for at least 6 hours or up to overnight At this point you can freeze the dough in an airtight container for up to 1 week.

Philadelphia Sticky Buns on Foodista
-Aaron John
My Food Outings: AJ's Food Adventure
Facebook Fan Page

Monday, June 7, 2010

Blueberry Sauce


Boy, it feels good finishing up finals!! In general, it feels good to finish any test. My Sociology Final went pretty well. As usual, there were the tricky questions but I think I did alright. I personally thought that the blueberries worked their magic on my brain. haha. Now time for this post.

Well, the past two posts have been about blueberries. This one is no different! What I forgot to tell you guys before was that the blueberries I got came from Costco. We all know that when you go to Costco, you buy things in BULK. So, the past two recipes/blog posts weren't able to use up all the blueberries. Finally, this recipe for Blueberry Sauce by Ina Garten (Surprise, Surprise. It's Ina again! haha) was able to use them all up and I have a little plan for it later. This recipe was extremely simple. You can do it in your sleep!! It's only sugar, blueberries and water. How easy is that? You just throw everything in a pot and let it cook (I actually used regular sugar and about 1/2 a teaspoon of vanilla extract for this recipe in place of the vanilla sugar). Once cooked, I strained it, and let the sauce cool before refrigerating/freezing. The sauce had a nice tangy sweetness with flavors of blueberries and vanilla. Simple and delicious. After it cooled, I froze this sauce. You'll just have to wait and see where I'm going to use it! Here's the recipe!

Blueberry Sauce (Makes about 1 cup)
Ingredients
1 1/2 pints fresh blueberries, rinsed
1 cup vanilla sugar
1 tablespoon fresh lemon juice

Directions
Combine the blueberries and vanilla sugar in a large heavy saucepan. Add 1 cup water and the lemon juice and bring to a boil over high heat, stirring occasionally. Reduce the heat and simmer for 15 minutes, or until the mixture begins to thicken.

Remove from the heat and strain through a fine sieve. Cool to room temperature, cover and refrigerate.

Blueberry Sauce on Foodista
-Aaron John
My Food Outings: AJ's Food Adventure
Facebook Fan Page

Sunday, June 6, 2010

Blueberry Coffee Cake Muffins


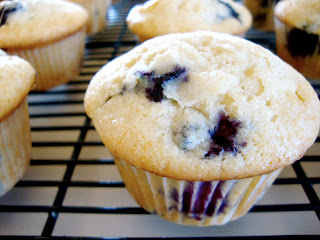
Because of the disastrous Blueberry Scones with Lemon Glaze recipe yesterday, I decided to make Ina Garten's Blueberry Coffee Cake Muffins today. Tomorrow I have my Sociology Final and I was hoping these wouldn't be another flop of a recipe. Since I had a ton blueberries left over from yesterday, I might as well use them, right? This recipe was extremely simple and straight forward. Plus the blueberries didn't get crushed!! And why would they in this recipe? It's an actual batter which makes it less stressful. **Tip: Toss the blueberries in a little bit of flour before folding them into the batter to prevent them from sinking to the bottom of the muffin when baking. I also added the zest of one lemon to the batter because it goes well with blueberries. Making the batter was quick. The longest part of the recipe was the baking period but that was about it. These came out with a pale golden brown top and were delicious!! Finally, redemption from yesterday. These were moist, sweet yet tart from the blueberries and the lemon definitely rounded out the flavors. Hopefully these will be a great "brain food" tomorrow! They actually say that blueberries help with memory so let's see if that's true with my Sociology Final. Now I have to get back to studying!! Here's the recipe!

Blueberry Coffee Cake Muffins (Makes 16 Muffins)
Ingredients
12 tablespoons (1 1/2 sticks) unsalted butter, at room temperature
1 1/2 cups sugar
3 extra-large eggs, at room temperature
1 1/2 teaspoons pure vanilla extract
8 ounces (about 1 cup) sour cream
1/4 cup milk
2 1/2 cups all-purpose flour
2 teaspoons baking powder
1/2 teaspoon baking soda
1/2 teaspoon kosher salt
2 half-pints fresh blueberries, picked through for stems

Directions
Preheat the oven to 350 degrees F. Place 16 paper liners in muffin pans.

In the bowl of an electric mixer fitted with the paddle attachment, cream the butter and sugar until light and fluffy, about 5 minutes. With the mixer on low speed, add the eggs 1 at a time, then add the vanilla, sour cream, and milk. In a separate bowl, sift together the flour, baking powder, baking soda, and salt. With the mixer on low speed add the flour mixture to the batter and beat until just mixed. Fold in the blueberries with a spatula and be sure the batter is completely mixed.

Scoop the batter into the prepared muffin pans, filling each cup just over the top, and bake for 25 to 30 minutes, until the muffins are lightly browned on top and a cake tester comes out clean.

Blueberry Muffins on Foodista
-Aaron John
My Food Outings: AJ's Food Adventure
Facebook Fan Page

Saturday, June 5, 2010

Blueberry Scones with Lemon Glaze


Lately, I've been craving Blueberry Scones. I haven't had one in a very long time. The first ever Blueberry Scone I had came from Starbucks and it was beyond good. It had a crunchy layer of sugar on the top, was buttery on the inside and the blueberries were tart and sweet. Just describing them makes me want to go buy one right now. But instead, I have a funny story to tell you that my friend told me about. My friend was at "By George", which is a cafe/food place underneath UW's Odegaard library, waiting in line to order. A girl in front of her ordered a muffin and when the cashier returned with the girl's order, she gave her a scone. Okay, who gets a muffin confused with a scone?! They look totally different! Anyway, since it's finals week here at UW, I thought Blueberry Scones would be a good "brain food" to eat before my FINAL EXAM. That's right, I only have ONE Final Exam and I took FOUR classes this quarter. I'm so happy about that. So, I searched high and low for a Blueberry Scones with Lemon Glaze recipe and ended up with one by Tyler Florence. His Blueberry Scones got rave reviews so I said "Why not?". Tyler Florence is a really great chef so I trust that he can make great food.

I did exactly what the recipe said. I cut the butter into the flour mixture and added the heavy cream. I noticed that the dough was very strange. It was extremely dry and thick so I had to add even more heavy cream. Then, I added the fresh blueberries (which I froze to try and reduce crushing them) and things got even worse. It was almost impossible to mix in the blueberries into the dough. Every which way, the blueberries were getting crushed even though they were frozen! The skins of the blueberries were peeling off and created a huge mess. I wasn't able to fully mix in the blueberries and to top it all off, now I had to pat it down so I can cut scones. I think you get the picture now, right? Patting them down led to more smashing. At this point, I was completely over and annoyed by this recipe and so I just cut out these scones, brushed them with heavy cream and sprinkled them with sugar. When they came out of the oven, they looked like deformed rectangles. Some weren't even cooked so I had to take out the ones that were cooked and put the rest back into the oven. At this point, I was so done with the recipe that I didn't want to waste more ingredients on these scones by making the glaze. Nothing could save them now. When I ate one, it wasn't that great. It was so doughy and dense. It wasn't fluffy and flakey like I hoped. Maybe I'll try it again but I don't want to put myself through this misery. Here's the recipe if you actually want to try out these scones. Because of this horrible recipe, I will make Blueberry Coffee Cake Muffins tomorrow so look out for that.

Blueberry Scones with Lemon Glaze (Makes 8 scones)
Ingredients
Blueberry Scones:
2 cups all-purpose flour
1 tablespoon baking powder
1/2 teaspoon salt
2 tablespoons sugar
5 tablespoons unsalted butter, cold, cut in chunks
1 cup heavy cream, plus more for brushing the scones
1 cup fresh blueberries
Lemon Glaze:
1/2 cup freshly squeezed lemon juice
2 cups confectioners' sugar, sifted
1 lemon, zest finely grated
1 tablespoon unsalted butter

Directions
Preheat the oven to 400 degrees F.

Sift together the dry ingredients; the flour, baking powder, salt, and sugar. Using 2 forks or a pastry blender, cut in the butter to coat the pieces with the flour. The mixture should look like coarse crumbs. Make a well in the center and pour in the heavy cream. Fold everything together just to incorporate; do not overwork the dough. Fold the blueberries into the batter. Take care not to mash or bruise the blueberries because their strong color will bleed into the dough.

Press the dough out on a lightly floured surface into a rectangle about 12 by 3 by 1 1/4 inches. Cut the rectangle in 1/2 then cut the pieces in 1/2 again, giving you 4 (3-inch) squares. Cut the squares in 1/2 on a diagonal to give you the classic triangle shape. Place the scones on an ungreased cookie sheet and brush the tops with a little heavy cream. Bake for 15 to 20 minutes until beautiful and brown. Let the scones cool a bit before you apply the glaze.

Technically you should make this simple lemon glaze in a double boiler (i.e. over a pot of simmering water with a heatproof bowl set on top) but it's even simpler to zap it in the microwave. Mix the lemon juice and confectioners' sugar together in a microwave-safe bowl. Stir until the sugar dissolves. Add the lemon zest and butter. Nuke it for 30 seconds on high. Whisk the glaze to smooth out any lumps, then drizzle the glaze over the top of the scones. Let it set a minute before serving.

Blueberry Cream Scones on Foodista

-Aaron John
My Food Outings: AJ's Food Adventure
Facebook Fan Page

Thursday, June 3, 2010

"Strawberry Shortcake" Cookies


I have a love for many things strawberry. From the simple chocolate dipped strawberry, strawberry jams, strawberry ice cream and so forth. Then, there's my love for the Strawberry Kellogg's Special K Bars. These are my favorite to eat, especially during my two hour breaks in between classes at UW. They are a great snack to have and have a great sweetness. They taste similar to "Cap'n Crunch Berries". If you haven't tried them, you should!! Well, one day during my two hour break, I got an inspiration. I wanted to make a strawberry cookie that had the same intense strawberry sweetness that the Special K Bar had. Shouldn't be too hard right? I mean, I said to myself "I can probably just add strawberry extract to my chocolate chip cookie recipe and it would be done".

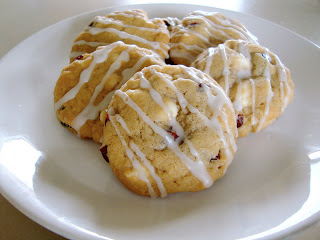
Well, I started to read the ingredients in the Special K Bar to see what the strawberry looking pieces were because if I was going to make a cookie like these bars, it should have some strawberry pieces right? However, these "strawberry pieces" in the Bars were actually CRANBERRIES! o__O What a revelation. A strawberry bar that doesn't have strawberries?! Say Whaaaaa?! It made my life a little easier though because I made "White Chocolate Cranberry Cookies" before. So, I would just have to add strawberry extract to this cookie. I did exactly that. In this case, I used imitation strawberry extract. I don't usually do or recommend this. If anything, get the pure stuff. However, after going to four different stores, they either had the imitation extract or none at all. Anywho, I used about 2 tsp. of the imitation strawberry extract and mixed it into the "White Chocolate Cranberry Cookies". Then I scooped and baked them. After coming out of the oven and cooled, I drizzled them with a simple icing made out of powdered sugar and milk. These cookies were delicious!! The cookies had the strawberry sweetness, the cranberries gave a tartness and the chocolate gave a vanilla creaminess. I gave them the name "'Strawberry Shortcake' Cookies" because the white chocolate chips really gave the creamy, vanilla factor that whip cream gives strawberry shortcakes. This has become one of my favorites!! :D Here was my simple icing recipe.

Vanilla Icing (Good for a batch of 8 cookies)
Ingredients
1/4 cup powdered sugar
1 teaspoon milk
A Splash of vanilla

Directions
Place all ingredients in a bowl and mix until smooth. Once finished, check to see if the icing is able to be drizzled easily. If not, add more milk. If too thin, add more powdered sugar. Once at desired thickness, drizzle lightly over the cookies.

-Aaron John
My Food Outings: AJ's Food Adventure
Facebook Fan Page

LinkWithin

Related Posts with Thumbnails