Pages

Sunday, December 29, 2013

Pan Fried Pork Chops


I hope everyone had a great Christmas!! Now that Christmas is over, everything is beginning to settle back down. The last of the gatherings are finishing up, the Christmas lights are coming down, the returning of gifts have begun and there's just one last party on New Year's Eve. Oh, we can't forget the sales that are still going on at department stores. They really want us to spend our money now don't they?


After eating my weight in delicious fancy party food, let's bring things back down to earth with something simple and comforting like Pan fried pork chops! Pan fried pork chops are so easy to prepare that you can cook these in your sleep without a recipe. Season, flour and fry...that's it. This is a method everyone should have in their back pocket to make delicious food on the fly. In the words of Ina Garten, "How easy is that?"

AJ's Secret

  • For this particular recipe, I used thin pork chops because they cook quickly.
  • I find some people suggest seasoning the flour instead of the meat. "WHY?" I say! Seasoning the meat ensures the MEAT IS SEASONED. Sure, you can season the flour but is the main star the flour? I think not. I chose not to season the flour for this recipe because the coating is so thin that seasoning the pork chop was good enough.


Pan Fried Pork Chops
Recipe by Me

Ingredients
6-8 Pork loin chops (thin)
1 cup all-purpose flour
~2 tsp salt
~1 tsp pepper
~2 tsp garlic powder
Extra salt, pepper and garlic powder
1/4 to 1/2 cup Vegetable/Canola oil

Directions
Season both sides of the pork loin chops evenly with the salt, pepper and garlic powder. Proceed to dredge each pork chop in the flour and set aside.

Heat the vegetable oil/canola oil in a large skillet on medium heat. Once the oil is heated, add in 2 to 3 pork chops depending on the size of the skillet. Cook the pork chops for about 3 to 4 minutes on each side until golden brown and no red/pink juice is seen on the pork chop. Set aside the cooked pork chops on a plate and repeat with the remaining pork chops.

-Aaron John

Saturday, December 21, 2013

Monster Cookies


Last quarter, my friend J and I talked about food and food blogs before our Physical Chemistry class constantly. From my unhealthy eating habits, to whether thin crust is better than thick crust pizza, to whose food blogs we go on and scope out. One particular conservation involved the Pioneer woman and her Monster Cookies.


I don't know how these cookies came into the conversation but it surrounded the idea of putting Rice Krispies cereal in them. Genius much? I mean, what else are you supposed to do with Rice Krispies Cereal besides eating it with milk and making Rice Krispy Treats? Not much. Although, I read some people bread chicken in crushed Rice Krispies cereal. I need to try that one day... Until that day, these cookies will do.


These cookies were placed on a pedestal, the highest of high. I joked around with J saying that the Pioneer Woman's reputation is going to be put on the line with these cookies when J makes them and gives some to me. Well, I just couldn't wait for her to make them and I'm not that patient so I just went ahead and made them myself. These cookies have the most interesting texture and you have to wrap your head around it. It's like a crisp and chewy chocolate chip cookie, mixed with an oatmeal cookie, with a surprising different kind of chewy, crispy quality? You just have to taste it for yourself. I do have to say, I wish these cookies maintained the light crispiness of the cereal because it seemed to have disappeared after baking. After eating these cookies, The Pioneer Woman's reputation is in good standing. 


AJ's Secret:
  • When making this recipe, the dough was simply too wet. I added an extra 1/2 cup of flour so that I ended up with a thicker, moister cookie.
  • 1-ounce cookies only take about 9 minutes to bake


Monster Cookies
Recipe by Ree Drummond

Ingredients
2 sticks (1/2 pound) salted butter, softened
1 1/2 cups brown sugar, packed
1/2 cup white sugar
2 whole large eggs
1 tablespoon vanilla extract
1 1/2 cups all-purpose flour
2 teaspoons kosher salt
1 teaspoon baking powder
1/2 teaspoon baking soda
1 1/2 cup oats (either quick or regular)
1 cup chocolate coated candies, such as M&M's
3/4 cup chocolate chips (milk or semisweet)
1/2 cup pecans, chopped
2 1/4 cups rice cereal, such as Rice Krispies
Cold milk, for serving

Directions
Preheat the oven to 375 degrees F.

Cream the butter with both sugars in a mixing bowl until fluffy. Add the eggs one at a time, beating well after each addition. Add the vanilla and beat.

Combine the flour, salt, baking powder and baking soda. Add to the mixing bowl and mix until combined. After that, add in the oats, chocolate candies, chocolate chips and pecans in whatever quantity you prefer. Add the cereal at the very end, mixing until just combined. Do not over mix!

Use a cookie scoop to scoop balls of dough onto a cookie sheet. Bake until golden brown, about 20 to 25 minutes, and then allow to cool on a rack. Serve with glasses of cold milk.

-Aaron John

Saturday, December 14, 2013

Decorated Sugar Cookies: Coomassie Stained SDS-PAGE Gel


Where my nerds at because this cookie is just for you! It all began about 4 years ago when I started to make food for the people in my class around the holiday season. Now, there was just one criteria that people had to make before I was to make them food. Simply, let me get to know you and I'll let you get to know me. Simple as that. 


UW classes are enormous that it's never simple to meet people. Most of the time, people are already in their pre-formed cliques, and I am guilty of that as well. Every so often, I get into a smaller class and everything just clicks. People get along, we laugh, play games and it doesn't even seem like we're taking a class anymore, but more of a socializing hour.


I can honestly say, Biochem 426 lab was exactly that. It never seemed like we were in an intense upper level course. Everyone knew their job and with all the waiting period for reactions to occur, all we did was socialize. Playing Mafia, green glass door and "To the moon, I'm going to take _____", killed time and allowed us to get to know one another in a way I've never experienced at UW since starting my college career. By the way, those are some great party games.


Because of that, they pretty much filled the criteria of "Let me get to know you and I'll let you get to know me" and that meant food.


In honor of the class, I wanted to do something that revolved around what we did and the inside jokes that we made. Thus, decorated sugar cookies in the form of a Coomassie stained SDS-PAGE gel were made. Now, an SDS-PAGE gel is used to look at the purity of a solution and how well you were able to separate a single protein from all the other proteins in solution. The presence of one band in a lane is pure, the presence of many is not pure. Just like this gel my lab partner and I got from lab.


Simply using our gel as a template, I copied our results onto a cookie and BAM! Coomassie Stained SDS-PAGE Gel Cookies!


AJ's Secret:
  • When using the Royal icing, make sure it dries completely before decorating or packaging them up. If not, it indentations will be made and decorations can fall off.
  • Use a thicker royal icing to outline the cookie and then thin out the icing with water 1 tsp at a time until it's the consistency of syrup. Fill the remaining space with this thinner icing. This is known as flooding.


Decorated Sugar Cookies
Recipe by Sharon Bowers

Ingredients
1/2 cup (1 stick) unsalted butter, softened
3/4 cup sugar
1 egg
1 teaspoon vanilla
2 cups all-purpose flour
1 teaspoon baking powder
1/2 teaspoon salt
1 batch Royal Icing (see below)
Food coloring

Directions
Cream the butter and sugar. Add the egg and beat until fluffy. Blend in the vanilla. Sift in the flour, baking powder, and salt, mixing until just combined. Wrap the dough in plastic wrap and chill for 1 hour.

Preheat the oven to 350 degrees. On a floured surface, roll half of the dough to 1/8-inch thick. Cut into circles using a 3-inch round cookie cutter or the top of a drinking glass. Gather and reroll scraps. Repeat with remaining dough. Place the cookies on a greased baking sheet and bake for about 8 minutes, until just golden. Do not allow cookies to brown. Cool cookies completely.

Spread white royal icing smoothly over the surface. Allow the icing to dry completely, about 24 hours. With the same royal icing, dye with food coloring and decorate with a desired design.

Royal Icing: 
1 egg white*
1 teaspoon lemon juice
1 1/2 cups confectioners' sugar

With beaters or a standing mixer, whip the egg white and lemon juice until frothy. At medium speed, beat in the confectioners' sugar, a little at a time, until the mixture is thick but still liquid enough to beat. Then beat on high until the mixture is thick and glossy, about 3 minutes. Cover the surface with plastic wrap while waiting to use it. Royal icing will set to a firm, glossy finish when applied to a cookie. The icing can be stored, tightly covered, in the refrigerator for up to a week. 

*RAW EGG WARNING Food Network Kitchens suggest caution in consuming raw and lightly-cooked eggs due to the slight risk of Salmonella or other food-borne illness. To reduce this risk, we recommend you use only fresh, properly-refrigerated, clean, grade A or AA eggs with intact shells, and avoid contact between the yolks or whites and the shell.

-Aaron John

Saturday, December 7, 2013

Green Bean Casserole


Thanksgiving is still not over. Here's another dish I made for the meal. The ever famous "Green Bean Casserole" and might I add, this one is BADASS.


Everyone needs to eat their vegetables, so they say. Apparently, America is just so fat that it's been a big thing to eat healthier nowadays. What's the solution? Drench green beans in a creamy mushroom sauce and top it with fried onions! Michelle Obama can't say we're not eating our vegetables anymore. Ok, so maybe this won't make us all skinnier and fit into our favorite pair of jeans, but it's a baby step.


Just look at those blanched green beans. So, vibrantly green and healthy. Don't you just feel the pounds melting away just looking at it? Such a shame they have to be drenched in a rich and creamy, deliciously decadent, mushroom cream sauce. What a shame, what a shame.


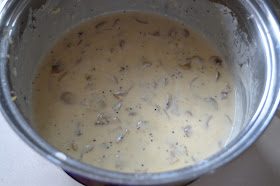
I can't stress this enough. Make your own mushroom cream sauce, it will change your life. Throw away those cans of gelatinous soup in a can. You know, that thick globby mess they call "condensed soup". I don't know where you're from but that stuff just needs to go...in the trash. Why buy a canned soup when you can make one yourself that tastes a whole lot better with fresh ingredients? But if you must, go ahead and use that stuff but don't tell me I didn't warn you.


And those onions in a can. Is it really onions? I haven't had those fried onions in a can in many years after tasting one that was completely burnt. From that moment on, I haven't touched the stuff. Hopefully whatever company makes those stepped their game up. But everyone has onions on hand, and everyone has flour. Go ahead and make them from scratch too. Heck, don't make them if you don't want to. The green beans and mushroom cream sauce, alone, blew my mind away.


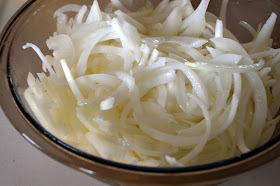
Flour those buttermilk soaked onions...


and fry...Seriously, whose counting calories anymore once you know you're going to drench green beans in a cream sauce? I know I'm not.


So, there's green beans, mushrooms and onions. Three vegetables in one?! This is definitely a health food. If I don't make America healthier, with this dish, I don't know what will!

AJ's Secret:

  • If you find the mushroom cream sauce is not thick enough, take about 1 tbsp room temperature butter and 1 tbsp flour. Mix until homogenous and add it into the sauce. Mix until the butter and flour mixture is completely dissolved. This method disperses the flour evenly as the butter melts so that you don't have clumps. But, you must make sure you MIX or else a dumpling will form.


Green Bean Casserole 
Recipe by Me

Ingredients
Crispy Onions
1 large onion, thinly sliced
1 cup buttermilk
1 ½ to 2 cups flour
~ 2 tsp salt
~ 1/2 tsp pepper

Casserole 
2 lbs green beans, trimmed and cut in half
1 lb button mushrooms, cleaned and sliced
4 tbsp butter
5-6 tbsp flour
3 cloves garlic
2 cups chicken stock
¾ cup cream salt and pepper to taste

Directions 
Crispy Onions 
Prepare the crispy onions by soaking the onion slices in buttermilk for 5 minutes. While the onions are soaking, place the flour in a clean plastic bag, season with salt and pepper and shake to mix. Add a handful of onion slices (drained) to the plastic bag and shake until evenly coated. Place the coated onions on a baking sheet and repeat the process.
At this stage, there is the option of baking or frying the onions. If baking, spray the pan with non-stick cooking spray and place the onions in an oven preheated to 450 degrees F for about 30 minutes until golden brown, tossing the onions a couple of times while cooking. If frying, heat vegetable oil to 375 degrees F and add in a handful of onions into the oil. Cook for a couple of minutes or until golden. Repeat with the remaining onion slices. I chose the latter. 

Prepare the beans 
Bring about 6 to 8 cups of water to a boil and season with about 1 tbsp of salt. Add in the prepared beans and blanch for about 5 minutes. Drain in a colander and rinse with cold water until the beans are no longer hot. Set aside.

Prepare the mushroom cream sauce
In a large pot, melt the butter and add in the garlic. Cook on medium heat for about 1 minute until aromatic and proceed to add in the sliced mushrooms. Cook until the mushrooms begin to release their liquid and are fully cooked, about 5 minutes. Season with salt and pepper and add in the flour. Continue to cook the mixture for an additional minute to cook out the raw flour taste. Slowly add in the chicken stock until combined. Bring the mixture to a boil and reduce to simmer. Cook for about 5 minutes until the sauce thickens and the flavors begin to marry. Lastly, add in the cream and adjust the seasoning with salt and pepper.

Final Assembly 
Preheat the oven to 350 degrees F
Add the blanched green beans and a small handful of the crispy onions to the mushroom cream sauce and stir to combine. Place into an oven safe dish and top with the remaining crispy onions. Bake for about 15 minutes until bubbly.

-Aaron John