Showing posts with label cookie. Show all posts

Tuesday, October 28, 2014

Halloween Themed Sugar Cookies

Halloween is literally in a couple of days! Because of this, I decided to make Halloween Themed Sugar Cookies and film a youtube video while doing it! Enjoy!

Halloween Sugar Cookies Video: https://www.youtube.com/watch?v=Y9LDTPOu8WI

-Aaron John

Sunday, July 27, 2014

Lengua de Gato (Butter Cookies)


Oh you know, I'm still on that Filipino dessert phase. Next up is Lengua de Gato! *Cue the streamers* Remember how I had my graduation/23rd birthday party weeks ago? Well, it's not a filipino party unless there's Leche Flan. Thus, after buckets of eggs yolks, you can only imagine the amount of egg whites there was. So, what the heck did I make out of those egg whites? These cookies. Move over angel food cake, ain't nobody got time for that.


These cookies are childhood to me. Not in the sense my family would be pumping these out the oven but in the sense that whenever my grandparents would go back to the homeland, they would always bring these cookies in a clear, cylindrical container with a screw top. These cookies would be perfectly displayed within and I would just eat them endlessly.

They are flat, crunchy and sweet cookies with a hint of vanilla. These become addicting so be careful. One becomes two, which becomes three, and well, you get the idea.


Look, look, look! Don't you just want to grab it and eat like a bajillion?? I know I do!


Lengua de Gato
Recipe by Panlasang Pinoy

Ingredients
1 cup all-purpose flour, sifted
1/2 cup superfine white sugar Whites from 2 eggs
1/4 teaspoon salt
1/2 cup butter, softened
1/2 teaspoon vanilla extract

Directions
Preheat oven to 375 degrees Fahrenheit.

Cream the butter using an electric mixer then gradually add the sugar. Continue mixing for another 2 minutes. Stir-in the egg whites gradually and mix for about 3 to 4 minutes more. Add salt and vanilla extract. Gradually stir-in the flour. Continue to mix for about 2 to 3 minutes more or until the mixture is well incorporated.

Get a piping bag and install a round tip. Place the mixture in the piping bag. On a baking tray lined with wax or parchment paper, begin piping the mixture. Each piece should be about 2.5 to 3 inches in length. Bake for 9 to 10 minutes. Remove from the oven and place in a cookie rack until the temperature cools down.

-Aaron John

Saturday, March 29, 2014

Earl Grey Shortbread Cookies


After receiving loose leaf teas from "The Tea Company", the search was on for what to do with them. A post on instagram got my friend J to suggest I make Tea Cookies. Honestly, I've never heard of them before. I mean, Tea Cookies...with actual tea leaves in them. Really?


A bunch of questions ran through my head and the primary question was "Can you eat tea leaves?" I mean, it's not like I think tea is poisonous, we can drink it after all. But, can we digest them? You know how you can use bay leaves in things like beef stew and such, well, you don't eat the bay leaf now do ya'. Well, "Can you eat tea leaves?"


But, if a recipe says to put Earl Grey Tea leaves into the cookie, I assume tea is edible. If not, Claire Robinson would be arrested. But look, I'm still alive! 

I used "The Tea Company" Earl Grey Creme which gave the cookies a slight anise flavor. This recipe used powdered sugar which gave the cookies this crackly outer cookie which was unique. So, who knew you can eat tea leaves? I sure didn't.

AJ's Secrets
-Instead of pulsing the flour, salt and tea together, I pulsed the tea in the food processor first before I added the flour and salt. This just ensured there weren't too many large pieces of tea leaves.


Earl Grey Shortbread Cookies
Recipe by Claire Robinson

Ingredients
2 cups all-purpose flour
2 tablespoons loose Earl Grey tea leaves
1/2 teaspoon salt
3/4 cup confectioners' sugar
1 teaspoon pure vanilla extract
1 cup (2 sticks) butter, room temperature

Directions
In a food processor, pulse together the flour, tea, and salt, until the tea is just spotted throughout the flour. Add the confectioners' sugar, vanilla, and butter. Pulse together just until a dough is formed. Place dough on a sheet of plastic wrap, and roll into a log, about 2 1/2-inches in diameter. Tightly twist each end of wrap, and chill in refrigerator for 30 minutes.

Preheat oven to 375 degrees F.

Slice the log into 1/3-inch thick disks. Place on parchment or silpat lined baking sheets, 2 inches apart (2 probably needed depending on size of sheets). Bake until the edges are just brown, about 12 minutes. Let cool on sheets for 5 minutes, then transfer to wire racks and cool to room temperature.

-Aaron John

Saturday, January 11, 2014

Peanut Butter Cookies w/ Dark Chocolate


Peanut butter is something people are obsessed with. Watching commercials of people taking a spoon to peanut butter and eating it...well I think that's interesting. While other people would bring peanut butter and jelly sandwiches to school during my elementary days, I would bring bologna sandwiches. If the day came when I had a peanut butter and jelly sandwich, I would go heavy on the jelly and light on the peanut butter. Am I weird?


Other than the rare times I would eat a peanut butter and jelly sandwich, or should I say a jelly sandwich with some peanut butter, the only time I would eat a sandwich with peanut butter alone was on a toasted filipino roll called Pan de Sal. For some reason or another, this appealed to me because of the warm crunchy bread that heated the peanut butter just enough to change it's flavor characteristics and consistency.


Well, this time it's all about a Peanut Butter cookie. These cookies are extremely moist and chewy with just a hint of chocolate to bring you to those peanut butter cup flavor characteristics. My friend C thought they were "So goooddd" and would like "a thousand more". If that's any indication to make these, do it!


AJ's Secret:
  • Why is it that my cookies come out flat instead of thick? It's all about the leavener. Baking soda causes a chemical reaction that causes the cookie to rise nicely, but once cooled, brings the cookie back down to a flatter level.


Peanut Butter Cookies w/ Dark Chocolate
Recipe from the Hummingbird Bakery Cookbook) 

Ingredients
225g unsalted butter at room temp
200g caster sugar
200g soft light brown sugar
2 eggs
1/2 teaspoon vanilla extract
240g crunchy peanut butter
340g plain flour
2 1/2 teaspoons bicarbonate of soda
1/2 teaspoon salt
75g dark chocolate, chopped

Directions
Preheat the oven to 170C (325F). Prepare two baking trays with baking parchment paper on.

 Put the butter and sugars in a freestanding electric mixer with a paddle attachment and cream until light and fluffy. Add the eggs one at a time, mixing well and scraping any unmixed ingredients from the side of the bowl with a rubber spatula after each addition. Turn the mixer down to a slow speed and beat in the vanilla extract and peanut butter. Add the flour, bicarbonate of soda and salt and mix well until a smooth dough is formed. Stir in the chocolate until evenly dispensed.

Arrange 6 equal amounts of cookie dough on each prepared baking tray. Make sure that the cookies are spaced apart to allow for spreading while baking. Bake in the preheated oven for about 10 minutes or until golden brown around the edges and quite flat. Leave the cookies to cool slightly on the trays before turning out onto a wire cooling rack to cool completely. The cookies should be soft and chewy.

-Aaron John

Saturday, January 4, 2014

Chocolate Biscotti w/ Almonds


A couple days ago, I had a recipe testing kind of day. Now, recipe testing is what I live for. It gives me a chance to axe the bad recipes and praise the good ones. This time was no different and it involved Chocolate Biscotti. But how do you know what recipes to choose? Well, this post will be all about my secrets to testing recipes and finding great ones. These are my secrets:


Where do I start? Find recipes from trustworthy people and those who you've had much success with in their recipes. A few of my favorites are Ina Garten, Michael Symon and Anne Burrell. When a majority of their recipes are in good standing, you're pretty much guaranteed a good recipe. But, don't put all your hopes in that.

What if my favorite person doesn't have a recipe for what I want to make? Go to Google and search _______ recipe. But specifically, look at the images of the final product. If something doesn't look like you would eat it, skip on it. Yes, some recipes may be BADASS but look really bad, but, what I look for is a "WOW!" moment that makes you want to eat it.


So, you've found something either from your favorite chef or a great looking photo but how do you know if you should try it out? 
Read the reviews! If a majority of the reviews are great, you probably should try it out. If not, pass on it. If it's from a food blog, read the comments. Sometimes you find great info either from the blogger or readers with their tips on the recipe.

Should I go ahead and try the recipe? Well, it's all about a gut feeling at this point. Sometimes you just feel that a recipe will be good and if you have that feeling, go for it! You never know until you try.

Should I try the whole recipe? NEVER!! This is called "Recipe Testing" for a reason! Never make the whole recipe because you don't know what the outcome will be! If it's bad, you'll be throwing away so many ingredients. If it's good, you can always make more. I try to half the recipe usually.


I pretty much used all these secrets when looking for this Chocolate Biscotti and ended up with one from David Lebovitz. I was drawn to this recipe by the google image search. In addition, after finding David Lebovitz, I knew I had someone trustworthy because I used a recipe of his from the past. From my research, this is an authentic Italian Biscotti because the only fat that comes into this recipe is from the cocoa powder and the egg yolks in the eggs. "Americanized Biscotti" on the other hand has the addition butter. 

After trying this recipe, I'm back to square one on the search for a Chocolate Biscotti. I was not a fan of this biscotti due to how rock hard the biscotti came out to be. My issue was that I felt that they were going to break my teeth. These are definitely cookies that you eat with coffee to soften the cookie so if you like that, be my guest. 

I, myself, prefer the Americanized version because I find butter makes a biscotti that has the right amount of crunch without the struggle of biting through the cookie. So, on to a search for a recipe with butter!

Lastly, I leave you with this. Recipe testing is not always perfect and it takes a couple of tries to find the perfect one. Don't be discouraged when something doesn't come out the way you want it. Just "Keep Calm and Cook On!"


Chocolate Biscotti
Recipe by David Lebovitz

Ingredients
2 cups (280g) flour
3/4 cups (75g) top-quality cocoa powder
1 teaspoon baking soda
1/4 teaspoon salt
3 large eggs, at room temperature
1 cup (200g) sugar
1 teaspoon vanilla extract
1/2 teaspoon almond extract
1 cup (125g) almonds, toasted and very coarsely-chopped
3/4 cups (120g) chocolate chips

For the glaze
1 large egg
2 tablespoons coarse or crystal sugar

Directions
Preheat the oven to 350F (180C) degrees.

In a small bowl, sift together the flour, cocoa powder, baking soda, and salt.

In a large bowl, beat together the 3 eggs, sugar, and vanilla & almond extracts. Gradually stir in the dry ingredients, then mix in the nuts and the chocolate chips until the dough holds together. Line a baking sheet with parchment paper or a silicone mat. Divide the dough in half. On a lightly floured surface, roll the dough into two logs the length of the baking sheet. Transfer the logs onto the baking sheet, evenly spaced apart. Gently flatten the tops of the logs. Beat the remaining egg and brush the tops of the logs liberally with the egg. (You won’t use it all). Sprinkle the tops with the coarse or crystal sugar. Bake for 25 minutes, until the dough feels firm to the touch.

Remove the cookie dough from the oven and cool 15 minutes. On a cutting board, use a serrated bread knife to diagonally cut the cookies into 1/2-inches slices. Lay the cookies cut side down on baking sheets and return to the oven for 20 to 30 minutes, turning the baking sheet midway during baking, until the cookies feel mostly firm. Once baked, cool the cookies completely then store in an airtight container for up to two weeks. If you wish, the cookies can be half-dipped in melted chocolate, then cooled until the chocolate hardens.

-Aaron John

Saturday, December 21, 2013

Monster Cookies


Last quarter, my friend J and I talked about food and food blogs before our Physical Chemistry class constantly. From my unhealthy eating habits, to whether thin crust is better than thick crust pizza, to whose food blogs we go on and scope out. One particular conservation involved the Pioneer woman and her Monster Cookies.


I don't know how these cookies came into the conversation but it surrounded the idea of putting Rice Krispies cereal in them. Genius much? I mean, what else are you supposed to do with Rice Krispies Cereal besides eating it with milk and making Rice Krispy Treats? Not much. Although, I read some people bread chicken in crushed Rice Krispies cereal. I need to try that one day... Until that day, these cookies will do.


These cookies were placed on a pedestal, the highest of high. I joked around with J saying that the Pioneer Woman's reputation is going to be put on the line with these cookies when J makes them and gives some to me. Well, I just couldn't wait for her to make them and I'm not that patient so I just went ahead and made them myself. These cookies have the most interesting texture and you have to wrap your head around it. It's like a crisp and chewy chocolate chip cookie, mixed with an oatmeal cookie, with a surprising different kind of chewy, crispy quality? You just have to taste it for yourself. I do have to say, I wish these cookies maintained the light crispiness of the cereal because it seemed to have disappeared after baking. After eating these cookies, The Pioneer Woman's reputation is in good standing. 


AJ's Secret:
  • When making this recipe, the dough was simply too wet. I added an extra 1/2 cup of flour so that I ended up with a thicker, moister cookie.
  • 1-ounce cookies only take about 9 minutes to bake


Monster Cookies
Recipe by Ree Drummond

Ingredients
2 sticks (1/2 pound) salted butter, softened
1 1/2 cups brown sugar, packed
1/2 cup white sugar
2 whole large eggs
1 tablespoon vanilla extract
1 1/2 cups all-purpose flour
2 teaspoons kosher salt
1 teaspoon baking powder
1/2 teaspoon baking soda
1 1/2 cup oats (either quick or regular)
1 cup chocolate coated candies, such as M&M's
3/4 cup chocolate chips (milk or semisweet)
1/2 cup pecans, chopped
2 1/4 cups rice cereal, such as Rice Krispies
Cold milk, for serving

Directions
Preheat the oven to 375 degrees F.

Cream the butter with both sugars in a mixing bowl until fluffy. Add the eggs one at a time, beating well after each addition. Add the vanilla and beat.

Combine the flour, salt, baking powder and baking soda. Add to the mixing bowl and mix until combined. After that, add in the oats, chocolate candies, chocolate chips and pecans in whatever quantity you prefer. Add the cereal at the very end, mixing until just combined. Do not over mix!

Use a cookie scoop to scoop balls of dough onto a cookie sheet. Bake until golden brown, about 20 to 25 minutes, and then allow to cool on a rack. Serve with glasses of cold milk.

-Aaron John

Saturday, December 14, 2013

Decorated Sugar Cookies: Coomassie Stained SDS-PAGE Gel


Where my nerds at because this cookie is just for you! It all began about 4 years ago when I started to make food for the people in my class around the holiday season. Now, there was just one criteria that people had to make before I was to make them food. Simply, let me get to know you and I'll let you get to know me. Simple as that. 


UW classes are enormous that it's never simple to meet people. Most of the time, people are already in their pre-formed cliques, and I am guilty of that as well. Every so often, I get into a smaller class and everything just clicks. People get along, we laugh, play games and it doesn't even seem like we're taking a class anymore, but more of a socializing hour.


I can honestly say, Biochem 426 lab was exactly that. It never seemed like we were in an intense upper level course. Everyone knew their job and with all the waiting period for reactions to occur, all we did was socialize. Playing Mafia, green glass door and "To the moon, I'm going to take _____", killed time and allowed us to get to know one another in a way I've never experienced at UW since starting my college career. By the way, those are some great party games.


Because of that, they pretty much filled the criteria of "Let me get to know you and I'll let you get to know me" and that meant food.


In honor of the class, I wanted to do something that revolved around what we did and the inside jokes that we made. Thus, decorated sugar cookies in the form of a Coomassie stained SDS-PAGE gel were made. Now, an SDS-PAGE gel is used to look at the purity of a solution and how well you were able to separate a single protein from all the other proteins in solution. The presence of one band in a lane is pure, the presence of many is not pure. Just like this gel my lab partner and I got from lab.


Simply using our gel as a template, I copied our results onto a cookie and BAM! Coomassie Stained SDS-PAGE Gel Cookies!


AJ's Secret:
  • When using the Royal icing, make sure it dries completely before decorating or packaging them up. If not, it indentations will be made and decorations can fall off.
  • Use a thicker royal icing to outline the cookie and then thin out the icing with water 1 tsp at a time until it's the consistency of syrup. Fill the remaining space with this thinner icing. This is known as flooding.


Decorated Sugar Cookies
Recipe by Sharon Bowers

Ingredients
1/2 cup (1 stick) unsalted butter, softened
3/4 cup sugar
1 egg
1 teaspoon vanilla
2 cups all-purpose flour
1 teaspoon baking powder
1/2 teaspoon salt
1 batch Royal Icing (see below)
Food coloring

Directions
Cream the butter and sugar. Add the egg and beat until fluffy. Blend in the vanilla. Sift in the flour, baking powder, and salt, mixing until just combined. Wrap the dough in plastic wrap and chill for 1 hour.

Preheat the oven to 350 degrees. On a floured surface, roll half of the dough to 1/8-inch thick. Cut into circles using a 3-inch round cookie cutter or the top of a drinking glass. Gather and reroll scraps. Repeat with remaining dough. Place the cookies on a greased baking sheet and bake for about 8 minutes, until just golden. Do not allow cookies to brown. Cool cookies completely.

Spread white royal icing smoothly over the surface. Allow the icing to dry completely, about 24 hours. With the same royal icing, dye with food coloring and decorate with a desired design.

Royal Icing: 
1 egg white*
1 teaspoon lemon juice
1 1/2 cups confectioners' sugar

With beaters or a standing mixer, whip the egg white and lemon juice until frothy. At medium speed, beat in the confectioners' sugar, a little at a time, until the mixture is thick but still liquid enough to beat. Then beat on high until the mixture is thick and glossy, about 3 minutes. Cover the surface with plastic wrap while waiting to use it. Royal icing will set to a firm, glossy finish when applied to a cookie. The icing can be stored, tightly covered, in the refrigerator for up to a week. 

*RAW EGG WARNING Food Network Kitchens suggest caution in consuming raw and lightly-cooked eggs due to the slight risk of Salmonella or other food-borne illness. To reduce this risk, we recommend you use only fresh, properly-refrigerated, clean, grade A or AA eggs with intact shells, and avoid contact between the yolks or whites and the shell.

-Aaron John

Saturday, November 23, 2013

Oatmeal Lace Cookies


Red cups are back at Starbucks, twinkling lights surround the trees in Downtown Seattle and Christmas music is already playing on the radio. This can only mean one thing, cookie season is upon us. Thanksgiving is  next week and I feel like it's all about Christmas right now. Either way, this is the time where cookie magic happens. Personally, every day is a cookie day, but that's just me. So, if you're more of a cookie season kind if person, here's a recipe for you.


These cookies, although easy to put together, are quite time consuming when it's time to bake. Because these cookies spread out so much, you can only bake a few at a time which is the downfall to this cookie. But, these cookies come out crunchy, buttery and sugary. More like a cross between candy and cookie than anything else. Just be warned, shield your eyes when you remove the baked cookies from the pan, for pools of butter will be in your future.

AJ's Secrets:

  • These cookies need to be baked off immediately once the dough is made. If you put the dough in the refrigerator and bake later, the dough does not spread evenly in the oven. Once baked, I also found the cookies to not hold their shape and they ended up falling apart.
  • MUST use parchment paper or a silicone baking sheet. Due to the amount of sugar in these cookies, these will stick despite having so much butter in them.
  • Let the cookies cool on the pan for at least 5 minute before transferring to a cooling rack. If not, the cookies will break into pieces when you try to lift them up with a spatula.


Oatmeal Lace Cookies
Recipe by Martha Stewart
Ingredients
1 1/2 cups (3 sticks) unsalted butter
3 cups uncooked rolled oats (do not use instant)
1 1/2 tablespoons all-purpose flour
1 teaspoon salt
1 3/4 cups sugar
2 teaspoons vanilla extract
2 large eggs, lightly beaten

Directions
Heat oven to 325 degrees. Cover a baking sheet with parchment paper.

In a large saucepan over low heat, melt the butter. Let cool a bit and add all remaining ingredients except the eggs. Stir well to combine, then add the eggs. Mix thoroughly.

Place 1 1/2 tablespoons of batter at a time on the parchment, leaving at least 3 inches between cookies. Flatten batter into a circle with the back of a spoon. Bake for 13 to 15 minutes, or until just golden brown. Cool on wire racks.

-Aaron John

Wednesday, December 19, 2012

Ginger Molasses Cookies


Growing up, I wasn't one to eat these "spice" type cookies. It wasn't until I was in my art class way back in elementary school that I had my first gingersnap from our art teacher. Now, I thought the flavor was amazing but that art teacher, who was probably in her 20's and left the year after, gave us some STALE ASS cookies. Oh heck no!


I don't know, maybe it was the fact that that teacher gave us some stale cookies. Maybe it was the fact that my mom didn't like them. Maybe it was the fact that I didn't want to get them from the store in those big packages with 437824 cookies in them and knowing that I will be the only one eating them. Whatever the reason, rarely did I eat them.


Then last year, I tackled Speculoos right after trying "Cookie Butter" at my friend's house which was amazing. But this year, it's a whole other spice cookie. This year, I tackle that stale ass gingersnap from my younger years and make a Ginger Molasses Cookie.


This cookie makes up for that stale gingersnap by 10X. I reduced the amount of cloves by half because I personally find cloves to be overpowering but they still had great clove flavor. These cookies have just the right amount of spice, are crisp on the outside, have a nice crunch from the sugar (if you use raw sugar to roll them in) and they have this soft and chewy center to them if you bake them for a shorter amount of time.

So here's my lesson. If someone passes off a stale ass gingersnap to you, throw it back in their face. Well...maybe just throw it in the trash and make these cookies when you get home instead.

Ginger Molasses Cookies
Recipe from 17 and Baking

Ingredients
2 cups all purpose flour
2 tsp baking soda
2 tsp ground cinnamon
2 tsp ground ginger
1 tsp ground cloves (I used 1/2 tsp ground cloves)
Pinch of salt
1 cup packed light brown sugar
1/4 cup molasses
3/4 cup canola oil
1 large egg
Sugar for rolling (I used raw sugar)

Directions
Whisk together the flour, baking soda, spices, and salt in a medium bowl. In another bowl, combine together the brown sugar, molasses, canola oil, and egg until smooth. Mix the flour mixture into the brown mixture, stirring until dough comes together. Cover with plastic wrap and chill for 20 minutes.

Preheat the oven to 350 degrees and line baking sheets with parchment paper. Scoop up the dough using a 1-ounce scoop. Roll the balls in sugar and place on the baking sheets 2 inches apart. Bake for 8 to 10 minutes. I baked mine for 9 minutes. Bake it longer for crisper cookies

Cookies will be very soft but will firm up. Leave on the baking sheet 5 minutes, then transfer to a wire rack to cool completely.

-Aaron John

Wednesday, December 12, 2012

Chocolate Crinkles


Eleven weeks, seventeen quizzes, four midterms, three speeches and one final later, I can officially say that Fall Quarter 2012 is officially done and over with. No more early mornings, no more studying and no more stressing, well until Winter Quarter starts up. But until then, it's time to finally start baking again!


Now, I have to say, I bookmarked this recipe for Chocolate Crinkles back in September and this was the first thing I vowed I would make on the first day of break. Well, the first day of break had arrived and here goes! I love how unique each and every cookie comes out. Dare I say, just like snow flakes? Ha!


If you love chocolate, Chocolate Crinkles are for you! Not only are these chocolaty, (btw did you know "chocolaty" is actually word? I had no clue either!), but these cookies combine the best of both worlds, or three worlds in this case. These Chocolate Crinkles have the shape of a cookie, have a somewhat caky quality to them and have this brownie effect by being almost fudgy. Just make sure not to over-bake them! For a Holiday cookie giveaway, this is a great addition to any list!

Chocolate Crinkles
Recipe from Simply Recipes

Ingredients
1 cup unsweetened cocoa powder
1 1/2 cups white sugar
1/2 cup vegetable oil
4 eggs
2 teaspoons vanilla extract
2 cups all-purpose flour
2 teaspoons baking powder
1 teaspoon espresso powder (optional)
1/2 teaspoon salt
1 cup confectioners’ sugar

Directions
In the bowl of an electric mixer fitted with the paddle attachment (though you can do this with a wooden spoon, too) beat together the cocoa powder, white sugar, and vegetable oil until it comes together into a shiny, gritty, black dough of sorts.

Add the eggs, one at a time, mixing for 30 seconds each. Add the vanilla and beat in thoroughly.

In a separate bowl, whisk together the flour, baking powder, salt, and espresso powder if using. Mix into the chocolate mixture on low speed until just combined. Do not overbeat. Cover the dough with plastic wrap and chill the dough for four hours or overnight.

Preheat the oven to 350°F and line two baking sheets with parchment paper. Place the confectioner's sugar in a wide bowl. Using a tablespoon, get clumps of the chilled dough and roll them into 1-inch (2.5 cm) sized balls using your hands. Roll the balls in the confectioner's sugar and place on the cookie sheets (you should be able to get 12-16 on each sheet). Bake for 10-12 minutes. Allow to cool a minute or two on the sheets before transferring to a wire rack to cool completely.

-Aaron John

Saturday, April 7, 2012

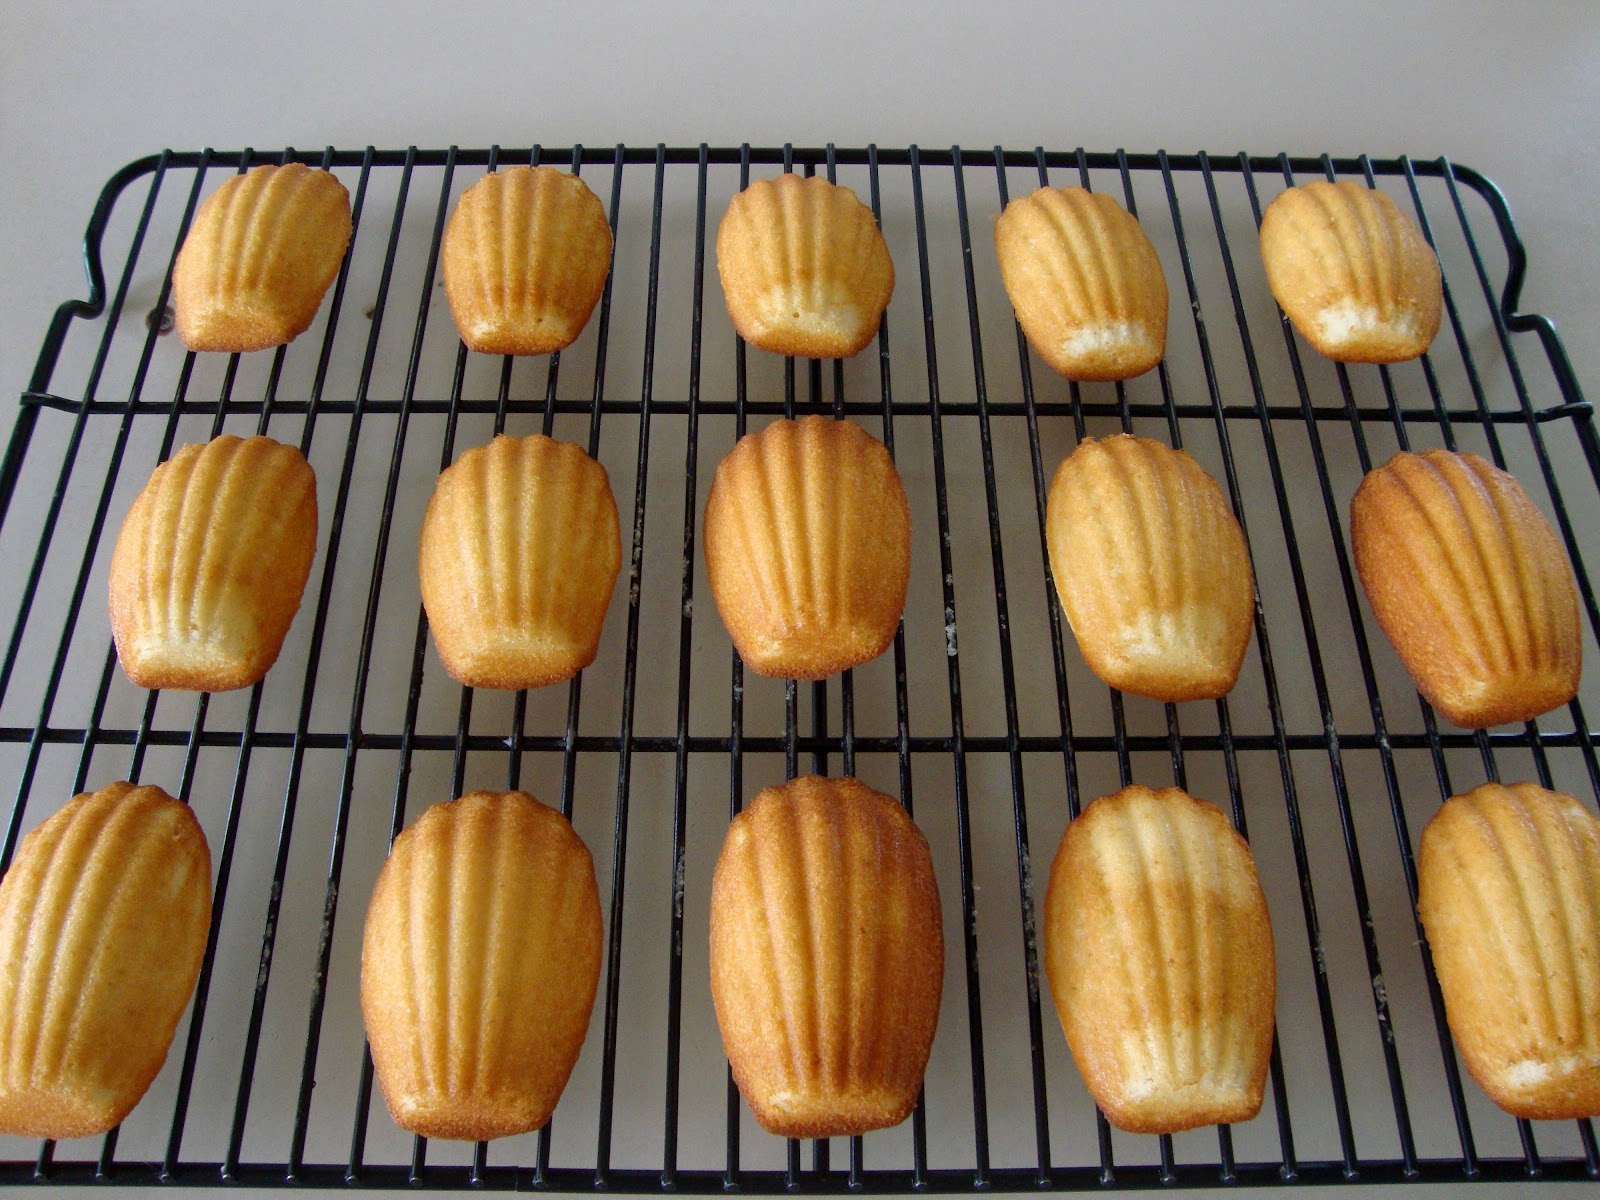
Madeleines


This week has been pretty good to me. For one, I was featured on Yummly yesterday for my post on Sticky Buns. Who would have thought that that post from 2010 would make a site like Yummly? I know I didn't even think of it. Thanks Yummly!  


In addition to being featured, I was finally able to work with one of the new tools I got from Williams-Sonoma, the Madeleine Pan. I can't tell you how long I've wanted to make Madeleines, it must have been a couple of years. There's just something about the shape that I found pretty fascinating. Usually, I'm against buying something that is not a multi-tasker/can only be used for one thing but for this I made an exception.


These Madeleines were crispy on the outside and cakey in the center. However, when my parents ate one, they were confused as to why the whole thing wasn't crunchy like a cookie. Apparently back in the Philippines, they have something called a "Butterfinger" (no, not the candy) that's similar in shape to Madeleines but are crunchy like a Pepperidge Farm Milano Coookie. Time to search for that recipe!

Madeleines
Recipe by Ina Garten
Makes 24 Madeleines

Ingredients
1 1/2 tablespoons melted butter, to grease the pans, plus 1/4 pound (1 stick) unsalted butter, melted and cooled
3 extra-large eggs, at room temperature
2/3 cup sugar
1 teaspoon pure vanilla extract
1 cup all-purpose flour
1/4 cup cornstarch
1/2 teaspoon baking powder
1/4 teaspoon kosher salt
1/3 cup sweetened shredded coconut
Confectioners' sugar, optional

Directions
Preheat the oven to 375 degrees F. Thoroughly butter and flour the madeleine pans.

In the bowl of an electric mixer fitted with the paddle attachment, beat the eggs, sugar, and vanilla on medium speed for 3 minutes, or until light yellow and fluffy. Add 1/4 pound of butter and mix. Sift together the flour, cornstarch, baking powder, and salt, and stir into the batter with a rubber spatula. Stir in the coconut.

With a soup spoon, drop the batter into the pans, filling each shell almost full. Bake the madeleines for 10 to 12 minutes, until they spring back when pressed. Tap the madeleines out onto a baking pan lined with parchment paper and allow to cool. Dust with confectioners' sugar, if desired.

-Aaron John

Saturday, March 3, 2012

Cheesecake Thumbprint Cookies


Cheesecake is one of those things that is rich and decadent. It definitely is a "Special Occasion" type of treat. But what about a version that you don't have to feel too guilty about? Why not take it a step forward and make it portable as well? So, what do you get when you merge the two? Cheesecake Thumbprint Cookies.


When searching for a recipe, I ended up with one from Cookie Madness which combined the crunchiness of a cookie and the creaminess of cheesecake in one. It starts off with a shortbread like cookie and is filled with a tangy cream cheese filling. This cookie is a process to make but pretty much has all the flavors of a cheesecake.


I would have loved the cookie to have more of a graham cracker flavor but it still was pretty good. You can even add more flavor by adding some jam into the cookie before filling it with the cheesecake. Now that's something I would love to try.

Cheesecake Thumbprint Cookies
Recipe from Cookie Madness (Adapted from Martha Stewart)

Ingredients
Cheesecake filling
4 ounces cream cheese, softened
1/4 cup granulated sugar
1/8 teaspoon salt
1 large egg yolk
1 1/2 teaspoons sour cream
1/4 teaspoon vanilla

Cookie dough
16 tablespoons unsalted butter, softened
1/4 cup granulated sugar
1/4 teaspoon salt
1 large egg yolk
2 cups all-purpose flour

Directions
For the filling beat cream cheese with the sugar and salt until smooth. Mix in egg yolk, sour cream and vanilla. Place into the refrigerator for 30 minutes.

Preheat oven to 350 degrees

For the cookie dough, beat together butter, sugar and salt until creamy. Add the egg yolk until combined and add the flour until it becomes cookie dough.

Scoop out tablespoons of the dough and roll into balls. Place balls onto parchment-lined baking sheets and make an indentation in the center of each ball with your thumb.

Place into the oven and bake for 10 minutes. Remove from the oven and carefully use your thumb to press the middle of the cookies back down, remaking the indentations. Place cookies back into the oven and continue to bake until slightly golden around the edges, about 7 minutes.

Remove cookies from the oven and fill with the cheesecake filling using a teaspoon. Place back into the oven and bake for 7 minutes. Remove from the oven and transfer cookies to a wire rack to cool. When cool, place cookies into the refrigerator to chill.

-Aaron John

Wednesday, December 21, 2011

Speculoos


A couple of days ago, I was exposed to the wonder that is Cookie Butter at one of my friend's house. I know what you're thinking. "Cookie Butter? What in the world is that?". That's exactly what I was thinking. At first I thought it would taste like a chocolate chip cookie made into a spread form. But nope, far from that. 

This Cookie Butter has a similar texture to peanut butter but tastes completely different. It's spicy in flavor. Not chili pepper spicy, but spicy in the terms of cinnamon, nutmeg and that sort of thing. When my friend read the label, he mentioned it being made of Speculoos. Then I had an "Aha!" moment. I remembered "Speculoos" from "Throwdown With Bobby Flay" which featured Belgian Waffles. From that episode, they mentioned Speculoos tasting similar to ginger snaps and/or graham crackers and they are right.


I got on the internet to search for a Speculoos recipe and found one from Dorie Greenspan. This cookie screams Christmas with the spices of cinnamon, ginger and cloves running through this cookie. It taste of the mixture of a ginger snap, graham cracker and ginger thins. If you need a new last minute cookie recipe, this one is it!!


My only complaint with this recipe is that it didn't hold onto its shape when I used a fluted cutter. It still tasted great nonetheless. Another thing, I actually preferred these cookies when they are crisp aka darker around the edges. This way, they were reminiscent of ginger thins. So good! 

Speculoos
Recipe by Dorie Greenspan
Makes about 70 cookies

Ingredients
1 2/3 cups all-purpose flour
1/4 teaspoon salt
1/4 teaspoon baking soda
2 1/2 teaspoons cinnamon
1/4 teaspoon ground ginger
1/8 teaspoon ground cloves
7 tablespoons unsalted butter, at room temperature
1/2 cup sugar
1/2 (packed) cup light brown sugar
1 LARGE EGG, AT ROOM TEMPERATURE

Directions
Whisk the flour, salt, baking soda, and spices together in a bowl.
Working in the bowl of a stand mixer fitted with the paddle attachment or in a bowl with a hand mixer, beat the butter at medium speed until creamy. Add the sugars and beat until well blended, about 2 minutes. ADD THE EGG AND CONTINUE TO BEAT UNTIL IT, TOO, IS BLENDED INTO THE BUTTER AND SUGARS. With the mixer on the lowest speed, add the dry ingredients in 3 additions, mixing only until the flour disappears into the soft dough. You may have some flour at the bottom of the bowl, or the dough may not be entirely smooth, but that’s normal. Using your hands (always my first choice) or a spatula, reach into the bowl and knead or stir the dough 2 or 3 times, just enough to eliminate any dry spots.

Divide the dough in half. (The dough is very soft, even after you refrigerate it for several hours, so if your kitchen is hot, you might want to divide the dough into thirds – that way it won’t take you as long to cut out the cookies and the dough won’t soften as much.) Working with 1 piece of dough at a time, roll the dough between two sheets of wax paper or plastic wrap until you have a circle that’s a scant ¼ inch thick. As you’re rolling, turn the dough over a couple of times and pull away the paper or plastic, so you don’t end up rolling creases into the dough. Put the rolled-out rounds of dough on a tray or cutting board and refrigerate for at least 3 hours. (The dough can be refrigerated for up to 3 days or frozne, well wrapped, for up to 2 months.)

When you’re ready to bake, center a rack in the oven and preheat the oven to 350 degrees F. Have a baking sheet lined with a silicone baking mat or parchment paper.

Choose a cookie cutter – I like to use a scalloped cutter that’s 1 1/4-inches in diameter – and remove 1 circle of dough from the refrigerator. Peel off the top piece of wax paper or plastic and cut out as many cookies as you can from the dough, carefully lifting the cutouts onto the lined baking sheet. Collect the scraps and set them aside to combine with the scraps from the second piece of dough.

Bake the cookies for 8 to 10 minutes, or until they are lightly golden and just slightly brown around the edges. Allow the cookies to rest on the baking sheet for a couple of minutes before transferring them to a cooling rack to cool.

Repeat with the second round of dough, making certain the baking sheet is cool before you put the cutouts on it. To use the scraps, press them together, roll them into a circle, and chill them before cutting and baking.

Serving: The cookies are just right with coffee, made for espresso and tea and really good nibbled as a snack.

Storing: The dough can be wrapped airtight and kept in the refrigerator for up to 3 days or in the freezer for up to 2 months. Kept in an airtight container, the cookies will be fine for a week or more.

-Aaron John

LinkWithin

Related Posts with Thumbnails