Tuesday, September 14, 2010

Raspberry Jelly Roll


The post for the Jelly Roll is coming sooner than planned. Since I'm a competitor in Project FoodBuzz, I need to make a blog post dedicated to that competition which I will post this week. So get ready for that and don't forget to vote for me on Sept 20th!! :D One more thing, if you haven't entered my second giveaway, you should!! Just head on over to my Molten Chocolate Cake Blog Post and enter to win a $35 gift certificate to CSN Stores!!

Any who, this weekend I was watching "Ghost Adventures" on the Travel Channel and this show is so addictive! I've been fascinated with paranormal stuff since the seventh grade along with some of my friends. We actually tried to hunt for ghosts in our old elementary school. haha. They say ghosts come out as "orbs" in pictures so I would take my friend's camera and take pictures down the hallway to see if orbs came up. To much disappointment, nothing came up. However, just because I was fascinated with the paranormal stuff, it doesn't mean I'm not afraid of it. I am extremely scared of it all!! The thought of coming face to face with a paranormal thing scares the heck out of me! I mean, after watching "Paranormal Activity", I couldn't sleep for weeks because of the thought of a ghost lifting up the blankets to get into bed. Scary, much? lol. So, why is it that these ghost shows are so addictive? I mean, you don't want to watch it but you just can't stop. What this has to do with Jelly Rolls, I have no clue. haha. But here's the Results, Tips and Recipe!

Results
-Taste: Not that great. Sponge cake had a nice subtle vanilla flavor but the jelly overpowered the jelly roll making it too sweet (I added a bit too much jelly)

-Texture: Sponge cake was dry and broke during the rolling process. Parts surrounded by jelly made the cake "mushy"

Tips
-Another way to make sure the sponge cake is fully cooked is to press the top slightly. If the cake springs back to its original form, it's done.

-There are 2 methods for rolling a jelly roll:

1. Some recommend you invert the cake immediately, after coming out of the oven, onto a towel that is covered in powdered sugar. Then you roll it in the towel and let it cool completely. After cooling, you unroll the cake, remove the towel, spread the jam, then re-roll

2. Others recommend you let the cake completely in the pan after coming out of the oven. Once cooled, remove the cake from the pan, spread the jam and roll.

-If using method 1, I advise to sprinkle powdered sugar not only on the towel where the cake will be positioned, but on the top of the cake when the cake is on the towel as well. It will reduce the "sticking".

-I tried both methods and found that method 2 worked best for me (even though my cake cracked multiple times).

-If filling the sponge cake with something other than jam, such as whipped cream, refrigerate the rolled and filled cake for at least 6 hours to allow the cake to set.

Sponge Cake (Serves 8-10)
Ingredients
4 eggs, bring to room temperature
100g caster sugar
4g salt
140g cake flour
30g salad oil
30g fresh milk

Directions
Sift cake flour, set aside. Grease and line a 20cm round pan, set aside. Pre-heat oven to 180degC. Position rack at the lower bottom of the oven.

With an electric mixer, whisk eggs and sugar & salt on HIGH speed for about 5 to 7mins, until the batter double in volume and is ribbon-like (the beater should leave a ribbon-like texture when the batter is lifted up). Turn to LOW speed and whisk for another 1 to 2 mins. Whisking at low speed helps to stabilize the air bubbles in the batter.

Add sifted cake flour into the batter. With a spatula, gently fold in the flour until well blended.
With a spatula, mix about 1/3 of the batter with the salad oil in a separate bowl. Fold in this mixture into the remaining batter. This method will help to ensure the oil will be fully blended and at the same time will not deflate the batter.

Add in fresh milk and fold in gently with spatula.

Pour the batter into the pan and bake for 35 mins, or until a skewer inserted in the centre comes out clean. Unmold and cool completely.

**For a Jelly Roll, prepare the sponge cake the same way. Once prepared, pour the batter into a 15'' x 10'' inch baking pan that is greased and lined with parchment paper. Bake for about 20 min or until a toothpick comes out clean.

From this point you can either roll the cake in a towel that is covered with powdered sugar or let it cool completely in the pan. Once fully cooled, spread about 1/2 cup Raspberry Jam onto the cake and roll. Let it sit for about an hour before consuming.

Jelly Roll on Foodista

Saturday, September 11, 2010

Molten Chocolate Cake With A Surprise Inside...Another Giveaway That Is!

Today is your lucky day! The surprise isn't IN the Molten Chocolate Cake, it's literally in this blog post. Once again, I was contacted by CSN Stores to do another giveaway. If you still haven't given CSN Stores a look-see, get to it!! They seriously have everything. Need some Modern Bedding to spruce up your bedroom? Well, they have it! Need some new furniture? They have that! Need a simple pot? They even have that. Seriously, with their 200+ stores, the possibilities are endless! I'll talk more about this later.

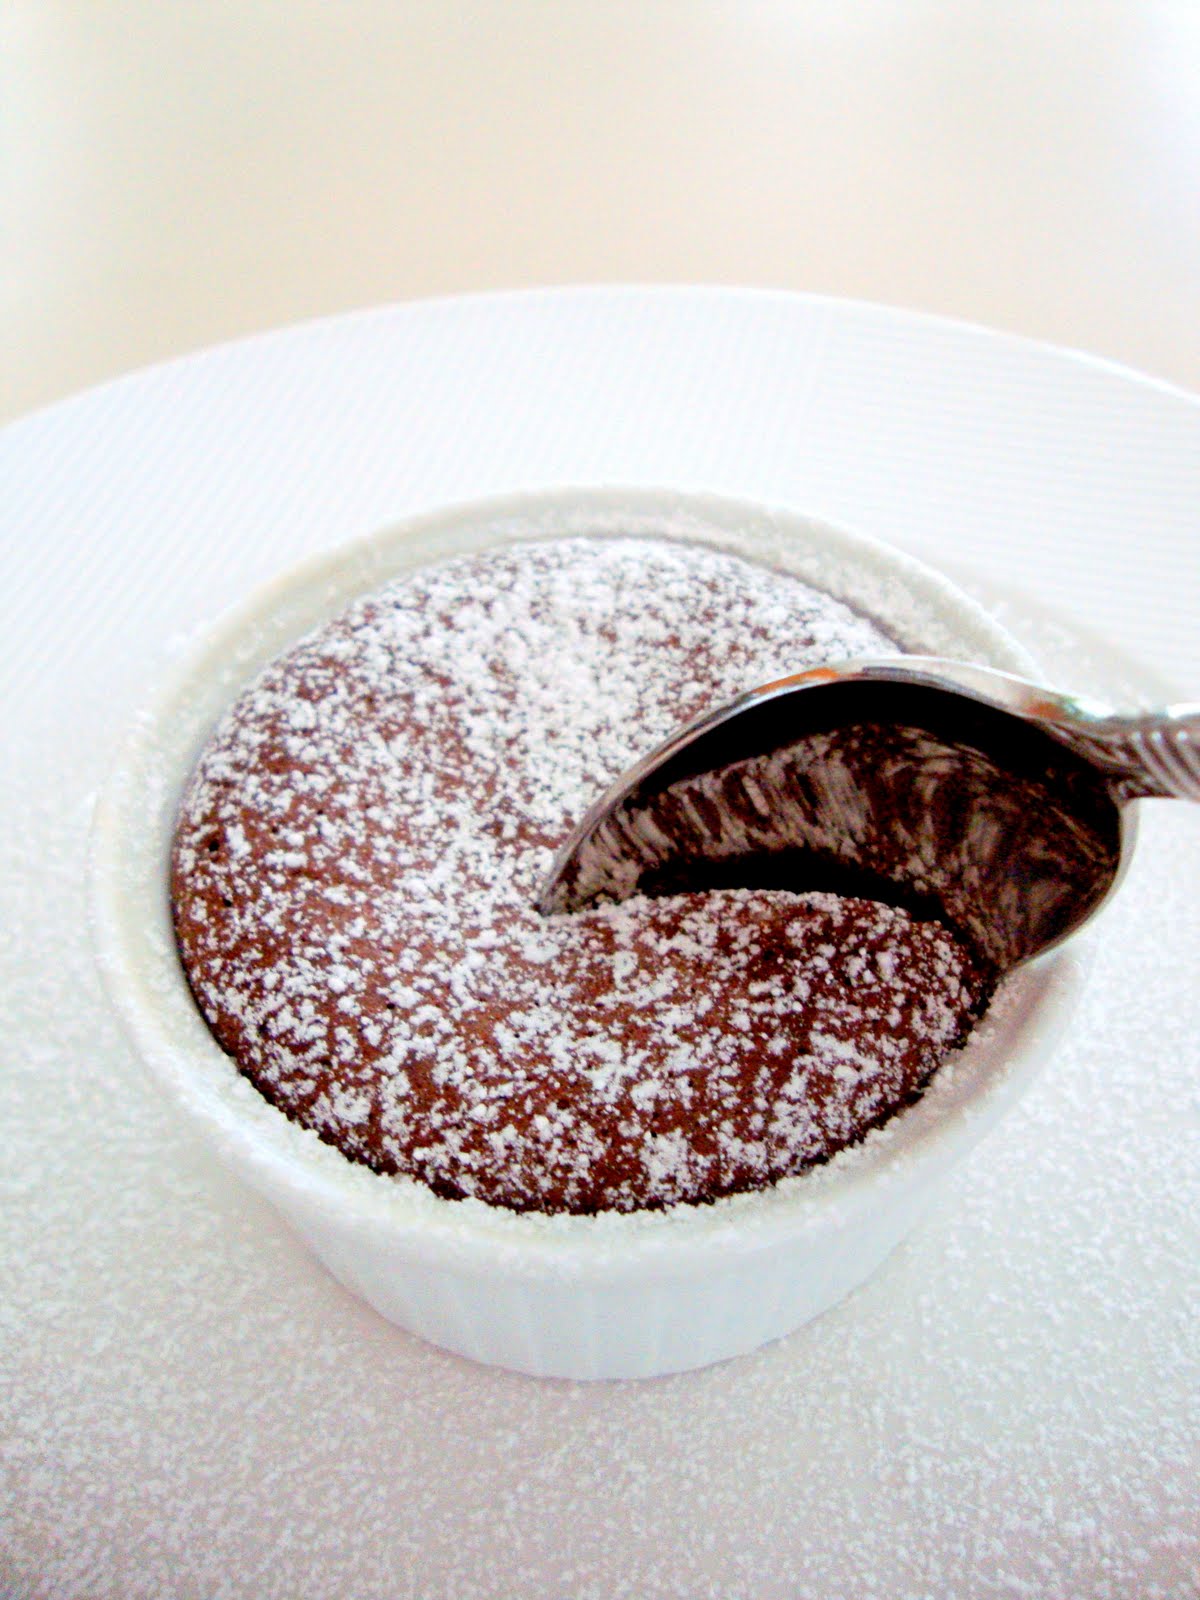
Well, two weeks after the egg fiasco (which I still think is going on) and it's time to make the Molten Chocolate Cake I planned for. This recipe comes from Jean-Georges Vongerichten and Mark Bittman and this is also the first time that I will try a Molten Chocolate Cake. There has been so much hype about a Molten Chocolate Cake that I had to make it. This recipe is extremely simple to follow that it was made in no time. When I tried the cake, it's essentially a chocolate cake, meets a melted chocolate bar, meets a souffle. The cake was fluffy like a souffle with the center somewhat liquidy (I left it in the oven a minute too long). Overall, it tasted "ehhhh". I'm not exactly sure what the "best" Molten Chocolate Cake is supposed to taste like but I'm not exactly a fan. haha. It definitely tasted like dark chocolate but I think I have to get used to the "molten" center. I think I'm a little sketchy about it since the eggs are basically still raw. I'm not a fan of a Molten Chocolate Cake just yet but, maybe in the future, I will be. As of right now, I would gladly eat a chocolate cake with fudge sauce on top or even a chocolate cupcake that is baked with a chocolate truffle on the inside rather than this Molten Chocolate Cake. Would that be great or what?! Well, that's for next time. ha.

Now, back to the giveaway. Like I said before, I was approached by CSN to do a giveaway. This time, CSN Stores is giving you the chance to win a $35 Gift Certificate for any of their online stores! Here's how to enter:

You must be a follower of "AJ's Cooking Secrets" through the Google Friend Connect located on the left side bar of my blog to enter this giveaway. If you are not a follower, your entry and/or entries will not be counted.

You have FOUR chances to enter!!
1. Leave a comment stating what you would like to buy from CSN Stores with the $35 Gift Certificate, along with your email.
2. Follow my other blog, AJ's Food Adventure, and leave a comment below stating that you have become a follower. If you are already a follower of my other blog, leave a comment stating that you are.
3. Become a fan/liker of my Facebook Fan Page : AJ's Cooking Secrets and leave a comment below stating that you have become a fan/liker. If you are already a fan/liker of my FB Fan Page, leave a comment stating that you are.
4. Follow me on Twitter @aaronjohn04 and leave a comment below stating that you have become a follower. If you are already a follower of my twitter page, leave a comment stating that you are.

**If entering all four times, leave four different comments.

Important Guidelines:
-Must be a follower of this blog, "AJ's Cooking Secrets", through Google Friend Connect located on the left side bar for your entry/entries to count. Anyone who "enters" without being a follower of this blog will not be entered into the drawing.
-The Giveaway will last until Sunday, September 19, 2010 at 11:59 PM PST. The winner will be drawn using Random.org. The winner will then be announced in a blog post, on my facebook page and emailed that they are the winner. From there, the winner will be contacted by CSN Stores where you will receive a Gift Certificate Code.

Now, here's my tips and recipe to the Molten Chocolate Cake.

**Tips
-You're going to love this tip. You can actually make this cake ahead of time! Follow the recipe as stated and when you divide the batter into the molds, store it in the refrigerator until you're ready! All you have to do is take it out of the refrigerator about 30 min before baking, to allow the cake batter to come to room temperature, then bake it off!

-I personally think that the cake looks better presented in a ramekin rather than un-molding it. I un-molded one of the cakes and it had a sort of "wrinkly" outside. If you like that, go for it. haha

Molten Chocolate Cake (Makes 4 individual cakes)
Ingredients
8 tablespoons (1 stick) unsalted butter, plus more for molds
2 teaspoons all-purpose flour, plus more for dusting molds
4 ounces bittersweet chocolate, preferably Valrhona
2 large whole eggs
2 large egg yolks
1/4 cup sugar

Directions
Butter and lightly flour four 4-ounce molds, ramekins, or custard cups. Tap out excess flour; butter and flour them again, and set aside.

In the top of a double boiler or heat-proof bowl set over a pan of simmering water, combine butter and chocolate; heat until chocolate has almost completely melted.

In the bowl of an electric mixer fitted with the paddle attachment, beat together eggs, yolks, and sugar until light and thick.
Add melted chocolate mixture, and beat to combine. Quickly beat in flour until just combined. Divide batter evenly among the molds.

Preheat oven to 450 degrees. Place filled molds on a rimmed baking sheet, and bake until the sides have set but the centers remain soft, 6 to 7 minutes.

Invert each mold onto a plate, and let rest 10 seconds. Unmold by lifting up one corner of the mold; the cake will fall out onto the plate. Serve immediately.

Wednesday, September 8, 2010

"That's How I Roll" Cookie


So I have some news!! If you look on the right side bar of my blog, you may notice that I am now a contestant for Project Food Blog. This competition is a set of culinary blogging challenges that many featured publishers have entered with a Grand Prize at the end. I am actually very excited about this because not only does it seem like it would be a fun thing to do, but I think it will help me blog better. Well, this is where you come in. Once the competition starts in two week, I will need your guy's help to vote! haha. I would appreciate it so much! :D Also, my weekly creations might need to be put on hold the longer I stick around in the competition but we will see. Until then, if I just so happen to be the winner, I will post my actual Chocolate Chip Cookie Recipe and my Red Velvet Cupcake Recipe on this blog. Sound like a plan? ;)

Anyways, the second week in my "Ice Cream Into Cookies" Project is here. My "That's How I Roll" Cookie is inspired by the Coldstone's Ice Cream flavor. This flavor is Cake Batter Ice Cream, cinnamon, pecans and vanilla cake pieces. This flavor sounded and looked delicious on their website that I just had to try it. Essentially, Coldstone re-invented a cinnamon roll into an ice cream flavor. So technically, my "That's How I Roll" Cookie is a cinnamon roll, turned ice cream, turned cookie. haha. Once again, I used Tyler Florence's Chocolate Chip Cookie recipe as my base.

What's in my "That's How I Roll" Cookie? The same exact thing that's in the ice cream!! I mixed chopped pecans, cinnamon, and pound cake pieces into the chocolate chip cookie dough and got this cookie. Once again, I am in love with this cookie! lol. It actually taste's like a cinnamon roll! The dough isn't too sweet, the cinnamon gave a great "spice" to the cookie, the pecans gave a nutty-ness and crunch and the pound cake was, of course, delicious. It added a moistness to the cookie just like in the "Birthday Cake" Cookie I made. I think I might even like these more than the "Birthday Cake" Cookie. This is another keeper!! Here's my tips and recipe!

**Tips
-Just like in the "Birthday Cake" Cookie, it's best to mix in the pecans before the cake to keep the cake in bigger chunks.

-Try not to break up the cake too much. A light mix-in is just fine.

"That's How I Roll" Cookie (Makes 1 Dozen 5 inch Cookies or 4 Dozen Mini Cookies)
Ingredients

2 1/2 cups all-purpose flour
1 teaspoon baking soda
2 tsps ground cinnamon
1 teaspoon salt
1 cup (2 sticks) unsalted butter, at room temperature
1/2 cup white sugar
3/4 cup packed light brown sugar
1 teaspoon pure vanilla extract
2 large eggs
3/4 cup chopped pecans
1 1/2 cups pound cake, cut into cubes

Directions
Preheat the oven to 350 degrees F.

Line 2 cookie sheets with parchment paper. Sift together the flour, baking soda, cinnamon, and salt into a medium bowl and set aside.

Place the butter, sugar, and brown sugar in the bowl of an electric mixer; cream together on medium speed until light and fluffy. Scrape down the sides of the bowl with a rubber spatula. Beat in the vanilla and eggs. Gradually add the dry ingredients to the creamed mixture and continue to mix until a smooth batter forms. Turn off the mixer and fold in the pecans and pound cake using the spatula.

To form the cookies, scoop about 1/4 cup of cookie dough into your hands and roll it around into a ball; place them about 3-inches apart onto the prepared cookie sheets; you should get about 4 cookies on each pan. Press down the tops of the dough slightly and bake until the cookies are light brown, 12 minutes for chewy cookies, or about 15 minutes for crispy cookies.

Allow the cookies to cool on the baking sheets for 5 minutes before transferring to a wire rack to cool completely. Repeat with remaining dough/cookie sheets.

Saturday, September 4, 2010

Soft Pretzels


It's beginning to look like Fall here in Seattle. The air is crisp, the clouds have arrived and the rain has fallen. I love it. Well, just not the rain part. Everything else is "A-OK" with me.

Anyways, I don't know about you but I have this crazy obsession with anything carbs. Whether it be rice, pasta or bread! I commend anyone that can do those "low carb/no carb" diets. How can you live your life without BREAD?! lol. This leads to this week's recipe for Soft Pretzels. One of my favorite "carb-ed" foods at the mall has got to be Soft Pretzels from Auntie Anne's. They're soft, chewy, salty (or sweet) and just soooooo good! How can you go wrong with a Soft Pretzel that is dipped in butter and has various toppings and sauces to dip it in?! Talk about YUM!! This is a copycat recipe of Auntie Anne's. The original recipe was from CDKitchen which you can find here. I love these pretzels! They are delicious!! Chewy, salty, the cinnamon sugar one was sweet and overall just great. Totally reminded me of Auntie Anne's. I must admit, I ate half the batch of pretzels. lol. Did I mention these make your house smell like Soft Pretzels? The smell of these as they were baking got me excited! Here's my tips and recipe!

**Tips
-Try to roll out the pretzel dough as thin as you can. Sort of like the thickness of a pencil. The thinner it is, the better the outcome and the more it looks like the original.

-Using Kosher Salt is perfectly fine to use instead of pretzel salt. Who wants to buy a huge thing of pretzel salt for a batch of pretzels anyway?

Soft Pretzels (Makes 12)
Ingredients:

1 1/2 cup warm water
1 1/8 teaspoon active dry yeast
2 tablespoons brown sugar
1 1/8 teaspoon salt
1 cup bread flour
3 cups regular flour
2 cups Warm water
2 tablespoons baking soda
to taste coarse salt
4 tablespoons butter (melted)

Directions:
Sprinkle yeast on lukewarm water in mixing bowl; stir to dissolve. Add sugar, salt and stir to dissolve; add flour and knead dough until smooth and elastic. Let rise at least 1/2 hour.

While dough is rising, prepare a baking soda water bath with 2 cups warm water and 2 Tbsp baking soda. Be certain to stir often. After dough has risen, pinch off bits of dough and roll into a long rope* (about 1/2 inch or less thick) and shape. Dip pretzel in soda solution and place on greased baking sheet. Allow pretzels to rise again. Bake in 450 oven for about 10 minutes or until golden. Brush with melted butter and enjoy!

Toppings: after you brush with butter try sprinkling with coarse salt. or for Auntie Anne's famous Cinnamon Sugar, try melting a stick of butter in a shallow bowl (big enough to fit the entire pretzel) and in another shallow bowl make a mixture of cinnamon and sugar. Dip the pretzel into the butter, coating both sides generously. Then dip again into the cinnamon mixture. Enjoy!

Wednesday, September 1, 2010

"Birthday Cake" Cookie

Happy September guys!! :) So, way back in May I decided to do an "Ice Cream Into Cookies" Project but I never followed through with it. It actually started when I made my "Cookies N' Cream" Cookies and had a brilliant idea to turn our favorite Ice Cream flavors into cookies. The same great flavor of ice cream in a portable "vehicle" that doesn't melt. From there, the last "Ice Cream Into Cookies" baked creation I made was my "Jamocha Almond Fudge" Cookies. Well, 3 months later and my "Ice Cream Into Cookies" Project is back in action and it all starts with my "Birthday Cake" Cookie.

My "Birthday Cake" Cookie was inspired by Coldstone's Birthday Cake and Birthday Cake Remix ice creams. I decided to combine the two flavors of these two ice creams into one. If you don't know, their Birthday Cake Ice Cream is, if I can remember right, chocolate cake batter ice cream, vanilla cake, sprinkles and fudge. I think it was taken off the menu for Birthday Cake Remix though. Birthday Cake Remix is Cake Batter Ice Cream, sprinkles, brownies and fudge. So, I combined both flavors and ended up with this "Birthday Cake" Cookie. For the base of the cookie, I used Tyler Florence's Chocolate Chip Cookie recipe. Coincidentally, his recipe was the first chocolate chip cookie recipe I have ever used.

You're probably asking yourself what is this "Birthday Cake" Cookie. Well, it's a chocolate chip cookie dough mixed with rainbow sprinkles, pieces of pound cake and white chocolate to keep up with the "vanilla theme" I seemed to be having. I'm seriously in love with this cookie!! It tastes soooo good!! When it comes out of the oven, it smells like a combination of chocolate chip cookies and vanilla cupcakes! The dough had the right amount of sweetness, the sprinkles added a little crunch and color, the white chocolate enhanced the vanilla flavor and the pound cake kept the cookie soft and moist, not to mention that biting into a chunk of cake was the best part! I'm definitely keeping this recipe! I have a ton of ideas for my "Ice Cream Into Cookies" Project and I can't wait to try them! Here's my tip and the recipe!

**Tips
-When the cookie base is finished, it's best to mix in the sprinkles and chocolate chips completely before the pound cake. It allows the pound cake to stay in bigger chunks.

-The pound cake doesn't need to be completely mixed into the dough so don't feel frustrated when the cake is breaking apart. When you begin to scoop the cookies, it'll make it's way into the dough.

"Birthday Cake" Cookie (Makes 1 Dozen 5 inch Cookies or 4 Dozen Mini Cookies)
Ingredients
2 1/2 cups all-purpose flour
1 teaspoon baking soda
1 teaspoon salt
1 cup (2 sticks) unsalted butter, at room temperature
1/2 cup white sugar
3/4 cup packed light brown sugar
1 teaspoon pure vanilla extract
2 large eggs
1/4 cup colored sprinkles
3/4 cup white chocolate
1 1/2 cups of pound cake, cut into cubes

Directions
Preheat the oven to 350 degrees F.

Line 2 cookie sheets with parchment paper. Sift together the flour, baking soda, and salt into a medium bowl and set aside.

Place the butter, sugar, and brown sugar in the bowl of an electric mixer; cream together on medium speed until light and fluffy. Scrape down the sides of the bowl with a rubber spatula. Beat in the vanilla and eggs. Gradually add the dry ingredients to the creamed mixture and continue to mix until a smooth batter forms. Turn off the mixer and fold in the sprinkles, chocolate chips, and pound cake pieces using the spatula.

To form the cookies, scoop about 1/4 cup of cookie dough into your hands and roll it around into a ball; place them about 3-inches apart onto the prepared cookie sheets; you should get about 4 cookies on each pan. Press down the tops of the dough slightly and bake until the cookies are light brown, 12 minutes for chewy cookies, or about 15 minutes for crispy cookies.

Allow the cookies to cool on the baking sheets for 5 minutes before transferring to a wire rack to cool completely. Repeat with remaining dough/cookie sheets.

LinkWithin

Related Posts with Thumbnails