Wednesday, December 28, 2011

Palace Korean Bar & Grill

 
Last week, my friends and I decided to go to an all you can eat Korean BBQ place. We decided on Palace Korean Bar & Grill. When we entered, not one person was at the front desk. Another group of people were ahead of us and were waiting at a door which was actually where the "BBQ-ing" was taking place. Then, a lady popped up rolling a cart and told us to take a booth where we wanted. The place had a sort of hole in the wall feel but not completely. A gas heater was right in the middle of the place yet the place was freezing cold. Not to mention, the booth was a bit dirty with crumbs from the previous diners. Uhhh, GROSS! 

We stayed in our booth anyway and just wiped it a bit. Korean BBQ places are awesome! It's essentially meat galore! The idea of having a variety of meats to choose from and having the meat constantly brought to you to grill on your own is just the best idea ever. Just make sure you're really hungry so you can get your money's worth!!


For the first plate of meat we opted for the combo platter because we really didn't know what to get. Before our meat came out a variety of side dishes came out including kim chi, marinated cucumber, fish cakes, mashed potatoes w/ apples, peas and carrots, and a green salad. Then the meat came and it was time to grill up.


Our meat combo was full of brisket, short ribs, marinated beef, beef tongue, pork's belly, shrimp, spicy pork bulgogi, marinated chicken and more. At the point where we essentially grilled most of our meat, I was getting disappointed with how our rice didn't even arrive. We had to tell our waiter about the rice again for it to arrive and when it did come, they only gave us two bowls because they were still cooking it, and we were a group of four.


Once our meat was all gone, we had to wait 5-10 minutes for the waiter to come by and ask if we wanted more. Of course we do! I mean, that's why they call is "All You Can Eat". This time we ordered the spicy pork bulgogi and grilled marinated beef slices.

The pork bulgogi was a bit too spicy for my taste but the grilled marinated beef slices was my fav. Definitely a must try!! The Short ribs were a fav. as well.

Yet again, we had to wait another 5-10 min for our waiter to come back and ask if we wanted more. Seriously? We will not be done with just 2 plates of meat....

Overall, we had four plates of meat and the the food was delicious. I just love places where you can make your own food. Despite how good the food was, I was disappointed with the service, or lack there of. In the restaurant, there was only one server which I didn't understand and the woman we had seen earlier rolling the cart seemed to have disappeared. There was also a moment when there was only our table and another table and yet we didn't receive the best attention. However, when the waiter did come to our table, he was very friendly.

My Rating: 3 out of 5 stars

Palace Korean Bar & Grill
15932 NE 8th St
(between N 160th Ave & S 159th Pl)
Bellevue, WA 98008
(425) 957-3522

-Aaron John

Wednesday, December 21, 2011

Speculoos


A couple of days ago, I was exposed to the wonder that is Cookie Butter at one of my friend's house. I know what you're thinking. "Cookie Butter? What in the world is that?". That's exactly what I was thinking. At first I thought it would taste like a chocolate chip cookie made into a spread form. But nope, far from that. 

This Cookie Butter has a similar texture to peanut butter but tastes completely different. It's spicy in flavor. Not chili pepper spicy, but spicy in the terms of cinnamon, nutmeg and that sort of thing. When my friend read the label, he mentioned it being made of Speculoos. Then I had an "Aha!" moment. I remembered "Speculoos" from "Throwdown With Bobby Flay" which featured Belgian Waffles. From that episode, they mentioned Speculoos tasting similar to ginger snaps and/or graham crackers and they are right.


I got on the internet to search for a Speculoos recipe and found one from Dorie Greenspan. This cookie screams Christmas with the spices of cinnamon, ginger and cloves running through this cookie. It taste of the mixture of a ginger snap, graham cracker and ginger thins. If you need a new last minute cookie recipe, this one is it!!


My only complaint with this recipe is that it didn't hold onto its shape when I used a fluted cutter. It still tasted great nonetheless. Another thing, I actually preferred these cookies when they are crisp aka darker around the edges. This way, they were reminiscent of ginger thins. So good! 

Speculoos
Recipe by Dorie Greenspan
Makes about 70 cookies

Ingredients
1 2/3 cups all-purpose flour
1/4 teaspoon salt
1/4 teaspoon baking soda
2 1/2 teaspoons cinnamon
1/4 teaspoon ground ginger
1/8 teaspoon ground cloves
7 tablespoons unsalted butter, at room temperature
1/2 cup sugar
1/2 (packed) cup light brown sugar
1 LARGE EGG, AT ROOM TEMPERATURE

Directions
Whisk the flour, salt, baking soda, and spices together in a bowl.
Working in the bowl of a stand mixer fitted with the paddle attachment or in a bowl with a hand mixer, beat the butter at medium speed until creamy. Add the sugars and beat until well blended, about 2 minutes. ADD THE EGG AND CONTINUE TO BEAT UNTIL IT, TOO, IS BLENDED INTO THE BUTTER AND SUGARS. With the mixer on the lowest speed, add the dry ingredients in 3 additions, mixing only until the flour disappears into the soft dough. You may have some flour at the bottom of the bowl, or the dough may not be entirely smooth, but that’s normal. Using your hands (always my first choice) or a spatula, reach into the bowl and knead or stir the dough 2 or 3 times, just enough to eliminate any dry spots.

Divide the dough in half. (The dough is very soft, even after you refrigerate it for several hours, so if your kitchen is hot, you might want to divide the dough into thirds – that way it won’t take you as long to cut out the cookies and the dough won’t soften as much.) Working with 1 piece of dough at a time, roll the dough between two sheets of wax paper or plastic wrap until you have a circle that’s a scant ¼ inch thick. As you’re rolling, turn the dough over a couple of times and pull away the paper or plastic, so you don’t end up rolling creases into the dough. Put the rolled-out rounds of dough on a tray or cutting board and refrigerate for at least 3 hours. (The dough can be refrigerated for up to 3 days or frozne, well wrapped, for up to 2 months.)

When you’re ready to bake, center a rack in the oven and preheat the oven to 350 degrees F. Have a baking sheet lined with a silicone baking mat or parchment paper.

Choose a cookie cutter – I like to use a scalloped cutter that’s 1 1/4-inches in diameter – and remove 1 circle of dough from the refrigerator. Peel off the top piece of wax paper or plastic and cut out as many cookies as you can from the dough, carefully lifting the cutouts onto the lined baking sheet. Collect the scraps and set them aside to combine with the scraps from the second piece of dough.

Bake the cookies for 8 to 10 minutes, or until they are lightly golden and just slightly brown around the edges. Allow the cookies to rest on the baking sheet for a couple of minutes before transferring them to a cooling rack to cool.

Repeat with the second round of dough, making certain the baking sheet is cool before you put the cutouts on it. To use the scraps, press them together, roll them into a circle, and chill them before cutting and baking.

Serving: The cookies are just right with coffee, made for espresso and tea and really good nibbled as a snack.

Storing: The dough can be wrapped airtight and kept in the refrigerator for up to 3 days or in the freezer for up to 2 months. Kept in an airtight container, the cookies will be fine for a week or more.

-Aaron John

Wednesday, December 14, 2011

Final Project: Cookies and Cake?

L to R: Raspberry Linzer Cookies, Black and White Cookies, Sugar Cookies, Chocolate Chip Cookies dipped in White Chocolate and Red Sprinkles

Vanilla Butter Cake layered with Raspberry Jam and Vanilla Bean Buttercream, drizzled with a Sweet Tea Caramel Sauce

How is it possible to make cookies and cake for a final project you ask? Well, I have no idea either. It's almost unheard of but there I was, making cookies and cake for my AAS 330 final project.

AAS 330 stands specifically for Asian American Studies: Asian American Theater. For our final essay/project, the goal was to either write an essay about an artistic problem in a play or to have an artistic approach to presenting a play, mainly in set design, directing, lighting, etc. and creating a 3D model. To be honest, I was confused as to what to do.

I began to write my essay and I hit a wall, didn't know which way to go. So, I ended up thinking about what I can do artistically. It hit me like a ton of bricks; do something in the culinary arts! Duhhh. So I ended up emailing my Professor about an idea to turn the five characters of the play Tea, into dessert form. To my amazement, the idea was viable!

I debated if it were a smart thing to do. I mean, with finals the same week as the presentation, would it be smart to bake for one whole day and sacrificing a whole day of studying for my other classes? I did it anyway because when will I ever be able to have an opportunity like this to do what I love for a project? Probably never again.

After a day and a half of baking, this is what I came up with:

Sugar Cookie: Represents Teruko. Such a plain character with no sub-text and was one dimensional like a sugar cookie

Black and White Cookie: Represents Setsuko. A calm character that I felt observed both sides of a conversation, weighed her options and tried to reduce conflict as much as possible.

Chocolate Chip Cookie dipped in White Chocolate and Red Sprinkles: Represents Chizuye. As the most assimilated character, she is the most iconic American Cookie. The white chocolate and red sprinkles represents the Japanese flag and culture. She breaks away from her Japanese culture in the form of a chocolate shell and becomes assimilated into America, revealing the Chocolate Chip Cookie.

Raspberry Linzer Cookie: Represents Himiko. She is seen as a ghost throughout the play which explains the dusting of powdered sugar. The Raspberry Jam in the center represents the "pool of blood" she layed in after she shot herself. I specifically wanted her to be a sandwich cookie to represent how easily the two cookies can be ripped apart representing how easily Himiko's life fell apart due to the lack of stability after being controlled by her husband, murder of her daugther and eventually Himiko's death.

Vanilla Butter Cake layered with Raspberry Jam and Vanilla Bean Buttercream, drizzled with a Sweet Tea Caramel Sauce: Represents Atsuko. At first I believed she was a selfish and rude character that tried to take away from the remembrance of Himiko's life and putting attention on herself. However, reading the play over about two times, that wasn't the case at all. She put on a facade of not caring about Himiko, hiding her emotions unlike the rest of the characters, which is why she's a cake and not a cookie. Being a cake and not a cookie provides a difference in how she expressed her emotions vs. the others. Even though she put on a facade, deep down, she truly cared about Himiko which is why the cake is layered with Raspberry Jam to tie it back to Himiko's cookie. The Sweet Tea Caramel was used to bring back the whole notion that the play is called Tea.

Overall, doing this project was the best thing that I could've done. This was the first time I was able to present something I was truly passionate about and I can't tell you enough how great it felt to present this. Never in a million years would I think I would be able to do this and it's all because of my Professor. Thanks Professor!! This was the best class I have ever taken so far!! :)

-Aaron John

Wednesday, December 7, 2011

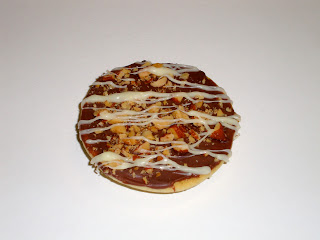
Hybrid Cookie: Chocolate & Almond Biscotti Meets a Black & White Cookie


Today, I had a presentation at UW for my Asian American Studies: Asian Theater Class. The presentation: Act out the lines of the play "Tea" by Velina Houston in groups of 6. I never knew how much fun acting could be. 

The lights were dim in the Ethnic Cultural Theater. As we watched other groups go through their lines, it was finally our group's turn to have the spot light. We sat around a bamboo mat, had tea and recited our lines. Nervous? Yes. But it all went away when we came into character. Not to mention how great my group was! 

So, how do these cookies come into play? Well, yesterday, I really did NOT want to study. If I don't study what do I do? Make food! This time, I decided to make this hybrid cookie. This was actually my first time making these. At first I was simply going to make Black and White Cookies but I thought they were too plain and needed added texture. Thus, I added almonds to the top and drizzled with white chocolate instead. The flavors of a Chocolate & Almond Biscotti with the texture of the cookie resembling that of a Black And white Cookie.

All in all, you can't make baked goods without giving some away. After all, it's the time of year where giving treats should be a must!! This was exactly why I gave some to my AAS group. I hope they liked it! :)

Black and White Cookies 
(Makes about 16 large cookies)
Adapted from Gourmet Cookbook via Joy The Baker

Ingredients
For the Cookies:
2 1/2 cups all-purpose flour
1 teaspoon baking soda
1 teaspoon salt
2/3 cup well-shaken buttermilk
1 teaspoon vanilla
2/3 cup unsalted butter, softened
1 cup granulated sugar
2 large egg

Topping
1/2 cup chopped almonds
Melted Milk Chocolate
Melted White Chocolate

Directions
Preheat oven to 350°F.

Whisk together flour, baking soda, and salt in a bowl. Stir together buttermilk and vanilla in a cup.

Beat together butter and sugar in a large bowl with an electric mixer until pale and fluffy, about 3 minutes, then add eggs, beating until combined well. Mix in flour mixture and buttermilk mixture alternately in batches at low speed (scraping down side of bowl occasionally), beginning and ending with flour mixture. Mix until smooth.

Spoon 1/4 cups of batter about 2 inches apart onto a buttered large baking sheet. Bake in middle of oven until tops are puffed and pale golden, and cookies spring back when touched, 15 to 17 minutes. Transfer with a metal spatula to a rack and chill (to cool quickly), about 5 minutes.

Once cooled, spread melted chocolate on the bottom of the cookies. Sprinkle the chopped almonds over the chocolate. Finally, drizzle with white chocolate.

-Aaron John

Friday, November 25, 2011

The Thanksgiving Meal!


I hope your Thanksgiving meal was as good as mine was. It was a long day of cooking, 6 hours to be exact, but it was all worth it! Here was my menu: Garlic Studded Prime Rib w/ Thyme Au Jus, Honey Baked Ham, Roasted Asparagus, Sun Dried Tomato and Feta Pasta Salad, Sauteed Corn w/ bacon, Baked Potatoes, Green Salad, Roasted Garlic and Rosemary Focaccia, Apple Hand Pies and Chocolate Devils Food Cupcakes.

My family isn't a big "Turkey on Thanksgiving" kind of family. We tend to move more towards a Prime Rib; it's probably a sin, I know. But I figure, we always get a rotisserie chicken from Costco every now and then throughout the year so why have a bigger chicken again for Thanksgiving? Swapping out the turkey for a Prime Rib isn't that bad, right?


I have never cooked this big of a meal since, well, last Thanksgiving and I forgot how hard it is! Especially for this kind of meal, it's all about timing. It's all about "When should I start this dish so that it finishes at the same time as another dish?" Once you get that down you're golden. Everything worked like clockwork at my Thanksgiving.


I was surprised at how well everything was going, with only one oven to use and 5 items that needed to be baked off at different temps. Prime Rib is one of those iffy things especially when it comes to the perfect temperature. I actually had to google the temperature of a medium rare/medium prime rib and came up with weird results. Some said 115 degrees, others said 125 degrees, another said 135 degrees F. So, I kind of guessed on this one and took it out at 132 degrees F and to me it was perfect, for my family anyway! My tip would be baking it about 20 min a pound. Start off at 450 degrees for the first 30 min, then lower your heat to 350 degrees F for the remainder of the cooking time.


With this kind of meal, there was no need to go on a diet. You can bet that a nap was well needed right after.

-Aaron John

Sunday, November 20, 2011

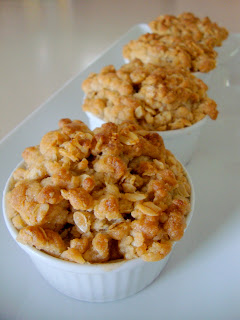
Apple Crisp


4 days until Thanksgiving and counting!! So, what desserts do you have planned on this day that's all about food, friends, and family? Tired of the boring old apple pie. What about that classic Pumpkin Pie. Even though, this Apple crisp has no pumpkin in it what so ever, it is filled with apple upon apples to turn that apple pie around into something different than that staple.

The crunchy, buttery, sweet, nutty tasting topping has cookie qualities to it almost like a lace cookie. Alone, it's just as good as the whole dessert. The apples and the acidity from the lemon cuts through the sweetness just enough so that you want to take that extra bite. 

Still think this is boring? Try adding pears to give a different dimension of flavor. Even add dried cranberries to mirror the flavor of cranberry sauce. Want to intensify this apple flavor? Why not add a little apple cider (maybe 1/4 cup) and a bit of flour to thicken the sauce to "confit" the apples as they are baking. There are many variations to a crisp and since it is the fall season after all, you are more than likely to have a couple of apples laying around to make this sweet dessert.

Apple Crisp
Recipe by Ina Garten

Ingredients
5 pounds McIntosh or Macoun apples
Grated zest of 1 orange
Grated zest of 1 lemon
2 tablespoons freshly squeezed orange juice
2 tablespoons freshly squeezed lemon juice
1/2 cup granulated sugar
2 teaspoons ground cinnamon
1 teaspoon ground nutmeg

For the topping:
1 1/2 cups flour
3/4 cup granulated sugar
3/4 cup light brown sugar, packed
1/2 teaspoon kosher salt
1 cup oatmeal
1/2 pound cold unsalted butter, diced

Directions
Preheat the oven to 350 degrees F. Butter a 9 by 14 by 2-inch oval baking dish.

Peel, core, and cut the apples into large wedges. Combine the apples with the zests, juices, sugar, and spices. Pour into the dish.

To make the topping, combine the flour, sugars, salt, oatmeal, and cold butter in the bowl of an electric mixer fitted with the paddle attachment. Mix on low speed until the mixture is crumbly and the butter is the size of peas. Scatter evenly over the apples.

Place the crisp on a sheet pan and bake for 1 hour until the top is brown and the apples are bubbly. Serve warm.

-Aaron John

Saturday, November 5, 2011

French Toast


What do you do with leftover bread? Make French Toast
What do you do with leftover Cinnamon-Raisin Swirl Bread? Make Cinnamon Raisin Swirl Bread French Toast!

Now, I have to admit, there has been plenty of times where I've said on my blog that I'm a carb-a-holic, but even I have my limits. Seriously, who can eat a whole loaf of bread?? That's just absurd. If you can, I would love to see that. ha. Over time, a loaf of bread, as delicious and filled with goodies as it may be, just becomes a loaf of bread. You always need to reinvent that loaf of bread to have some variety. French Toast is the perfect way to continue enjoying a good ol' carb feast.


With my leftover loaf of Cinnamon Raisin Swirl Bread, it already had plenty of flavor that a simple custard base is all I needed. No need for extra flavorings, just something clean in flavor. French Toast is really something that doesn't need a recipe. Simply, get some eggs and milk, whisk that around and add a tad bit of sugar, dip in your bread and griddle until a delicious crusty golden brown.

I guess the real technique to french toast is the soaking period of the bread. Should you soak for long or little? Well, do you like a mushy, custardy french toast or a firm, yet moist french toast. Some people like one or the other. I personally like a firm, moist french toast. I'm sorry but I def. am not a fan of a custardy french toast due to its texture. I soaked my bread literally for 15/20 sec. a side no more, no less. If you like the other way, soak it longer.


If we can't agree on what's the best texture for French Toast, I think we can all agree that the best part is drenching it all in maple syrup! :d ha

French Toast
Recipe by Alton Brown


Ingredients
1 cup half-and-half
3 large eggs
2 tablespoons honey, warmed in microwave for 20 seconds
1/4 teaspoon salt
8 (1/2-inch) slices day-old or stale country loaf, brioche or challah bread
4 tablespoons butter

Directions
In medium size mixing bowl, whisk together the half-and-half, eggs, honey, and salt. You may do this the night before. When ready to cook, pour custard mixture into a pie pan and set aside.

Preheat oven to 375 degrees F. Dip bread into mixture, allow to soak for 30 seconds on each side, and then remove to a cooling rack that is sitting in a sheet pan, and allow to sit for 1 to 2 minutes.

Over medium-low heat, melt 1 tablespoon of butter in a 10-inch nonstick saute pan. Place 2 slices of bread at a time into the pan and cook until golden brown, approximately 2 to 3 minutes per side. Remove from pan and place on rack in oven for 5 minutes. Repeat with all 8 slices. Serve immediately with maple syrup, whipped cream or fruit.

-Aaron John

Saturday, October 29, 2011

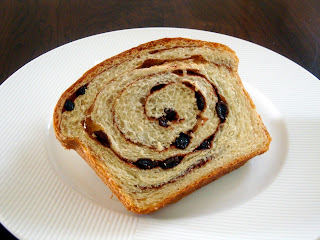
Cinnamon-Raisin Swirl Bread


To be honest, I didn't really know about "The Pioneer Woman" until about a couple months ago when she had a show premiering on the Food Network. Shocker!! Thank God for Food Network putting her on the Food Network or else I would have never known about her! Her blog is amazing and filled with food I want to try out. First up was Cinnamon Swirl Bread.

About a year ago, I saw tons of posts on Foodgawker with Cinnamon Swirl Bread. Apparently, it was part of the "Daring Bakers Challenge" and everyone made it. Growing up, my family didn't usually buy these types of breads. It was all about "Pan de Sal" which is a Filipino dinner roll. However, every time my family went to the supermarket, I would always see this "Cinnamon-Raisin Swirl Bread" and I always wanted to try it! Luckily, "The Pioneer Woman" had a post about it!

Nows my chance to eat this bread and man is it good! I've been deprived my whole life! ha. I personally ate a couple of slices as is. That's how good it was. Just imagine if this was used for cinnamon toast or.....FRENCH TOAST!! Definitely going to be on the to-do list before this loaf of bread is gone! :D
BTW, check out "The Pioneer Woman" website for a step by step guide to this bread. I found it extremely useful!

Cinnamon Swirl Bread
Recipe from The Pioneer Woman
Makes 1 loaf
Ingredients
1 cup Milk
6 Tablespoons Butter
2-1/2 teaspoons Active Dry Yeast
2 whole Eggs
1/3 cup Sugar
3-1/2 cups All-purpose Flour
1 teaspoon Salt
1/3 cup Sugar
2 Tablespoons Cinnamon
1/2 cup Raisins (optional)
Egg And Milk, Mixed Together, For Brushing
Softened Butter, For Smearing And Greasing

Directions
Melt butter with milk. Heat until very warm, but don't boil. Allow to cool until still warm to the touch, but not hot. Sprinkle yeast over the top, stir gently, and allow to sit for 10 minutes.
Combine flour and salt.

In the bowl of an electric mixer, mix sugar and eggs with the paddle attachment until combined. Pour in milk/butter/yeast mixture and stir to combine. Add half the flour and beat on medium speed until combined. Add the other half and beat until combined.

Switch to the dough hook attachment and beat/knead dough on medium speed for ten minutes. If dough is overly sticky, add 1/4 cup flour and beat again for 5 minutes.

Heat a metal or glass mixing bowl so it's warm. Drizzle in a little canola oil, then toss the dough in the oil to coat. Cover bowl in plastic wrap and set it in a warm, hospitable place for at least 2 hours.

Turn dough out onto the work surface. Roll into a neat rectangle no wider than the loaf pan you're going to use, and about 18 to 24 inches long. Smear with 2 tablespoons melted butter. Mix sugar and cinnamon together, then sprinkle evenly over the butter-smeared dough. Add the raisins if desiredStarting at the far end, roll dough toward you, keeping it tight and contained. Pinch seam to seal.

Smear loaf pan with softened butter. Place dough, seam down, in the pan. Cover with plastic wrap and allow to rise for 2 hours.

Preheat oven to 350 degrees.

Mix a little egg with milk, and smear over the top. Bake for 40 minutes on a middle/lower rack in the oven.

Remove from the pan and allow bread to cool. Slice and serve, or make cinnamon toast or French toast with it.

-Aaron John

Thursday, October 20, 2011

BBQ Chicken Pizza

When you have a craving for food but don't exactly want to go out and spend money, you figure out ways to recreate a favorite food. That was the same exact story with me. Seriously, who doesn't crave pizza even now and then? That yummy, greasy, salty, crispy pizza! :d


When it comes to pizza, people have their preferences. I personally like substance to my pizza, particularly I like the pizza dough to be the right thickness. I don't want any of my pizzas to have a thin crisp crust like a cracker. If I wanted cheese and crackers, I would eat cheese and crackers. However, I want pizza! Having a crisp edge to my pizza yet still have a nice chew to it is what I think is best. Now, to luck out and find a fantastic recipe for a pizza crust on my first try, no more take out pizza for me!


This recipe comes from Ina Garten and she really can't do no wrong. This pizza dough is simple to make and tastes way better than take out pizza. Seriously, go and make this! Since this was all about making things on hand, I threw just enough bbq sauce to cover the dough, topped it with cheese and cooked chicken breast and baked. When baked, topped it with green onions for garnish and eat. No more cravings here. :)

Basic Pizza Dough
Recipe by Ina Garten

Ingredients
Pizza Dough:
1 1/4 cups warm water (100 to 110 degrees)
2 packages or 4 ½ tsps dry yeast
1 tablespoon honey
3 tbsps Good olive oil
4 cups all-purpose flour, plus extra for kneading
2 tsps Kosher salt

Garlic Butter:
¼ cup Olive Oil
¼ cup Butter
4 garlic cloves, minced
1/4 teaspoon crushed red pepper flakes
Freshly ground black pepper

Directions
For the dough, combine the water, yeast, honey, and 3 tablespoons olive oil in the bowl of an electric mixer fitted with a dough hook. When the yeast is dissolved, add 3 cups of the flour, then 2 teaspoons salt, and mix on medium-low speed. While mixing, add up to 1 more cup of flour, or just enough to make a soft dough. Knead the dough for about 10 minutes until smooth, sprinkling it with the flour as necessary to keep it from sticking to the bowl. When the dough is ready, turn it out onto a floured board and knead it by hand a dozen times. It should be smooth and elastic. Place the dough in a well-oiled bowl and turn it to cover it lightly with oil. Cover the bowl with a kitchen towel and allow the dough to rise at room temperature for 45 minutes. (If kneading by hand, knead for 30 min.)

Meanwhile, make the garlic butter. Place 1/4 cup olive oil, 1/4 cup butter, 4 cloves garlic, and red pepper flakes in a small saucepan and bring to a simmer over low heat. Cook for 5 minutes, making sure the garlic doesn't burn. Set aside.

Preheat the oven to 500 degrees. (Be sure your oven is clean!)

Dump the dough onto a board and divide it into 6 equal pieces. Place them on a sheet pan lined with parchment paper and cover them with a damp towel. Allow the dough to rest for 15 minutes. Use immediately, or refrigerate for up to 4 hours.

Press and stretch each ball into an 8-inch circle and place 2 circles on each parchment-lined sheet pan. (If you've chilled the dough, take it out of the refrigerator approximately 30 minutes ahead to let it come to room temperature.) Brush the pizzas with the garlic butter, and sprinkle each one liberally with salt and pepper. Top with whatever toppings you like.

-Aaron John

Friday, October 7, 2011

Melt Gelato


Okay, so I have to confess, I haven't been blogging as often as I would like. I'm just so busy that I haven't had a pocket of time to make a post or cook up something good for that matter. I'll try my best and getting to it soon. Until then, another foodie place from San Diego.

After a day of shopping in the Otay Ranch shopping area in Chula Vista, we were def. in need for some food. Knowing me and my sweet tooth, I knew I wanted something cold and sweet because it got so hot! When my bro and his gf came into one of the stores with some gelato, I told my cousin we should get some too.

Melt Gelato was somewhat tucked away in this shopping area. Mind you, it's an outdoor mall so everything looked like clothing stores. If I didn't know any better, I would've went past this thinking it was just clothes. I mean, there was a store right next door that was called "Chocolate" and looking in, they definitely did not look like they sold any chocolates. ha. 

So we got inside and looked at what they had and their selection was tremendous. I couldn't even name off the different ones because they had so many! The most I've ever seen! They also had a variety of sandwiches and crepes to choose from. I being the ice cream lover had to get some gelato.

I decided to get the pistachio and the tiramisu gelato. The pistachio had a plethora of pistachios mixed in. I was amazed at how much there was inside. It wasn't too sweet either which was nice. Now, the tiramisu was another story. I think I have just found my new fav. gelato! It was decadent in flavor; It had chocolate and coffee notes with lady fingers mixed in! It was dense and rich but oh so good! Move over pistachio because tiramisu is in town! Woot!

My Rating: 4 out of 5 stars

2015 Birch Rd
Chula Vista, CA 91915
Neighborhood: Chula Vista
(619) 397-0388

-Aaron John

Thursday, September 29, 2011

Lucha Libre Taco Shop


Well, I'm officially back from San Diego. Sad to see the past week come to an end but it definitely was something to remember. Just having a blast with family, it could not have been any better. With Sea World, Disneyland and a wedding, it was a packed week. First stop on food was Lucha Libre Taco Shop.

Lucha Libre Taco Shop was featured on Man V. Food and while in San Diego, my brother had mentioned that we should head over there. Being from Seattle, we're not exactly known for our Mexican Food; San Diego however is. Thus, it has been a goal to eat REAL mexican food.

After a long day at Sea World, my cousins and I headed over to Lucha Libre Taco Shop to eat an early dinner. I was surprised at how small this place was. It was literally decorated with pictures of mexican wrestlers from wall to wall. I've heard that this place gets crowds of people but luckily, there were only a couple other people there.

I ordered a Classic California Burrito with Carne Asada. Now, the whole notion of "California Burrito" simple means french fries is wrapped inside it. Inside this burrito was french fries, cheese, pico de gallo, sour cream and the carne asade and man was it good! Best burrito I've ever had. It was also a good price for the size of the burrito. It was about $6 and I was only able to finish half of it before getting full! Of course, I saved the rest for later.

All the flavors and textures of this burrito melded beautifully. The creaminess of the sour cream, cheese and the french fries, juiciness of the carne asada, freshness of the pico de gallo. This burrito showed me simplicity is best when it comes to Mexican food. Not to mention, they give complimentary chips and have a condiment bar with different salsas.


They also have a gold booth for important people. I guess we were important since we got to sit there for a picture XD

My Rating: 5 out of 5 stars

Lucha Libre Taco Shop
1810 West Washington Street
San Diego, CA 92103-3734
(619) 296-8226
Open Mon-Thu, Sun 10:30am-11pm; Fri-Sat 10:30am-3am

Monday, September 19, 2011

Going MIA

No food post this week. Instead I'm heading to the the happiest place on earth! Not my kitchen but Disneyland! A California trip for 6 days is well deserved after 4 years of no vacationing. It's going to be filled with Disneyland, Sea World, a wedding and of course FOOD!


See you all when I get back!

-Aaron John

Sunday, September 11, 2011

Monkey Bread


With two weeks remaining before class starts up, my time left for working with yeast is slowly decreasing. Why you ask? Yeast simple takes a lot of patience and time and with my school work, that's just a no-no. With my last attempt at bread, I decided to make Monkey Bread. Circular dough balls drenched in butter, rolled in cinnamon sugar with pecans, placed into a bundt pan and baked. Served best when warm. YUM!

Monkey Bread reminds me of an inside out cinnamon roll. Instead of having that delicious gooey centers of cinnamon rolls, monkey bread has more of a crispy sugary crust. With the added crunch of the pecans, it's to die for. This isn't a diet food by any means so if you are on a diet, I apologize. It definitely gives you that sugar rush with every bite you take.

Trust me, with the next two weeks, I'm gonna need that sugar rush. To start off the first two weeks, I'm taking the PCAT for pharmacy this week. EEEEEEEEEKKKK! Super nervous. Just reading through the rules and regulations are freaking me out. The security is crazy! Apparently they have to capture our signature and our PALM VEIN! I thought I was taking the PCAT, not getting arrested! haha. Oh well, I just can't wait to get it over with :)

Monkey Bread
Recipe by Martha Stewart
Makes one 10-inch Bundt Cake
Ingredients
For The Bread:
2 tablespoons solid vegetable shortening, plus more for pan and bowl
1/4 cup warm (110 degrees to 115 degrees) water
1/4 cup granulated sugar, plus a pinch for yeast
1 envelope dry active yeast (scant tablespoon)
3/4 cup warm (110 degrees to 115 degrees) milk
1 teaspoon salt
1 large egg
3 1/4 cups all-purpose flour

For The Coating:
8 tablespoons (1 stick) unsalted butter, melted
3/4 cup firmly packed light-brown sugar
2 teaspoons ground cinnamon
1/2 cup pecans, coarsely chopped
For The Icing:
1/4 cup milk
2 cups confectioners' sugar

Directions
Lightly coat a 10-inch Bundt pan and a medium bowl with shortening; set aside. Put the warm water and a pinch of sugar in a small bowl; sprinkle yeast over top. Stir; let the yeast soften and dissolve, about 5 minutes.

Place shortening, milk, sugar, salt, and egg in the bowl of an electric mixer fitted with the dough hook.

Add yeast mixture to shortening mixture, and beat to combine. Slowly add flour. Knead on medium-low, 1 minute. Transfer dough to the prepared bowl. Cover with plastic wrap, and let stand in a warm place, 20 minutes.

Make coating: Place melted butter in a bowl. In a second bowl, combine brown sugar, cinnamon, and nuts; sprinkle 2 tablespoons nut mixture into prepared Bundt pan.

Cut dough into 1/2-inch pieces. Roll into balls. Coat in butter, then roll in nut mixture, and place in prepared pan. Cover with plastic wrap, and let stand in a warm place until doubled in bulk, about 1 hour.

Preheat oven to 350 degrees. Bake, 30 to 35 minutes. Let cool in pan for 15 minutes. Invert onto a serving plate, and let cool 20 minutes more.

Make icing: In a small bowl, combine milk and confectioners' sugar. Stir until smooth. Drizzle over bread.

-Aaron John

Saturday, September 3, 2011

Arancini di Riso (Risotto Balls)


What the?? How is August already over and Fall just around the corner? Time seems to fly when you get older. I can honestly say, when I was younger, summer break seems to go by slower. Maybe that happened because all I did was sit around and watched my daily cartoons.

Anywho, when time seems to fly, you always want to reinvent or use up leftovers in a whole new way. Risotto balls are no different. Every culture seems to get the most value for their buck whether it's using every part of the animal, including internal organs, in dishes or changing a leftover into a "makeover". I mean have you seen Bizarre Foods with Andrew Zimmern?? The things that guy eats are just uhhhhh..., if you've seen his show you know what I'm talking about.

Since I made a bunch of risotto last week, I decided to save some risotto for the next day and whip up this. Man oh man are these good! I do have to say, they're pretty filling so 2 of them are good enough. Squeeze a little lemon on top and it's taken to a whole other level.

Arancini di Riso (Risotto Balls)
Recipe by Giada de Laurentiis
Makes about 20 servings

Ingredients
Vegetable oil, for deep-frying
2 large eggs, beaten to blend
2 cups Risotto with Mushrooms and Peas, recipe follows, cooled
1/2 cup grated Parmesan
1 1/2 cups dried Italian-style bread crumbs
2 ounces mozzarella, cut into 1/2-inch cubes
Salt

Directions
Pour enough oil in a heavy large saucepan to reach the depth of 3 inches. Heat the oil over medium heat to 350 degrees F.

Stir the eggs, risotto, Parmesan, and 1/2 cup of the bread crumbs in a large bowl to combine. Place the remaining breadcrumbs in a medium bowl. Using about 2 tablespoons of the risotto mixture for each, form the risotto mixture into 1 3/4-inch-diameter balls. Insert 1 cube of mozzarella into the center of each ball. Roll the balls in the bread crumbs to coat.

Working in batches, add the rice balls to the hot ail and cook until brown and heated through, turning them as necessary, about 4 minutes. Using a slotted spoon, transfer the rice balls to paper towels to drain. Season with salt. Let rest 2 minutes. Serve hot.

- Aaron John

Saturday, August 27, 2011

Basic Risotto w/ Asparagus


Have you made Risotto? Yeah...me neither... ha.

Well, there's a first for everything right? Plus, with it being rice, we're practically best friends! hehe. Anything you make for the first time seems daunting. I know for a fact, I went back and forth from the recipe at least 10 times just to make sure I had it right. But, the true test of getting it right is in the taste.

Ask yourself this, "Would I want to take another bite of this?". If the answer is yes, well, clearly you're the best cook ever! BUT, if you say no, try to fix it with different seasonings. Sometimes that extra crack of black pepper will do the trick. If nothing ends up working, do what I do and blame the recipe! ha. If you're lucky enough, no one will be around and you can toss it while acting like nothing ever happened. Always a good way to get out of serving it to people. ;)

If you think standing over a stove and doing nothing but adding liquid and stirring is some hard work...I just have nothing to say to that. Seriously, that's literally all you do. Sure, it's not as simple as cooking a pot of white rice but this is not just rice, it's RISOTTO!

Basic Risotto
Recipe by Giada De Laurentiis
Makes 2 cups

Ingredients
2 cups low-sodium chicken broth
3 tablespoons unsalted butter, at room temperature
1/2 small onion, chopped
3/4 cup Arborio rice
1/4 cup dry white wine
1/4 cup finely grated Parmesan
1/4 teaspoon kosher salt
1/4 teaspoon freshly ground black pepper
A little less than a pound of asparagus

Directions
In a medium saucepan, bring the broth to a simmer over high heat. Reduce the heat to low and keep the broth hot.

In a large, heavy saucepan, melt 2 tablespoons of the butter over medium heat. Add the onion and cook, stirring frequently until tender, about 3 minutes. Add the rice and stir to coat with the butter. Add the wine and simmer until most of the liquid has evaporated, about 1 minute. Add 1/2 cup hot broth and stir until almost completely absorbed, about 2 minutes. Continue cooking the rice, adding the broth, 1/2 cup at a time, stirring constantly and allowing each addition of broth to absorb before adding the next. Cook the rice until tender but still firm to the bite and the mixture is creamy, about 20 minutes. Remove the pan from the heat and stir in the remaining butter, Parmesan cheese, salt, and pepper.

-Aaron John

Sunday, August 21, 2011

Pull Apart Coffee Cake Two Ways: Cinnamon and Lemon


What do you get when you mix a cinnamon roll with a loaf of bread? Pull Apart Coffee Cake! Just imagine eating a cinnamon roll, but only the inner layer of it!Soft, buttery and oozing with that cinnamony goodness! Not to mention that decadent cream cheese frosting! Mmmmm, I can already smell those Cinnabon Cinnamon Rolls now. But today is not about the cinnamon roll, it's about Pull Apart Coffee Cake!

I woke up bright and early this morning to put this together. Finally finishing my Summer Quarter at UW, it finally gives me time to bust out the yeast and tackle bread once again. Bread in and of itself is kind of a temperamental thing to begin with. You need patience and even a little muscle power helps along in the process. However, this recipe is one of the easiest bread recipes I have made so don't feel intimidated.

This is my own adaption to the original recipe of a "Lemon Scented Pull Apart Coffee Cake". I wanted that cinnamon roll-esque flavor in the bread but I also wanted to try the lemon of the original recipe. Basically, I made a Half Cinnamon and Half Lemon Pull Apart Coffee Cake. Genius right? Who needs one flavor when you can have two!! If you want a whole loaf of either, just double the sugar filling of whatever you like.

Cinnamon and Lemon Pull-Apart Coffee Cake
Makes a 9″x5″ pan 

Sweet Yeast Dough
About 2 3/4 cups (12 1/4 ounces) all-purpose flour
1/4 cup (1 3/4 ounces) granulated sugar
2 1/4 teaspoons (1 envelope) instant yeast
1/2 teaspoon salt
1/3 cup (2 1/2 fluid ounces) whole milk
2 ounces unsalted butter
1/4 cup (2 fluid ounces) water
1 1/2 teaspoons pure vanilla extract
2 large eggs, at room temperature

Lemon Sugar Filling
1/4 cup granulated sugar
1 tablespoons finely grated lemon zest (1 1/2 lemons)
1/2 tablespoon finely grated orange zest

Cinnamon Sugar Filling
2 tbsp granulated sugar
2 tbsp light brown sugar
1 1/2 tsp cinnamon

2 ounces unsalted butter, melted to be spread over the dough

Tangy Cream Cheese Icing
3 ounces cream cheese, softened
1/3 cup (1 1/4 ounces) powdered sugar
1 tablespoon whole milk
1 tablespoon fresh lemon juice

Make the Sweet Yeast Dough
Mix two cups (nine ounces) flour, the sugar, yeast, and salt in a medium bowl with a rubber spatula. Meanwhile, in a small saucepan or in the microwave, combine the milk and the butter and heat until the butter is melted. Remove from the heat, add the water, and let rest a minute until just warm (120 to 130°F [49 to 54°C]). Stir in the vanilla extract.

Pour the milk mixture over the flour-yeast mixture and, using a rubber spatula, mix until the dry ingredients are evenly moistened. Attach the bowl to the mixer, and fit the mixer with the paddle attachment. With the mixer on low speed, add the eggs, one at a time, mixing after each addition just until incorporated. Stop the mixer, add 1/2 cup (2 1/4 ounces) of the remaining flour, and resume mixing on low speed until the dough is smooth, 30 to 45 seconds. Add 2 more tablespoons flour and mix on medium speed until the dough is smooth, soft, and slightly sticky, about 45 seconds.

Lightly flour a work surface and knead the dough gently until smooth and no longer sticky, about one minute. Add an additional 1-2 tablespoons of flour only if the dough is too sticky to work with. Place the dough in a large bowl, cover it with plastic wrap, and let it rise in a warm place (about 70°F [21°C]) for 45-60 minutes or until doubled in size. An indentation made with your finger should keep its shape.

Meanwhile, make the lemon sugar and cinnamon sugar filling. Mix the sugar, lemon zest, and orange zest in one bowl and mix the sugar, brown sugar and cinnamon in another.

Center a rack in the oven and preheat the oven to 350°F (175°C). Grease a 9″x5″ loaf pan.

Gently deflate the dough with your hand. Flour a work surface and roll the dough into a 20″ by 12″ rectangle. [I suggest using a ruler and getting this as accurate as possible, for a prettier loaf that will fit better in the pan. I also suggest making sure both sides are floured, so that the dough will be easy to lift up later.] Use a pastry brush to spread the melted butter evenly and liberally over the dough.

Use a pizza cutter to cut the dough crosswise in five strips, each about 12″ by 4″. With the dough sliced but still together, sprinkle the dough lengthwise with the all the sugar (half getting the lemon and half the cinnamon). Take each rectangle and top one over the other, making sure the lemon is over the lemon and the cinnamon is over the cinnamon. Continue to top with rectangles, so you have a stack of five 12″ by 4″ rectangles, all buttered and topped with lemon sugar for one half and cinnamon sugar for the other.

Slice this new stack crosswise, through all five layers, into 6 equal rectangles (each should be 4″ by 2″.) 3 should be all lemon and 3 should be all cinnamon. Carefully transfer these strips of dough into the loaf pan, cut edges up, side by side doing cinnamon, cinnamon, cinnamon, lemon, lemon, lemon. it might be a little roomy, but the bread will rise and expand after baking. Loosely cover the pan with plastic wrap and let the dough rise in a warm place (70 °F [21°C]) until puffy and almost doubled in size, 30 to 50 minutes. When you gently press the dough with your finger, the indentation should stay.

Bake the loaf until the top is golden brown, 30 to 35 minutes.

Meanwhile, make the cream cheese icing. Beat the cream cheese and powdered sugar in a medium bowl with a wooden spoon until smooth, then add the milk and lemon juice. Stir until creamy and smooth.

The recipe recommends you tilt and rotate the pan while tapping on a table to release the loaf. I just carefully ran a knife around it. Flip the loaf over onto a cooling rack, then flip onto another rack so that it’s right side up. Spread the top of the warm cake with the cream cheese icing, using a pastry brush to fill in all the cracks.

-Aaron John

Saturday, August 13, 2011

Vanilla Bean Pound Cake


Whether it's vanilla cake or vanilla pound cake, its flavor is simple.
It can be put with ice cream, sauces, etc and it seems to stand in the back.
But, what if it were to stand alone, you know, have a solo performance?
A stage where the only thing to look forward to is a vanilla cake.

I, myself, have been on a vanilla cake/cupcake recipe hunt.
Every recipe I tested led me to a dead end.
Ending up with a soft and fluffy cake straight out of the oven.
Turning into a dense mass over time. Does this happen to you?
This pound cake was almost "The One".
But not close enough.
I need a recipe like those cupcake shops.
Staying soft and light even after days.
How do they do it?!
I guess, we will never know. ha.

Vanilla Pound Cake
Recipe by Paula Deen
Ingredients
Nonstick baking spray with flour
1 cup (2 sticks) butter, softened
3 cups sugar
1 vanilla bean, split lengthwise and seeds scraped
6 large eggs, separated
3 cups cake flour
1/2 teaspoon baking soda
1/4 teaspoon salt
1 cup sour cream
1/2 cup sliced almonds
Black Cherry Sauce, recipe follows

Directions
Preheat the oven to 325 degrees F. Spray a 12 to 15-cup fluted pan with nonstick baking spray with flour.

In a large bowl, beat the butter and sugar at medium speed with an electric mixer until fluffy. Add the scraped vanilla bean seeds, beating until combined. Add the egg yolks, 1 at a time, beating well after each addition.

In a medium bowl, sift together the flour, baking soda, and salt. Gradually add to the butter mixture, alternately with the sour cream, beginning and ending with the flour mixture. Beat the egg whites at high speed with an electric mixer until foamy. Gently fold into the butter mixture. Spoon into the prepared pan. Sprinkle the almonds evenly over the top of the cake. Bake until a wooden pick inserted in the center comes out clean, 1 hour to 1 hour and 15 minutes. Let cool in the pan for 10 minutes. Remove from the pan, and cool completely on a wire rack. Serve with Black Cherry Sauce, if desired.

Black Cherry Sauce:
2 tablespoons sugar
1 tablespoon cornstarch
1 teaspoon lime zest
1/2 cup black cherry juice
1 (12-ounce) package frozen dark sweet cherries
In a medium saucepan, combine the sugar, cornstarch, and lime zest. Stir in the black cherry juice, whisking until smooth. Add the cherries. Bring to a boil over medium heat, stirring frequently, until thickened, about 1 minute.. Remove from the heat and let cool.

-Aaron John

Saturday, August 6, 2011

Chocolate Bundt Cake With A Chocolate Ganache Glaze


Let's get back to the recipes shall we? After a 2 week hiatus from blogging about recipes, it's about time I blog about them again.

I came home from class on Thursday (Thank God there's only 2 weeks left) with this crazy craving of something sweet and chocolatey. I feel like I always have this craving at least once a week. I'm not the only one right? Usually, I would make a box of brownies but it was no where to be found in my pantry.

With the Hershey's Cocoa powder staring me straight in the eye, I decided to make cake instead. Something with minimal effort, no need for piping frosting on top but instead something sweet to pour. I mean it's a Thursday after all, can't take too long making it. The idea of a Bundt cake hit me in the face  like a slap a girl gives to a jerk. ha.

This is practically one of the easiest cakes to make. Dump, mix and bake. Now, that's my kind of recipe. When you're in a time crunch and have a chocolate craving, this cake is perfect. Not to mention, a better Bundt Cake than the Sour Cream Chocolate Bundt Cake I made a year ago.

Tips
-I buttered and floured the pan to make removal easier but it did end up with a pale brown color where the flour was. No way to prevent it when you use the butter and flour method.

-I baked this cake for about 50 min because the center was a bit gooey

Results
Taste: Chocolate on top of chocolate. A mellow chocolate cake with hints of coffee topped with a glaze that gives a more intense dark chocolate flavor 

Texture: Soft and moist cake with a smooth and creamy glaze.

Devil's Food Cupcakes with Milk Chocolate Buttercream
Recipe's are Hershey's Perfectly Chocolate Cake

Ingredients
For the cake:
2 cups sugar
1¾ cups all-purpose flour
¾ cup cocoa powder
1½ teaspoons baking powder
1½ teaspoons baking soda
1 teaspoon salt
2 eggs
1 cup whole milk
½ cup vegetable oil
2 teaspoons vanilla extract
1 cup boiling water

Glaze:
3 oz dark chocolate
1/3 cup heavy cream
1/2 tbsp corn syrup
1/2 tbsp butter


Directions
Preheat the oven 350 degrees F. Grease and flour two 9-inch round baking pans.

Whisk together the sugar, flour, cocoa powder, baking powder, baking soda and salt in a large bowl. Add eggs, milk, oil and vanilla; beat on medium speed of mixer for 2 minutes. Stir in boiling water (batter will be thin).

Pour the batter into the prepared pan and bake in the lower third of the oven for about 45 minutes, or until a toothpick inserted in the center of the cake comes out with a few moist crumbs attached. Let the cake cool on a rack for 10 minutes, then turn it out and let cool completely.

In a small saucepan, bring the cream to a boil. In a heatproof bowl, combine the remaining 3 ounces of chopped chocolate with the corn syrup and butter. Pour the hot cream over the chocolate and let stand until melted, about 5 minutes. Whisk until smooth. Let the ganache glaze cool until thick but still pourable, about 5 minutes.

Pour the ganache over the cooled cake. Let the cake stand until the glaze is set, at least 30 minutes, before serving.

-Aaron John

Saturday, July 30, 2011

Triple X Rootbeer Drive-in


Another food review! Triple X Rootbeer Drive-in is exactly that, a Drive-in. They have a sort of 50's Diner atmosphere that's actually pretty cool. With all the memorabilia everywhere, it seems as if you were transported to a different era. My friends and I arrived around 7 pm and there was a pretty large amount of people. In addition, we decided to sit in their outdoor seating area because it was just so nice out. Yes, we get sun here in Seattle. ha

At first, we were all confused as to what to do. We went inside where they had a stack of menus that you take and return. We took them outside to decide what we wanted and ended up sitting there for a good 5 minutes wondering what we were supposed to do. Apparently, we were supposed to go up to the counter and order so that's what we did. The man behind the counter is the owner and was very welcoming and a fun guy to be around. He was nice and courteous which I really liked. I decided to get the Strawberry Lemonade and the 58 Impala which was basically a bacon cheeseburger.

After you give your order, the people behind the counter will call your name to get your food and the food comes out fast. Within a couple of minutes the Strawberry Lemonade was ready.


Can you believe that this was a small?! I couldn't either. I love how it was served in a frosted glass as well! However, it seemed as if they were more about quantity than quality. This Strawberry Lemonade was lack luster. Didn't have a tanginess from lemons at all. Essentially, it tasted like watered down lemonade with a few strawberries thrown in.


Next, my burger came out within another 2 minutes. This was another disappointment. It was bland as can be. Even the bacon couldn't save it and that says a lot. In addition, even though there was their "special sauce" on it, I couldn't taste anything from it. The only thing good was the fries, crisp on the outside and creamy on the inside, just like they should be.

Overall, I had my hopes up for this place. There was great people, great surroundings and a great atmosphere but I left disappointed with the food. 

My Rating: 2 out of 5 stars

Triple X Rootbeer Drive-in
98 Northeast Gilman Boulevard
Issaquah, WA 98027-2529
(425) 392-1266

LinkWithin

Related Posts with Thumbnails