Showing posts with label coffee/espresso. Show all posts

Sunday, July 1, 2012

Chocolate Mocha Cake On My 21st Birthday!


So, my last blog post was just about two weeks ago? I didn't think I would have that big of a gap in posting being that it's summer and all. But, I have been busy lately with the most important thing being getting my first job ever! You wouldn't believe how many times I applied for jobs ever since I finished high school and finally, the time when my summer does not involve taking summer classes, I get one! Worked out perfectly.


To think, the first time I actually get a job is the time I turn 21. I'm finally growing up. I think over the years, I've learned that life is too short to stress out. As long as you do your best and set your mind to something, everything should take it's place. Everything happens for a reason and when you keep that in mind, even the most stressful moments become a learning moment.

This is something I will always keep in mind moving forward whether it be in school, my job or just life in general.


So what does a 21st birthday mean? Alcohol. Well yeah, but it also means cake. Duhhhh. It's just like any other birthday but with alcohol thrown into the mix. But let's just focus on cake for now. ;)

Chocolate Mocha Cake
Recipes: Cake from Hershey's Chocolate Cake
Frosting adapted from Sweetapolita

Ingredients
Cake
Hershey's Chocolate cake (I blogged about it here)

Frosting
4 egg whites
2/3 cup granulated sugar
2 sticks unsalted butter, softened but cool, cut into cubes
1 teaspoon pure vanilla extract
2 tsp instant espresso powder dissolved into 2/3 teaspoon boiling water
Pinch of salt

Directions
Prepare your favorite chocolate cake recipe using a 8 or 9 inch cake pan and allow it to cool completely. I used the Hershey's Chocolate Cake recipe I blogged about before.

In a bowl of an electric mixer, add the egg whites and sugar, and simmer over a pot of water (not boiling), whisking constantly. Heat until it until it reaches 160 degrees F, or until the sugar has completely dissolved and the egg whites are hot.

Remove from the heat and use the whisk attachment of mixer to whip the mixture until thick and glossy. Continue to whip until the bowl is no longer hot and it about at room temperature which usually takes 10 minutes. Switch over to paddle attachment and, while mixing on medium speed continuously, add softened (but cool) butter in chunks, one at a time, until incorporated, and mix until smooth. If curdles are formed, continue to mix. If too soft, chill the bowl in the refrigerator and take it back out to whip. If none of that works, you can add a few cubes of cool butter and whip a bit more. Add flavourings and salt, then mix well.

To assemble, place one of the cakes on a cardboard cake board flat side down. Spread about 1/2 cup to 3/4 cup of the frosting evenly over the cake. Next, add the second layer of cake with the flat side now facing up so you have a clean edge to the cake when frosted. Frost the cake completely with the remaining frosting. Decorate with chocolate sprinkles.

-Aaron John

Saturday, April 23, 2011

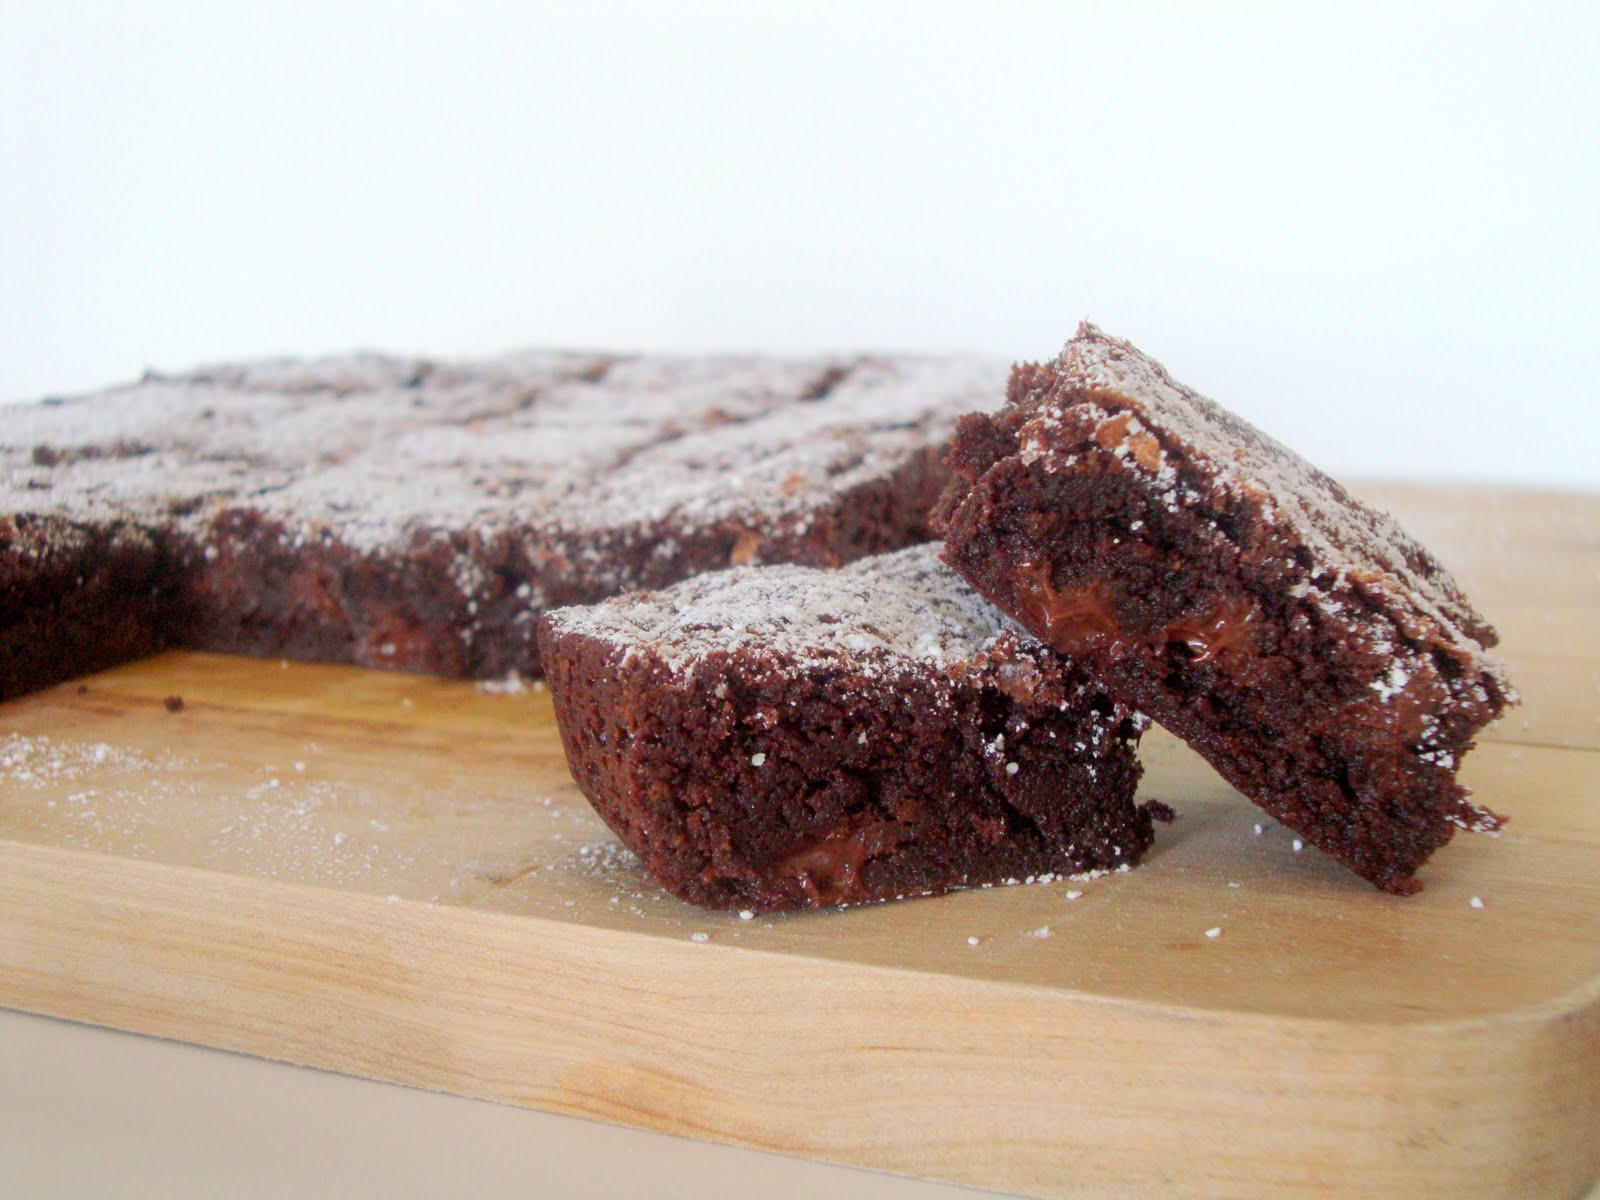
Brownies Part Trois, Outrageous Brownies Part Deux


This week, the sun in Seattle finally made its appearance. Oh, but just as the sun came out, the "interesting" people came out as well. These "interesting" people were the most, hmmm, I think I better describe them. One of them was a woman dressed up in cat ears and whiskers with a sort of forest-y outfit. Another 2 people were dressed up in purple spandex from head to toe. Literally, spandex covering the face. ha. Another person was wearing a ninja type mortal combat outfit. I thought Halloween was over months ago? But to top it all off, I was called a "yellow monkey" by an elderly russian who then preceded to shove me from my backpack. Rude, much? I'm telling you, all the "crazies" are coming out with the sun!

Another thing that's crazy is why I've had a whole string of brownie/cookie type recipes for the past 2 weeks. Keeping that in mind, I was reminded of my hunt for a perfect brownie recipe that was still on-going. I was looking for brownie recipes and I just had this urge to bake Ina Garten's Outrageous a second time to see if things will be different.

As I was making the batter I was getting pretty happy at the way things were going. The batter was beginning to look and taste a whole lot different than the first time. Oh man, was my hopes in these brownies being built up or what? I put these in an 8x8 pan, since I made 1/4 of the recipe, placed them in the oven and crossed my fingers. Are these THE BROWNIE RECIPE? The taste was there, but the texture, not so much...

Tips
-I made 1/4 of the recipe since this was another "testing out" of the recipe
-I used 1/2 tsp of Instant Espresso powder for 1/4 of the recipe which makes it out to be 2 tsp for the whole recipe

Results
Taste: Intensely chocolately! Strong, rich flavor from the chocolate, a bit on the sweet side but not overpoweringly sweet with slight hints of coffee flavor.

Texture: Not exactly the texture I want in a brownie. These tended to fall apart and not hold its shape so much when eating probably due to the low amount of flour. While reading other brownie recipes, they had about double the amount of  flour compared to this recipe. I would try increasing the flour by 1/2  to 3/4 cup maybe and see how that goes.

Outrageous Brownies
Recipe by Ina Garten

Ingredients
1 pound unsalted butter
1 pound plus 12 ounces semisweet chocolate chips
6 ounces unsweetened chocolate
6 extra-large eggs
3 tablespoons instant coffee granules (I would change this to 2 tsp Instant Espresso Powder)
2 tablespoons pure vanilla extract
2 1/4 cups sugar
1 1/4 cups all-purpose flour
1 tablespoon baking powder
1 teaspoon salt
3 cups chopped walnuts

Directions
Preheat oven to 350 degrees F.

Butter and flour a 12 x 18 x 1-inch baking sheet.

Melt together the butter, 1 pound of chocolate chips, and the unsweetened chocolate in a medium bowl over simmering water. Allow to cool slightly. In a large bowl, stir (do not beat) together the eggs, coffee granules, vanilla, and sugar. Stir the warm chocolate mixture into the egg mixture and allow to cool to room temperature.

In a medium bowl, sift together 1 cup of flour, the baking powder, and salt. Add to the cooled chocolate mixture. Toss the walnuts and 12 ounces of chocolate chips in a medium bowl with 1/4 cup of flour, then add them to the chocolate batter. Pour into the baking sheet.

Bake for 20 minutes, then rap the baking sheet against the oven shelf to force the air to escape from between the pan and the brownie dough. Bake for about 15 minutes, until a toothpick comes out clean. Do not overbake! Allow to cool thoroughly, refrigerate, and cut into 20 large squares.

-Aaron John

Saturday, April 9, 2011

Espresso "Brookies"


Have you ever craved some sort of food but can't exactly pinpoint what food you actually want to eat? Well, that happens to me often. Sometimes, I have to eat everything to know exactly what I actually wanted. However, there comes times when I eat everything in sight and still have that craving. I'm not the only one who does this right? Once you start your search, you can't exactly stop. That's correct for me anyways...

So, after a long week of school, I developed this craving for something but didn't know what. I ate crackers, chips, pretzels, chocolates and ice cream. Still no luck. Will these "Espresso Brookies" satisfy my craving?

Tips
-I found that when I didn't chill the dough, the cookies had a nice shine to them like a brownie. 

Results
Taste: The tastes of chocolate and espresso come together wonderfully. Each flavor enhances the other and makes for one darn good cookie! The chocolate and espresso flavors are intense!

Texture: Not chewy like a brownie. More cake like in texture with the edges only slighty chewy. 


Espresso "Brookies"
Recipe from Handle The Heat
Makes around 3 dozen cookies

Ingredients
2⅔ cups (around 16 oz.) bittersweet chocolate, chopped
4 tablespoons of butter, softened
4 eggs
1⅓ cups of granulated sugar
1 teaspoon vanilla extract
½ cup of all-purpose flour
½ teaspoon baking powder
1 tablespoon instant espresso powder

Directions
Preheat over to 350°. Line two baking sheets with parchment paper.

Melt chocolate and butter in a double boiler, stirring occasionally, until a smooth mixture forms. Alternatively, melt in a heat-proof bowl in the microwave in short 15-20 second bursts until melted, stirring after each burst. While chocolate and butter are melting, combine eggs, vanilla, and sugar in a large bowl and set aside.

Sift together flour, baking powder, and espresso. Whisk chocolate and butter into the egg mixture until well combined. Gradually stir in flour, baking powder, and espresso until a smooth batter forms. Chill batter in the fridge for an hour, or until firm.

Drop tablespoons of batter onto prepared baking sheets, spacing at least 2 inches apart. Bake for 8–10 minutes, until crackled and firm on the outside. Don't overbake!

-Aaron John

Saturday, June 26, 2010

Outrageous Brownies


Have you seen the movie Julie and Julia? You know, the movie where a woman named Julie cooks the recipes from Julia Child's cookbook for an entire year and blogs about it? Well, I'm beginning to think that my blog has become AJ and Ina. It seems like most of the recipes I've used involves Ina Garten. I don't know how many Ina Garten recipes I have used on this blog but it feels like every other blog post has been from Ina. Oh well, her food is delicious and that's all that matters.

So, this weeks creation was Brownies, specifically Ina Garten's Outrageous Brownies. I've been on the search for a great tasting brownie recipe for years now. Each time I made brownies from scratch, they don't exactly match my standards and by standards I mean the boxed brownie mixes. The boxed brownie mixes are the best. They are chewy, fudge-y, a little cake-like and chocolate-y. They just have a great overall taste to them. When you keep going back to a pan of brownies and slicing yourself a piece, you know it's great and that's what the boxed brownies do for me. With the different brownie recipes I have tried, such as Ghiradelli's and Hershey's recipes, I find that they are not chocolate-y enough and have a strange taste to them. I've wanted to try out Ina Garten's Outrageous Brownies for a couple of years now because of the great reviews but failed to do so because it requires a whole POUND of butter!! That's a crazy amount of butter and I didn't want to waste all that butter if the brownies turned out badly. So, I finally got the courage to make them by halving the recipe and just using two sticks of butter.

What's the result? I'm not that big of a fan. Sorry, Ina! So many people say these are the best but I don't think so. Compared to other brownie recipes from scratch, yes, these brownies are much better. Compared to the boxed brownie mix, the boxed brownie mix is much better in my opinion. Maybe I've just grown accustomed to the boxed brownies but for me, these did have a strong chocolate flavor but I feel as if the boxed version has more of a pleasant chocolate flavor, if that makes sense? Also, I didn't like the texture so much. These were like fudge so I was confused when eating them. I mean, I like them fudgey but I don't want to eat the fudge candy. I was somewhat disappointed by these. I think from now on, I will stick to the boxed version. But, I'm still going to be on the look out for a "from-scratch" version. What about you? What's your favorite "from-scratch" brownie recipe? Here's the recipe!

Outrageous Brownies (Makes 20 Large Brownies)
Ingredients
1 pound unsalted butter
1 pound plus 12 ounces semisweet chocolate chips
6 ounces unsweetened chocolate
6 extra-large eggs
3 tablespoons instant coffee granules
2 tablespoons pure vanilla extract
2 1/4 cups sugar
1 1/4 cups all-purpose flour
1 tablespoon baking powder
1 teaspoon salt
3 cups chopped walnuts

Directions
Preheat oven to 350 degrees F.

Butter and flour a 12 x 18 x 1-inch baking sheet.

Melt together the butter, 1 pound of chocolate chips, and the unsweetened chocolate in a medium bowl over simmering water. Allow to cool slightly. In a large bowl, stir (do not beat) together the eggs, coffee granules, vanilla, and sugar. Stir the warm chocolate mixture into the egg mixture and allow to cool to room temperature.

In a medium bowl, sift together 1 cup of flour, the baking powder, and salt. Add to the cooled chocolate mixture. Toss the walnuts and 12 ounces of chocolate chips in a medium bowl with 1/4 cup of flour, then add them to the chocolate batter. Pour into the baking sheet.

Bake for 20 minutes, then rap the baking sheet against the oven shelf to force the air to escape from between the pan and the brownie dough. Bake for about 15 minutes, until a toothpick comes out clean. Do not overbake! Allow to cool thoroughly, refrigerate, and cut into 20 large squares.

Killer Brownies on Foodista
-Aaron John
My Food Outings: AJ's Food Adventure
Facebook Fan Page

Monday, May 31, 2010

"Jamoca Almond Fudge" Cookies


If you've ever been to Baskin Robbins, you know that one of their classic flavors is their "Jamoca Almond Fudge" ice cream and you probably have tried it before. If you haven't, their "Jamoca Almond Fudge" ice cream is a combination of coffee ice cream, chocolate fudge that is running throughout and roasted almonds. This has been one of my favorite flavors at BR. So, still on my creative project of turning ice cream flavors into cookies, this post is the recreation of BR's "Jamoca Almond Fudge" ice cream. Once again, I used my chocolate chip cookie batter recipe. The recipe I used to use can be found at my old blog post, "The Best Chocolate Cookie Out There". I feel like I should explain why I'm using this recipe constantly. Well, the reason why I always use this recipe in creating new flavors is because it's a great cookie dough to work with. It has a neutral vanilla flavor which goes well with everything, it creates a nice chew to the cookie and it's easy to do. They say, you always need a great base in order to build a building. Well, you also need a great cookie dough to create a great cookie and the chocolate chip cookie dough recipe is exactly that. Anyways, back to my "Jamoca Almond Fudge" cookie. Like I said before, I used the chocolate chip cookie dough recipe. During the stage where I cream the butter and sugar together, I added about 2 tablespoons of instant espresso powder. I then continued the recipe as is. Then when it came time for the "mix-ins", I added 1 cup of chocolate chips and 1 cup of roasted almonds. Once baked, I let them cool and I topped them with a "hot fudge sauce" from a recipe by Wayne Harley Brachman. His recipe didn't taste like a store bought one but it was alright. I would say to buy the store bought stuff though because it is easier to use and tastes great. Overall, these cookies were somewhat of a success in my creative project. They only had a hint of coffee which was alright but it was missing that fudge sauce flavor that this sauce did not give. It was a good trial though! Here's the hot fudge sauce recipe I used.

Hot Fudge Sauce

Ingredients
1/2 cup very hot brewed coffee
1/2 cup sugar
3/4 cup unsweetened Dutch-processed cocoa
1/2 cup light corn syrup
4 ounces semi-sweet chocolate, chopped
2 tablespoons unsalted butter

Directions
In a medium bowl, whisk together the coffee, sugar and cocoa. Whisk in the corn syrup until all the sugar crystals are dissolved and the mixture is completely smooth.

Place the chocolate and butter in a large, dry bowl or in the top of a double boiler set over barely simmering water. When the chocolate has melted, whisk in the coffee-cocoa mixture until smooth and blended. The sauce is best if left to ripen for a full day before serving. Store in a sealed container. The sauce keeps for 3 weeks in the refrigerator or 3 months in the freezer.

-Aaron John
My Food Outings: AJ's Food Adventure
Facebook Fan Page

Friday, May 7, 2010

Profiteroles with Vanilla and Mocha Pastry Cream


Profiteroles with pastry cream, a.k.a. "cream puffs", are a classic treat. I remember having "cream puffs" a long time ago. However, the only "cream puffs" I've had came from the frozen food section of Costco. While it was a great treat on a hot summer day, I asked myself, "Is this really what a "cream puff" is? Is this what it's suppose to taste like?". On a mission to discover what was better, I decided to make "cream puffs" of my own. However, there are many "cream puff" recipes out there. So, which one do I choose? Do I choose one that's simple or hard to make? Do I choose one where I like the end picture? Well, after searching, I ended up with this recipe from another blog called "Annie's Eats". I decided on this recipe because compared to other recipes, these not only looked good, but they seemed more flavorful than the other recipes that I have seen. The process to make these is actually time consuming. From making the pastry cream, to making the dough, baking up the dough, filling them up and dipping them in chocolate, it took a long time. However, these cream puffs were DELICIOUS and worth the effort!!! So much better than the store bought ones. The dough was slightly sweet, the vanilla pastry cream tasted similar to vanilla ice cream and the mocha pastry cream tasted similar to coffee ice cream. With all of that, topped with powdered sugar for the mocha filled ones and chocolate topped for the vanilla filled ones, how can you go wrong? Definitely use this recipe to impress others! In addition, I did tweak the pastry cream recipe so that it was easier to make and more flavorful than what the recipe has. That will be my secret :) For the mocha pastry cream, I simply added chocolate and espresso powder. Here's the untweaked recipe.

Cream Puffs
Ingredients:
For the pastry cream:
2 cups half-and-half
½ cup sugar
Pinch salt
5 large egg yolks
3 tbsp. cornstarch
4 tbsp. cold unsalted butter, cut into 4 pieces
1½ tsp. vanilla extract
For the pâte à choux:
2 large eggs plus 1 large egg white
5 tbsp. unsalted butter, cut into 10 pieces
2 tbsp. whole milk
6 tbsp. water
1½ tsp. sugar
¼ tsp. salt
½ cup (2½ oz.) all-purpose flour
For the chocolate glaze:
3 tbsp. half-and-half
2 oz. semisweet or bittersweet chocolate, finely chopped
1 cup (4 oz.) confectioners’ sugar, sifted

Directions:
To make the pastry cream, heat the half-and-half, 6 tablespoons of the sugar, and the salt in a saucepan over medium-high heat until simmering, stirring occasionally to dissolve the sugar. Meanwhile, combine the egg yolks and remaining 2 tablespoons sugar in a medium bowl and whisk until the sugar has begun to dissolve and the mixture is creamy, about 15 seconds. Whisk in the cornstarch until combined and the mixture is pale yellow and thick, about 30 seconds.
When the half-and-half mixture has reached a simmer, slowly add it to the egg yolk mixture to temper, whisking constantly. Return the mixture to the saucepan, scraping the bowl with a rubber spatula. Return the mixture to a simmer over medium heat, whisking constantly, until a few bubbles burst on the surface and the mixture is thickened and glossy, about 30 seconds. Off the heat, whisk in the butter and vanilla. Strain the pastry cream through a fine mesh sieve set over a medium bowl. Press plastic wrap directly on the surface to prevent a skin from forming and refrigerate until cold and set, at least 3 hours and up to 2 days.

To make the pâte à choux, whisk the eggs and egg white in a liquid measuring cup. You should have ½ cup (discard the excess). Set aside. Combine the butter, milk, water, sugar and salt in a small saucepan. Heat over medium heat and bring to a boil, stirring once or twice. When it reaches a full boil and the butter is fully melted, remove from the heat and stir in the flour until incorporated and the mixture clears the sides of the pan. Return the saucepan to low heat and cook, stirring constantly, using a smearing motion, until the mixture is slightly shiny, looks like wet sand and tiny beads of fat appear on the bottom of the pan (the mixture should register 175-180˚ F on an instant-read thermometer.

Immediately transfer the mixture to a food processor and process with the feed tube open to cool slightly, 10 seconds. With the machine running, gradually add the reserved eggs in a steady stream. When they have been added, scrape down the sides of the bowl, then process 30 seconds more until a smooth, thick, sticky paste forms.

Place an oven rack in the middle position and preheat the oven to 425˚ F. Line a baking sheet with parchment paper. Fill a pastry bag fitted with a ½-inch plain tip with the pâte à choux. Pipe the paste into 1½-inch mounds on the prepared baking sheet, spacing them about 1 to 1¼ inches apart (you should be able to fit 24 mounds on the baking sheet). Use the back of a teaspoon dipped in water to even out the shape and smooth the surface of the piped mounds.

Bake for 15 minutes (do not open the oven door during baking). Reduce the oven temperature to 375˚ F and continue to bake until golden brown and fairly firm, 8-10 minutes longer. Remove the baking sheet from the oven. Use a paring knife, cut a ¾-inch slit into the side of each puff to release steam; return the puffs to the oven, turn the oven off, and prop open the oven door with the handle of a wooden spoon. Dry the puffs in the turned-off oven until the centers are just moist (not wet) and the puffs are crisp, about 45 minutes. Use a sharp paring knife to poke a hole through the bottom or side to check the interior. Transfer the puffs to a wire rack to cool completely. (At this point the puffs can be stored at room temperature for up to 24 hours or frozen for up to 1 month in an airtight plastic bag. Before serving, crisp in the oven at 300˚ F – 5-8 minutes for room temperature puffs, 8-10 minutes for frozen puffs.)

To fill the puffs, use the tip of a paring knife to make a small cut perpendicular to the first, creating an X in the side of each puff. Fill a pastry bag fitted with a ¼-inch plain tip with the pastry cream. Pipe some of the pastry cream through the X into the side of each puff until it starts to ooze back out. Repeat to fill all the puffs.

To make the glaze, place the half-and-half and chocolate in a medium microwave-safe bowl, cover with plastic wrap, and microwave for 20 seconds at a time, until the mixture just begins to steam. Whisk together thoroughly, add the confectioners’ sugar, and whisk until completely smooth. Dip the tops of the filled cream puffs in the chocolate glaze and transfer to a wire rack until the glaze has set completely. Serve within several hours.

Profiteroles on Foodista
-Aaron John
My Food Outings: AJ's Food Adventure
Facebook Fan Page

LinkWithin

Related Posts with Thumbnails