Sunday, December 29, 2013

Pan Fried Pork Chops


I hope everyone had a great Christmas!! Now that Christmas is over, everything is beginning to settle back down. The last of the gatherings are finishing up, the Christmas lights are coming down, the returning of gifts have begun and there's just one last party on New Year's Eve. Oh, we can't forget the sales that are still going on at department stores. They really want us to spend our money now don't they?


After eating my weight in delicious fancy party food, let's bring things back down to earth with something simple and comforting like Pan fried pork chops! Pan fried pork chops are so easy to prepare that you can cook these in your sleep without a recipe. Season, flour and fry...that's it. This is a method everyone should have in their back pocket to make delicious food on the fly. In the words of Ina Garten, "How easy is that?"

AJ's Secret

  • For this particular recipe, I used thin pork chops because they cook quickly.
  • I find some people suggest seasoning the flour instead of the meat. "WHY?" I say! Seasoning the meat ensures the MEAT IS SEASONED. Sure, you can season the flour but is the main star the flour? I think not. I chose not to season the flour for this recipe because the coating is so thin that seasoning the pork chop was good enough.


Pan Fried Pork Chops
Recipe by Me

Ingredients
6-8 Pork loin chops (thin)
1 cup all-purpose flour
~2 tsp salt
~1 tsp pepper
~2 tsp garlic powder
Extra salt, pepper and garlic powder
1/4 to 1/2 cup Vegetable/Canola oil

Directions
Season both sides of the pork loin chops evenly with the salt, pepper and garlic powder. Proceed to dredge each pork chop in the flour and set aside.

Heat the vegetable oil/canola oil in a large skillet on medium heat. Once the oil is heated, add in 2 to 3 pork chops depending on the size of the skillet. Cook the pork chops for about 3 to 4 minutes on each side until golden brown and no red/pink juice is seen on the pork chop. Set aside the cooked pork chops on a plate and repeat with the remaining pork chops.

-Aaron John

Saturday, December 21, 2013

Monster Cookies


Last quarter, my friend J and I talked about food and food blogs before our Physical Chemistry class constantly. From my unhealthy eating habits, to whether thin crust is better than thick crust pizza, to whose food blogs we go on and scope out. One particular conservation involved the Pioneer woman and her Monster Cookies.


I don't know how these cookies came into the conversation but it surrounded the idea of putting Rice Krispies cereal in them. Genius much? I mean, what else are you supposed to do with Rice Krispies Cereal besides eating it with milk and making Rice Krispy Treats? Not much. Although, I read some people bread chicken in crushed Rice Krispies cereal. I need to try that one day... Until that day, these cookies will do.


These cookies were placed on a pedestal, the highest of high. I joked around with J saying that the Pioneer Woman's reputation is going to be put on the line with these cookies when J makes them and gives some to me. Well, I just couldn't wait for her to make them and I'm not that patient so I just went ahead and made them myself. These cookies have the most interesting texture and you have to wrap your head around it. It's like a crisp and chewy chocolate chip cookie, mixed with an oatmeal cookie, with a surprising different kind of chewy, crispy quality? You just have to taste it for yourself. I do have to say, I wish these cookies maintained the light crispiness of the cereal because it seemed to have disappeared after baking. After eating these cookies, The Pioneer Woman's reputation is in good standing. 


AJ's Secret:
  • When making this recipe, the dough was simply too wet. I added an extra 1/2 cup of flour so that I ended up with a thicker, moister cookie.
  • 1-ounce cookies only take about 9 minutes to bake


Monster Cookies
Recipe by Ree Drummond

Ingredients
2 sticks (1/2 pound) salted butter, softened
1 1/2 cups brown sugar, packed
1/2 cup white sugar
2 whole large eggs
1 tablespoon vanilla extract
1 1/2 cups all-purpose flour
2 teaspoons kosher salt
1 teaspoon baking powder
1/2 teaspoon baking soda
1 1/2 cup oats (either quick or regular)
1 cup chocolate coated candies, such as M&M's
3/4 cup chocolate chips (milk or semisweet)
1/2 cup pecans, chopped
2 1/4 cups rice cereal, such as Rice Krispies
Cold milk, for serving

Directions
Preheat the oven to 375 degrees F.

Cream the butter with both sugars in a mixing bowl until fluffy. Add the eggs one at a time, beating well after each addition. Add the vanilla and beat.

Combine the flour, salt, baking powder and baking soda. Add to the mixing bowl and mix until combined. After that, add in the oats, chocolate candies, chocolate chips and pecans in whatever quantity you prefer. Add the cereal at the very end, mixing until just combined. Do not over mix!

Use a cookie scoop to scoop balls of dough onto a cookie sheet. Bake until golden brown, about 20 to 25 minutes, and then allow to cool on a rack. Serve with glasses of cold milk.

-Aaron John

Saturday, December 14, 2013

Decorated Sugar Cookies: Coomassie Stained SDS-PAGE Gel


Where my nerds at because this cookie is just for you! It all began about 4 years ago when I started to make food for the people in my class around the holiday season. Now, there was just one criteria that people had to make before I was to make them food. Simply, let me get to know you and I'll let you get to know me. Simple as that. 


UW classes are enormous that it's never simple to meet people. Most of the time, people are already in their pre-formed cliques, and I am guilty of that as well. Every so often, I get into a smaller class and everything just clicks. People get along, we laugh, play games and it doesn't even seem like we're taking a class anymore, but more of a socializing hour.


I can honestly say, Biochem 426 lab was exactly that. It never seemed like we were in an intense upper level course. Everyone knew their job and with all the waiting period for reactions to occur, all we did was socialize. Playing Mafia, green glass door and "To the moon, I'm going to take _____", killed time and allowed us to get to know one another in a way I've never experienced at UW since starting my college career. By the way, those are some great party games.


Because of that, they pretty much filled the criteria of "Let me get to know you and I'll let you get to know me" and that meant food.


In honor of the class, I wanted to do something that revolved around what we did and the inside jokes that we made. Thus, decorated sugar cookies in the form of a Coomassie stained SDS-PAGE gel were made. Now, an SDS-PAGE gel is used to look at the purity of a solution and how well you were able to separate a single protein from all the other proteins in solution. The presence of one band in a lane is pure, the presence of many is not pure. Just like this gel my lab partner and I got from lab.


Simply using our gel as a template, I copied our results onto a cookie and BAM! Coomassie Stained SDS-PAGE Gel Cookies!


AJ's Secret:
  • When using the Royal icing, make sure it dries completely before decorating or packaging them up. If not, it indentations will be made and decorations can fall off.
  • Use a thicker royal icing to outline the cookie and then thin out the icing with water 1 tsp at a time until it's the consistency of syrup. Fill the remaining space with this thinner icing. This is known as flooding.


Decorated Sugar Cookies
Recipe by Sharon Bowers

Ingredients
1/2 cup (1 stick) unsalted butter, softened
3/4 cup sugar
1 egg
1 teaspoon vanilla
2 cups all-purpose flour
1 teaspoon baking powder
1/2 teaspoon salt
1 batch Royal Icing (see below)
Food coloring

Directions
Cream the butter and sugar. Add the egg and beat until fluffy. Blend in the vanilla. Sift in the flour, baking powder, and salt, mixing until just combined. Wrap the dough in plastic wrap and chill for 1 hour.

Preheat the oven to 350 degrees. On a floured surface, roll half of the dough to 1/8-inch thick. Cut into circles using a 3-inch round cookie cutter or the top of a drinking glass. Gather and reroll scraps. Repeat with remaining dough. Place the cookies on a greased baking sheet and bake for about 8 minutes, until just golden. Do not allow cookies to brown. Cool cookies completely.

Spread white royal icing smoothly over the surface. Allow the icing to dry completely, about 24 hours. With the same royal icing, dye with food coloring and decorate with a desired design.

Royal Icing: 
1 egg white*
1 teaspoon lemon juice
1 1/2 cups confectioners' sugar

With beaters or a standing mixer, whip the egg white and lemon juice until frothy. At medium speed, beat in the confectioners' sugar, a little at a time, until the mixture is thick but still liquid enough to beat. Then beat on high until the mixture is thick and glossy, about 3 minutes. Cover the surface with plastic wrap while waiting to use it. Royal icing will set to a firm, glossy finish when applied to a cookie. The icing can be stored, tightly covered, in the refrigerator for up to a week. 

*RAW EGG WARNING Food Network Kitchens suggest caution in consuming raw and lightly-cooked eggs due to the slight risk of Salmonella or other food-borne illness. To reduce this risk, we recommend you use only fresh, properly-refrigerated, clean, grade A or AA eggs with intact shells, and avoid contact between the yolks or whites and the shell.

-Aaron John

Saturday, December 7, 2013

Green Bean Casserole


Thanksgiving is still not over. Here's another dish I made for the meal. The ever famous "Green Bean Casserole" and might I add, this one is BADASS.


Everyone needs to eat their vegetables, so they say. Apparently, America is just so fat that it's been a big thing to eat healthier nowadays. What's the solution? Drench green beans in a creamy mushroom sauce and top it with fried onions! Michelle Obama can't say we're not eating our vegetables anymore. Ok, so maybe this won't make us all skinnier and fit into our favorite pair of jeans, but it's a baby step.


Just look at those blanched green beans. So, vibrantly green and healthy. Don't you just feel the pounds melting away just looking at it? Such a shame they have to be drenched in a rich and creamy, deliciously decadent, mushroom cream sauce. What a shame, what a shame.


I can't stress this enough. Make your own mushroom cream sauce, it will change your life. Throw away those cans of gelatinous soup in a can. You know, that thick globby mess they call "condensed soup". I don't know where you're from but that stuff just needs to go...in the trash. Why buy a canned soup when you can make one yourself that tastes a whole lot better with fresh ingredients? But if you must, go ahead and use that stuff but don't tell me I didn't warn you.


And those onions in a can. Is it really onions? I haven't had those fried onions in a can in many years after tasting one that was completely burnt. From that moment on, I haven't touched the stuff. Hopefully whatever company makes those stepped their game up. But everyone has onions on hand, and everyone has flour. Go ahead and make them from scratch too. Heck, don't make them if you don't want to. The green beans and mushroom cream sauce, alone, blew my mind away.


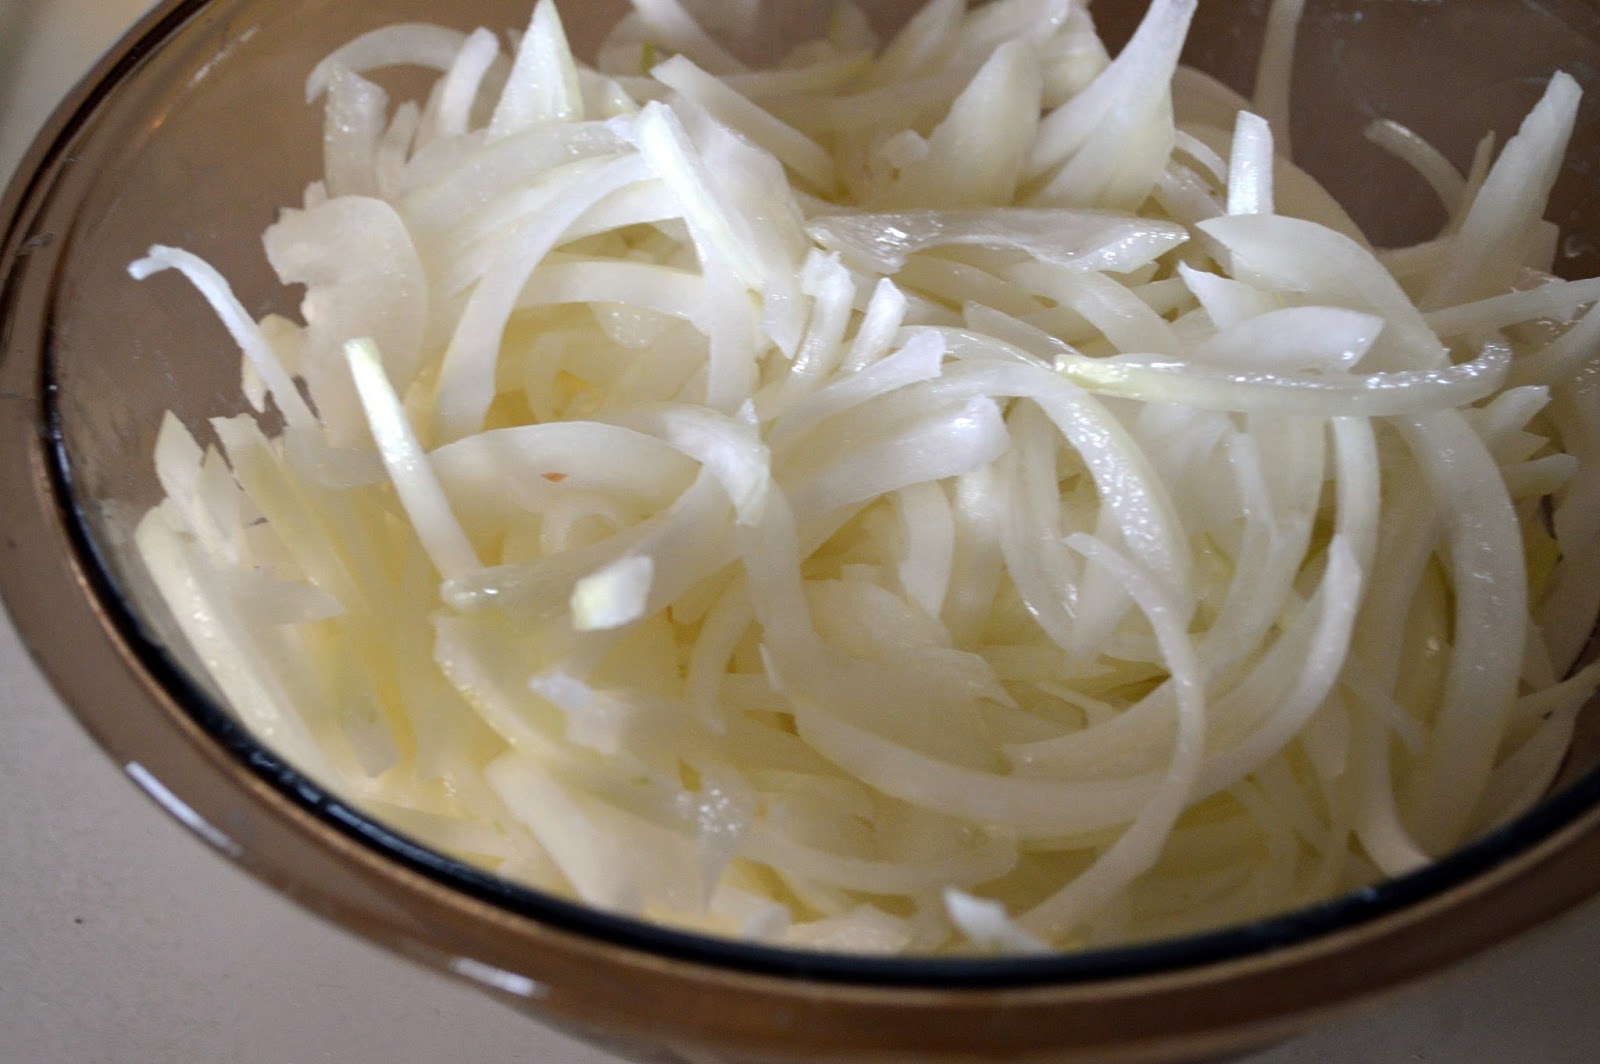
Flour those buttermilk soaked onions...


and fry...Seriously, whose counting calories anymore once you know you're going to drench green beans in a cream sauce? I know I'm not.


So, there's green beans, mushrooms and onions. Three vegetables in one?! This is definitely a health food. If I don't make America healthier, with this dish, I don't know what will!

AJ's Secret:

  • If you find the mushroom cream sauce is not thick enough, take about 1 tbsp room temperature butter and 1 tbsp flour. Mix until homogenous and add it into the sauce. Mix until the butter and flour mixture is completely dissolved. This method disperses the flour evenly as the butter melts so that you don't have clumps. But, you must make sure you MIX or else a dumpling will form.


Green Bean Casserole 
Recipe by Me

Ingredients
Crispy Onions
1 large onion, thinly sliced
1 cup buttermilk
1 ½ to 2 cups flour
~ 2 tsp salt
~ 1/2 tsp pepper

Casserole 
2 lbs green beans, trimmed and cut in half
1 lb button mushrooms, cleaned and sliced
4 tbsp butter
5-6 tbsp flour
3 cloves garlic
2 cups chicken stock
¾ cup cream salt and pepper to taste

Directions 
Crispy Onions 
Prepare the crispy onions by soaking the onion slices in buttermilk for 5 minutes. While the onions are soaking, place the flour in a clean plastic bag, season with salt and pepper and shake to mix. Add a handful of onion slices (drained) to the plastic bag and shake until evenly coated. Place the coated onions on a baking sheet and repeat the process.
At this stage, there is the option of baking or frying the onions. If baking, spray the pan with non-stick cooking spray and place the onions in an oven preheated to 450 degrees F for about 30 minutes until golden brown, tossing the onions a couple of times while cooking. If frying, heat vegetable oil to 375 degrees F and add in a handful of onions into the oil. Cook for a couple of minutes or until golden. Repeat with the remaining onion slices. I chose the latter. 

Prepare the beans 
Bring about 6 to 8 cups of water to a boil and season with about 1 tbsp of salt. Add in the prepared beans and blanch for about 5 minutes. Drain in a colander and rinse with cold water until the beans are no longer hot. Set aside.

Prepare the mushroom cream sauce
In a large pot, melt the butter and add in the garlic. Cook on medium heat for about 1 minute until aromatic and proceed to add in the sliced mushrooms. Cook until the mushrooms begin to release their liquid and are fully cooked, about 5 minutes. Season with salt and pepper and add in the flour. Continue to cook the mixture for an additional minute to cook out the raw flour taste. Slowly add in the chicken stock until combined. Bring the mixture to a boil and reduce to simmer. Cook for about 5 minutes until the sauce thickens and the flavors begin to marry. Lastly, add in the cream and adjust the seasoning with salt and pepper.

Final Assembly 
Preheat the oven to 350 degrees F
Add the blanched green beans and a small handful of the crispy onions to the mushroom cream sauce and stir to combine. Place into an oven safe dish and top with the remaining crispy onions. Bake for about 15 minutes until bubbly.

-Aaron John

Saturday, November 30, 2013

Garlic Studded Prime Rib


I hope everyone's Thanksgiving was as filled with food and family as mine was! It was another Thanksgiving and another year I cooked the Thanksgiving meal. One of my favorite aspects about the Thanksgiving meal is that you get to eat and cook "special occasion" food full of fat, cream, butter and salt. Diets better be left at the door because you are about to eat some full flavored and full fat food that will put you in a legit food coma. 


As an annual tradition, my family's Thanksgiving center piece has and always will be a Prime Rib. Juicy, fatty and flavorful. If you like meat, this is one for you. I make this Prime rib like I always do, studding the whole thing with 2  heads of garlic and seasoning it simply with salt, pepper and garlic powder. This is literally a 3 ingredient dish if you don't count salt, pepper and olive oil as ingredients since everyone should have those on hand.


Prime Rib is one of my favorite Thanksgiving main courses and is a definite show stopper. Place it in the oven and literally forget about it. It's all about timing. Make sure you have a schedule made up to when you want to eat dinner and when you place the Prime Rib into the oven. Get it in at the right time and you'll be eating like a king.

AJ's Secret:

  • I use a two temperature cooking method. The first 30 minutes begin at 450 degrees F to sear the meat and give it lots of flavor. The remainder of the cooking period is at 350 degrees F to evenly cook the meat from the inside out.  
  • As a general rule, cook the Prime Rib about 15-20 minutes a pound. For a medium cooked roast, remove the roast when the internal temperature is about 140 degrees F. It still has a bit of pink but not overbearingly bloody. If you're more of a pink lover, remove the roast when the internal temperature reaches about 130 degrees F.


Garlic Studded Prime Rib
Recipe by Me

Ingredients
1-10 lb Prime Rib Roast
2 heads of garlic
~ 3 tbsp Olive oil
~2 tbsp Kosher Salt
~1 1/2 tsp Pepper
~1 tbsp Garlic Powder

Directions
3 hours before roasting, take out the prime rib from the refrigerator and allow it to come to room temperature.

Preheat the oven the oven to 450 degrees F. While the oven is heating, quickly rinse the Prime Rib under cold water just to ensure it is clean. Dry with paper towels. Once dry, transfer the prime rib to a large roasting pan (a roasting rack is not necessary) and set aside. 

Take the 2 heads of garlic and remove the peel from each clove. Proceed to cut the individual garlic cloves in half or into thirds. With a small paring knife, cut small slits that are about 1 to 2 inches deep into the meat and begin to insert the pieces of garlic into each slit. Make enough slits to use up all the garlic.

When the Rib roast is completely studded with garlic cloves, evenly spread olive oil to cover the meat completely. Then, evenly spread the kosher salt, pepper and garlic powder so that every inch of meat has seasoning.

Place the seasoned and studded roast into the oven and bake at 450 degrees F for 30 minutes. After 30 minutes reduce the temperature to 350 degrees F. Continue to cook the roast for about 15-20 minutes a pound. For a 10 pound roast to get to medium, it should take about 3 hours or until the internal temperature reaches about 140 degrees F. For more of a medium rare, remove the rib roast when an internal temperature reaches about 130 degrees F.

Allow the roast to rest for at least 30 minutes before carving to prevent the juices from running out.

-Aaron John

Saturday, November 23, 2013

Oatmeal Lace Cookies


Red cups are back at Starbucks, twinkling lights surround the trees in Downtown Seattle and Christmas music is already playing on the radio. This can only mean one thing, cookie season is upon us. Thanksgiving is  next week and I feel like it's all about Christmas right now. Either way, this is the time where cookie magic happens. Personally, every day is a cookie day, but that's just me. So, if you're more of a cookie season kind if person, here's a recipe for you.


These cookies, although easy to put together, are quite time consuming when it's time to bake. Because these cookies spread out so much, you can only bake a few at a time which is the downfall to this cookie. But, these cookies come out crunchy, buttery and sugary. More like a cross between candy and cookie than anything else. Just be warned, shield your eyes when you remove the baked cookies from the pan, for pools of butter will be in your future.

AJ's Secrets:

  • These cookies need to be baked off immediately once the dough is made. If you put the dough in the refrigerator and bake later, the dough does not spread evenly in the oven. Once baked, I also found the cookies to not hold their shape and they ended up falling apart.
  • MUST use parchment paper or a silicone baking sheet. Due to the amount of sugar in these cookies, these will stick despite having so much butter in them.
  • Let the cookies cool on the pan for at least 5 minute before transferring to a cooling rack. If not, the cookies will break into pieces when you try to lift them up with a spatula.


Oatmeal Lace Cookies
Recipe by Martha Stewart
Ingredients
1 1/2 cups (3 sticks) unsalted butter
3 cups uncooked rolled oats (do not use instant)
1 1/2 tablespoons all-purpose flour
1 teaspoon salt
1 3/4 cups sugar
2 teaspoons vanilla extract
2 large eggs, lightly beaten

Directions
Heat oven to 325 degrees. Cover a baking sheet with parchment paper.

In a large saucepan over low heat, melt the butter. Let cool a bit and add all remaining ingredients except the eggs. Stir well to combine, then add the eggs. Mix thoroughly.

Place 1 1/2 tablespoons of batter at a time on the parchment, leaving at least 3 inches between cookies. Flatten batter into a circle with the back of a spoon. Bake for 13 to 15 minutes, or until just golden brown. Cool on wire racks.

-Aaron John

Saturday, November 16, 2013

Cherry de Pon


My favorite thing to eat has always been ice cream. Having those 1.5 quart tubs of Dreyer's ice cream in my house is dangerous! I've been known to finish that off in 4 days, no joke. Supposedly, ice cream is fattening, so they say. Frozen yogurt on the other hand is healthy then, right? I mean, it's yogurt. Well, maybe it's not "healthy", but it's "healthier".

After a walk in Seward Park, my friends and I decided to get something cold to cool us down. Our trek led us to Cherry de Pon in Renton. It's a self serve yogurt place, basically a Yogurtland.

We entered and they had about 8-10 different flavors. I opted to get their vanilla, chocolate, taro and pink lemonade and topped them with crushed chocolate cookies, andes mints and mochi. The frozen yogurt was fantastic. I didn't miss ice cream one bit. The vanilla was creamy and wasn't tangy, just like real ice cream. The chocolate had a classic chocolate flavor as well. The taro was the best I've tasted. I've tried taro at other places and it just tasted too much like coconut, not taro at all. But this one was just like taro bubble teas I get. The big surprise was the pink lemonade. It was super tangy which was refreshing, almost more like sorbet than frozen yogurt but still had a creamy aspect to it. It reminded me of when I was younger and would eat those lemon ice's that came in a tube at my cousins house. Was it by Minute Maid?

Overall, fantastic place!

My rating: 4 out of 5 stars

Cherry de Pon
365 S Grady Way Bldg F, Ste G
Renton, WA 98057
Telephone: (425) 226-5246

-Aaron John

Sunday, November 10, 2013

King 5 & Evening Magazine Best of Western Washington...The Winner for "Best Food Blog" 2013 is...

http://best.king5.com/best/food-blog/online-and-social-media/western-washington/slideshow
ME!! For the past 2 months I competed in King 5 & Evening Magazine's contest for "Best Food Blog" and I won!! I can't believe it and I'm still shocked.

Results were announced on November 8th and the whole day I was on pins and needles. Trying not to think about whether I won or not, I treated the day as normal. I went to class, had some lunch, volunteered at Swedish Medical Center, and was hoping the time would go by quickly until the results were announced at 8 PM that night.

This race was tight between the person in second and myself. I was expecting the best and prepared for the worst that day but I had a strange feeling in my gut. Was it good? Was it bad? I honestly didn't know and I just wanted it to be all over. When I got home, after waiting at least 15 minutes for the page to load due to site errors, I saw it. My face, "Winner", #1. "Whaaaa?!?!?! No way!!" I said to myself. I jumped, I ran and I screamed "Ahhhhh!!" like a little kid on Christmas morning. One of the best things I've ever felt in a long time.

Looking back on everything, when I started my blog 3 1/2 years ago, I never expected anything like this to happen. From hiding my love of food, cooking and baking from a majority of people in my life because of fear, to no longer being afraid of social norms in our society, it's amazing. If this competition showed me anything, it reinforces what I've said since the beginning. "Do what you love, no matter what it may be. Live your life the way you want to live it and don't let fear or the opinion of others drive you away from your passion."

I want to thank every single person that has supported me and my blog for the past 3 1/2 years and those that voted for me in this competition. Whether you are a friend, family member, supporter of my passion, lover of my blog, I wouldn't be here without any of you. No words can express how thankful I am for the support. It means the world to me that I won this competition and that this is just the beginning of what else may come my way. Food Network, here I come.

-Aaron John

Saturday, October 26, 2013

Pico de Gallo


A couple weeks ago, I bought something I've wanted for a long time. I've wanted this item for over 2 years, but every time I was ready to buy it, my school tuition notice would magically appear in my inbox with impeccable timing. That money I saved up could no longer be used for that one thing I wanted, instead, it went into helping pay for that tuition. Each and every time this happened, it was another chance that slipped away from me.


This time was different. I've waited long enough and I had to have it. What did I buy? A DLSR Camera! After asking for advice from a couple of friends, I decided on getting the nikon D3200. It wasn't exactly my first choice but all my friends brought up good points. Did I know how to use a DSLR? No. Did I want to realllyyy want to get into photography? Not really. Did I want to spend over $1000? Heck No! The nikon D3200 seemed like a good choice, a good entry level camera and decently priced. I could always upgrade if I wanted but it was best to learn the basics first.

I still have no idea what I'm doing with this thing. I have tons to read up on and a DVD that came with the package to watch. This Pico de Gallo was my first attempt with a DSLR, so hopefully it doesn't look like crap.


I love Pico de Gallo. The juicy tomatoes, crunchy onion, spicy jalapeno and fresh cilantro are one great combo. Give me tortilla chips and some Pico de Gallo and I'll be good. This week I ate a quesadilla with a boat load of this Pico de Gallo 3 times...I think that says a lot. Not to mention, this recipe is beyond easy to make.  

AJ's Secret:
  • My mom has always told me she learned that the harder the jalapeno, the spicier it will be. Whether this is true or not is completely up in the air. All the jalapenos around our house has been hard and spicy so maybe it's true?
  • Some people seed the tomatoes and I say why? I personally don't mind the seeds and it's one less step to do. If you're picky about the seeds, go ahead and squeeze them out or simply run your fingers in the inside to ease them out and dice them up from there.
  • Make this Pico de Gallo in advance, at least 2 hours, for the flavors to marry. It's definitely one of those things that gets better with time, if it lasts that long that is.

Pico de Gallo
Recipe by Me

Ingredients
4 roma tomatoes, diced
1/2 medium onion, diced
1/2 cup cilantro, chopped
1-2 jalapenos, seeded and minced
1/2 a lime
1 tsp salt

Directions
Mix the tomatoes, onion and cilantro in a bowl. Add in the seeded and minced jalapeno to your desired heat level, as well as the juice from 1/2 a lime and the salt. Mix the pico de gallo until everything is combined thoroughly. Adjust for seasoning if needed. This can be made well in advance.

-Aaron John

Sunday, October 13, 2013

Mexico Cantina y Cocina


Last week I talked about meeting up with my Chem study group and I left you with eating Sushi. Well, here's where we ate after!

We decided to eat at Pacific Place in Downtown Seattle because they have a parking garage and the last person to arrive was driving into town. Downtown parking is a nightmare so convenience is key. However, pay attention to parking rates when parking in garages in downtown and keep track of your arrival time!

Because it was so nice out when we came, we decided to eat out on their balcony. We were seated and out came the tortilla chips and salsa. My friend A. said the tortilla chips had a lime flavor to them and I thought he was crazy because I didn't taste the lime on the chip I ate. However, after taking another chip, he was right! The lime flavor was more prominent on the second chip I had. That added lime flavor is something I haven't seen at mexican restaurants so it was an interesting surprise. The salsa was great as well.

When it came down to ordering, I opted for two enchiladas, one with chicken and their poblano cream sauce and another with beef with red chile sauce and sour cream. The chicken enchilada was fantastic and I loved the poblano cream sauce. Slightly spicy and creamy which paired well with the chicken. The beef w/ red chile sauce was just alright. The sauce was a bit bitter for my taste and had a strange after taste which I wasn't fond of. The rice was fantastic and so were the beans. I loved how you were able to see whole beans which was a nice change from completely mashed ones.

The service was great as well. Our waiter was attentive, personable and even promised us a song and dance. Dinner theater anyone? He sang a song from the cartoon South Park but didn't dance. At least he tried?

My Rating: 3.5 stars out of 5

Mexico Cantina y Cocina
Pacific Place Center - Level 4
600 Pine St
Seattle, WA 98101
Telephone: (206) 405-3400

-Aaron John

Saturday, October 5, 2013

Sushi Bella


I love sushi! Whether it's sushi that comes around on that conveyor belt or sushi that will cost you $50, I love the sweet and tangy rice, the oceany flavor that the seaweed imparts and of course, the fresh seafood that fills them, not to mention the veggies such as cucumber that gives a fresh crunch and avocado that gives a nice creaminess.

On a little reunion of my Chem study group, we decided to meet up in Downtown around Pikes Place market for some dinner. We were just going to walk around and see what was good to eat. I arrived in Downtown and so did my friend C. While waiting for the last person to arrive, we were starving so we decided to walk around and find a snack to eat while we waited.

While walking down Western Avenue, just a couple blocks from Pikes, we found Sushi Bella, looked up it's ratings and decided to give it a try. We walked in, ordered a california roll and a tuna roll and it cost a little over $10.

The sushi was delicious and the fish was fresh being that Pikes Place was just down the street. The owners were friendly as well and overall, there wasn't anything bad to say about this place. With decent prices, this is a great find to have a small snack when you want something quickly without waiting in line.

My Rating: 4 out of 5 stars

Sushi Bella
2100 Western Ave (between Lenora St & Elliott Ave)
Seattle, WA 98121
Telephone: (206) 535-6401

-Aaron John

Saturday, September 28, 2013

The Ram Restaurant & Brewery


If you know me, you know not only do I take my food seriously, but I take clothes seriously. I mean, how can I pass up a shopping trip to the Tulalip outlets, about 40 miles from where I live. If that opportunity is there, I'm going.

Even though the outlet was pretty far, I didn't eat before the trip. I don't know, I've never been really good at eating breakfast ever since high school. So you can guess, by the time we arrived, I was starving.

The choice was simple, either eat at the food court or eat at an actual restaurant, and might I add, this was the only restaurant that was walking distance! Literally in the same parking lot. The Ram Restaurant & Brewery just began popping up everywhere in the Northwest and they have various locations in Washington, Idaho, Oregon, Indiana and Illinois.

We decided to eat at The Ram since we never ate there before. The atmosphere in the restaurant is pretty cool. High chairs, high tables, a huge bar with a ton of beer selections and beer and sports decor everywhere.

I ordered The Stadium Burger which contained a beef patty w/ bacon, mushrooms, cheddar cheese, lettuce and mayo on a Kaiser Bun. Of course, it came with fries and choice of dipping sauce and I chose ranch.

Now, I had a few problems with my meal. First off, the fries were way too salty! Whoever was seasoning them in the kitchen went overboard. You know it's a bad sign when two-thirds of my fries are still on the plate at the end of my meal. Second, I didn't like how the burger wasn't wrapped in parchment. Every time I took a bite and placed it down, it was land slide central because of the lettuce on the bottom. The burger itself was decent in flavor. The Ranch on the other hand was BANGIN'!

In terms of service, it was decent as well. The waitress came around every now and then and asked how we were doing. However, I've never been to a restaurant where they set down the check as you're eating your meal, about 5 minutes after they just served us what we ordered. Is that normal? I just didn't like that. Oh well...maybe a different location will have a different experience.

My Rating: 2.5 out of 5 stars

The Ram Restaurant & Brewery
10520 Quil Ceda Blvd
Tulalip, WA 98271
Telephone: (360) 653-7721

-Aaron John

Saturday, September 21, 2013

Thai Red Chicken Curry


With my vacation ending before I begin my last year at UW-Seattle, I figured I should make a dish that is abundant along what we huskies call "The Ave". You see, "The Ave" is nothing more than a street with blocks upon blocks of restaurants in the University District. It seems every time I walk down The Ave, there's always a new Thai place popping up out of the woodworks.

Thaiger Room, Thai Tom and Banana Leaf are just a few and the list goes on and on. Yes, I do have my favorite place to go to but it seems my favorite place varies with a different dish. From Chicken Pad See Ew at Thaiger Room to Pad Thai at Thai Tom, I felt it's time to do something else than just a noodle dish. This is where Thai Red Chicken Curry comes in.


This is my version of Thai Red Chicken Curry. Trying to stay true to the original but putting my own spin on it, I read pages and pages of recipes and watched various videos to get an idea on what to do and to stay authentic. I knew I didn't want to make a dish that is overly consumed in coconut milk because of its richness, so I added chicken stock to thin it out. I also thought I would need a Jalapeno just in case the curry wasn't spicy and let me tell you, red curry paste is SPICY! BE CAREFUL!! Good thing I didn't use the Jalapeno. Overall, this is what I came up with!


AJ's Secret:
  • When you add the Red Curry Paste to the oil, you need to be attentive! It can burn quickly so you need to stir constantly. Immediately add in the chicken to the pot once it becomes fragrant and has a slight change in color.
  • When you open up a can of Bamboo Shoots, they have an interesting smell. How can I describe it? When I was in elementary school, we took a field trip to the pumpkin patch. At the pumpkin patch, there were many animals from goats to cows. Bamboo Shoots smelled exactly like being at the pumpkin patch; it was that barnyard kind of smell. To remove some of the smell, I drained and rinsed the bamboo shoots with cold water a couple of times. Then I brought a small pot of water to a boil with about 1 tsp of salt. Blanch the Bamboo Shoots for about 2-3 minutes by adding the Bamboo Shoots to the boiling water. Drain in a colander and rinse w/ cold water. Submerge them in cold water until ready to use.
Thai Red Chicken Curry
Recipe by Me

Ingredients
2 tbsp Vegetable oil
2-3 tbsp Red Curry Paste
1 Shallot, thinly sliced
4 Chicken Breasts, sliced 1/4-inch thick
2 cups Coconut Milk
3/4 cup Low Sodium Chicken Broth
1 1/2 tbsp fish sauce
2-3 tbsp sugar
1-19 ounce can of Bamboo Shoots in water, blanched
1 Red Bell Pepper, sliced into 1/4-inch strips
4-5 leaves of Thai Basil
Optional:
2-3 slices of Jalapeno if the dish isn't spicy enough

Directions
In a medium sized pot, add the oil and begin to heat on medium. Once hot, add in the Red Curry Paste and shallot. Stir constantly for about one minute until the curry paste has become fragrant. Once fragrant, add in the sliced chicken breast and mix. Cook until the chicken begins to turn from a translucent pink to white and opaque in color.

Once most of the chicken has become opaque and is halfway cook, add in the coconut milk. Mix until the curry paste has been dissolved into the coconut milk and the coconut milk has taken on an orange hue. Finally add in the chicken broth, mix and bring to a boil. Once to a boil, boil for about 5 minutes to cook the chicken.

After the 5 minutes are up, add in the fish sauce and sugar to season. Finally, add in the blanched bamboo shoots and red bell pepper. Cook for an additional 3-4 minutes.

When done, turn off the heat and add in the Thai Basil. Serve with rice.

 -Aaron John

Saturday, September 14, 2013

Quick Pickled Red Onion


Onions. Red, white, yellow, sweet, and even shallots. Some people love 'em, some people hate 'em. Which one are you? I personally love onions. They give a little somethin' somethin' to foods. Just think about foods that need onions. Philly Cheesesteaks! Sausage w/ Peppers and Onions! Burgers! Tacos!

I think the main culprit as to why people dislike raw onions is not only the harsh flavor, but the aftertaste. I can totally understand that. Sometimes, it's even too much for me if a restaurant doesn't take care of removing some of it. But I have a solution and it's pickled onions! Sweet, tangy, crunchy, oniony but the harshness has magically disappeared!


Remember to vote for "AJ's Cooking Secrets" for "Best Food Blog" in Washington state! Thanks!

AJ's Secret: 
  • The key to pickling, in my opinion, is to have your pickling liquid extremely warm to just before boiling when adding it to the desired vegetable, in this case onions. It slightly blanches and cooks the onion a little bit to remove more of the harsh flavor and penetrates the onion better yet at the same time, maintains the crispness of the onions. Just dissolving the sugar in the vinegar at room temperature, which would happen over time, and adding it to the onions will take much longer and doesn't take away much of the harshness
  • What vinegar should I use? Well, different vinegars have different intensities. Some people say to not use white vinegar because it's too intense...but sometimes all you have on hand is white vinegar! Just remember, because vinegars vary, your sugar will vary! A rice vinegar will use much less sugar whereas white vinegar uses a lot. You're looking for a combo that is tangy and sweet at the same time.

Quick Pickled Red Onion
Recipe by Me

Ingredients
1 red onion, sliced
1 cup white vinegar
1/2 cup sugar
1/2 tsp salt
Optional:
5-8 Peppercorns
Fresh Herbs such as thyme or rosemary
Red Pepper Flakes
1 Garlic clove, sliced

Directions
Remove the outer layers of the red onion to reveal the smooth and clean flesh. Slice the onion down the middle along the root, and then into strips about 1/8 inch thick (alternatively, rings can be made by cutting the onion, "onion ring style"). Place the cut onions into a bowl. Rinse the onions under cold water while separating the individual layers, about 3 times, to remove some of the harsh flavor of the onion. Drain any excess water and set aside the bowl of onion slices.

In a microwavable measuring cup, measure out the vinegar and add in the sugar. Microwave the mixture for about 1 minute or until the sugar is completely dissolved. Add in any optional flavorings desired and mix thoroughly. Pour the warm liquid over the onions and mix. Allow to sit for at least 20-25 min. Store in an airtight container in the refrigerator. They should last a couple of weeks.

-Aaron John

Friday, September 13, 2013

Please Vote for Me!!!


I've been nominated once again for Evening Magazine's Best of Western Washington Contest for "Best Food Blog" in Washington State!! I'm excited about this opportunity and never thought it would happen again for the second time! Now I need your help in the form of votes! It only takes a minute or two! Let's win this!! Here are the steps!

1. Click the picture above, or on the top right corner of the blog or just this link: http://best.king5.com/aj-s-cooking-secrets/biz/652307

2. Connect through Facebook, twitter, email, etc. This is to ensure no one abuses the system and votes excessively for themselves.

3. Vote for "AJ's Cooking Secrets" for "Best Food Blog" in Online & Social Media

4. Spread the word, share the link on Facebook, twitter, etc.

That's it!! I just want to thank everyone that has supported me and read my blog. Winning this would be amazing and I can't do this without you!

-Aaron John

Sunday, September 8, 2013

Pasta Salad


What's new you ask? Well, I've finally started volunteering at Swedish Hospital in their pharmacy! If I've been on this path to becoming a pharmacist, I better get some experience don't ya' think? It's better late than never is what I always say!


Let me tell you, volunteering at Swedish is 10X better than working at Macy's. No more sales goals, no more managers breathing down your neck to get sales when they took away commission and no more following customers around helping them find jeans and then being forced to up-sale and say "You should buy a belt as well." Maybe I'm just crazy but I tend to like to browse and look at clothes myself without a sales associate following me around and suggesting things that they "think" I need. Am I the only one that feels that way? That's why I hated retail because I hated having to follow customers around when I personally wouldn't want that as a customer myself.


I'm just glad I'm finally working in an environment with professionals that have reached the goal that I want to reach. I still have a lot to learn but I love volunteering at Swedish so far! Not to mention, it brings me back to my high school days because my high school is just across the street.

Now, let's get back to the food. This post is all about Pasta Salad, pasta meant to be cold. Add in anything on hand with pasta and some dressing and it's a great accompaniment to a protein like chicken, for lunch.


Last post I introduced my idea for a cooking show and because of that, I will now feature a new segment at the end of each post called "AJ's Secret". Really, it's just a tip to have a fool proof dish. So, here goes!

AJ's Secret:
  • Cook the pasta not to "al dente", but past it until it's fully cooked. Because the pasta is eaten room temperature or cold, the pasta will firm up in the fridge because of the starches present in the pasta. An "al dente" pasta is just too firm.
  • Before mixing the dressing with the pasta, make sure the pasta is completely at room temperature or cold. With creamy dressings, I notice that if you add in the dressing while still warm, it eventually causes the dressing to separate especially when making it ahead. Vinaigrette type dressings can be added warm or cold however.
  • Red Onion can be a bit strong in flavor. To take away the intense flavor, I pickled mine with vinegar and sugar. Blog post on Pickled Red Onion will be up soon!


Pasta Salad
Recipe by Me

Ingredients
1 lb Rotini Pasta
1/2 cup Caesar Dressing
1/4 cup Parmesan Cheese, grated
1/4 Red Bell Pepper, roasted and diced
1/4 to 1/2 cup Sundried Tomatoes packed in oil, drained and sliced
1/2 Red Onion, thinly sliced (I pickled mine)
1/4 lb Feta Cheese, cubed
Salt and pepper to taste
Parsley (for color)

Directions
Bring a pot of water to a boil. Once boiling, add salt and the dried Rotini Pasta. Cook the pasta until it is past the "al dente" stage. Drain and rinse with cold water until the pasta is no longer hot. Set aside.

The following ingredients are nothing more than cubing, grating, slicing and dicing. 
  • Grate parmesan cheese
  • Use jarred roasted red bell peppers or roast off a fresh one. I used a fresh one, only cutting a 1/4 piece from the pepper, rubbing with olive oil and popped it into a toaster oven on broil until the skin turns black. Remove and place on a plate, cover with plastic wrap and let it sit for 5-10 min. Remove the skin and dice.
  • Slice sun dried tomatoes
  • Thinly slice red onion
  • Cube the feta cheese to bite sized pieces
Assembly: Toss the pasta with the Caesar dressing, salt and pepper. Then add in the parmesan cheese and toss. Add in the roasted red pepper, sun dried tomatoes and red onion, toss. Finally, add in the cubed feta, being careful not to break the cheese too much. Finish off with a sprinkling of parsley.

-Aaron John

LinkWithin

Related Posts with Thumbnails