Showing posts with label fruit. Show all posts

Saturday, June 28, 2014

Raspberry Crumble Bars


Well, well, well, it looks like I'M BACK! After five years of homework, studying, projects, essays, labs, quizzes, midterms and finals, I am officially a graduate of the University of Washington with a double degree in Biochemistry & Chemistry and a minor in Diversity. It has been a long road full of triumphs and failures, but I did it! Now the question is, what's next?


When I started my journey at UW-Seattle, I didn't know exactly what I wanted to do with my life. I jumped from different ideas, from pharmacy, to business, to just wanting to drop out and go to culinary school. People always say, "Do what you love", even my friends say that. But growing up, when you have to work for everything you've ever owned, where nothing is handed on a silver platter, where every time that tuition statement comes out, you hate to tell your parents about how much tuition was raised, doing what you love didn't really seem like an option. If I wanted to live out my dream whether that be a bakery, cafe or some show on the Food Network or Cooking Channel, I needed a backup plan and that was my two degrees.


After all is said and done, I still don't know what I want to do with my life. What I do know is that I'm going to take a year off of school, apply to pharmacy schools in the fall and look for jobs in the meantime. If I find a job god enough, maybe pharmacy school isn't necessary. But, that's what this next year is all about, figuring out my next step in life.


Until then, there is one last thing to do before I figure out my life, and that is my joint graduation and 23rd birthday party! Can I just say, I haven't had a party like this since grade school so this is kind of a big deal. This past week, I've been testing out recipes on what desserts I need to make and this was one recipe I tried out. These raspberry crumble bars were fantastic. My only criticism would be to bake the bottom layer for about 20 min or until lightly golden brown before adding the raspberry preserves. I found the bottom layer to be a bit soft and failed to hold together if that's not done. Other than that, this may be an option for the party!


Raspberry Crumble Bars
Recipe by Anne Thornton

Ingredients
2 sticks butter, softened, plus more for the pan
2 1/4 cups all-purpose flour
1/2 cup granulated sugar
1/2 cup light brown sugar
1 cup rolled oats
1/4 teaspoon fine sea salt
1 egg, beaten
1 cup Raspberry Preserves, recipe follows

Raspberry Preserves
1 quart raspberries
1 tablespoon lemon juice
1 3/4 cup sugar

Directions
Preheat the oven to 350 degrees F. Butter an 8-inch square baking pan.

Add the flour, both sugars, oats and salt to a bowl in your stand mixer. Add in the butter and egg and beat at low speed. Stop the machine and scrape the bowl down a couple of times. Keep processing until the mixture resembles coarse crumbs. Keep 2 cups crumb mixture aside.

Press the remaining crumb mixture on the bottom the prepared pan. Spread the Raspberry Preserves over top, leaving 1/2-inch border. Crumble the rest of the oat mixture over the preserves.

Bake until lightly browned, 40 to 50 minutes. Cool completely before cutting into bars.

Raspberry Preserves:
Put your raspberries and 1/4 cup water in a saucepan over medium heat. Once it's at a simmer, partially cover and cook 8 to 10 minutes. Pass the berry mixture through a food mill and measure the liquid that remains. You need 3 1/2 cups. Add more water if there isn't enough.

Put the berry liquid into a new saucepan over medium heat and bring to a simmer again. Once it simmers, start adding your sugar in 1/2 cup increments. Give it a stir to incorporate and bring it back to a simmer before adding of the next 1/2 cup sugar. Once the last 1/2 cup is added, bring the liquid to 216 to 218 degrees F on a candy thermometer. Stir constantly. Let this cool to room temperature prior to using. If not using right away, refrigerate for up to 1 week

-Aaron John

Monday, May 27, 2013

Apple Cinnamon Sour Cream Coffee Cake


Sour Cream Coffee Cake has always been a favorite of mine. Its moist cake and crunchy topping make a perfect combination. Coffee Cake was the first cake I ever made myself from scratch, just an fyi.


In the house, we had some leftover apples and I wanted to use it in some fashion. Then I remembered how Costco has an "Apple Streusel" type muffin and I decided I would try and recreate it in Coffee Cake form.


I used Ina Garten's recipe from her Blueberry Crumb Cake and tweaked the cake portion to contain apples and cinnamon and tweaked the crumb topping to contain some oats.

For an experiment recipe, it was a step in the right direction. It was moist, and I liked how I added in the oats into the crumb topping, giving it a nutty aspect. I would maybe add more apples to really get a prominent apple flavor in every bite though. Overall, a good day's work in my book!


Apple Cinnamon Sour Cream Coffee Cake
Adapted recipe by Me
Original recipe (Blueberry Crumb Cake) by Ina Garten

Ingredients
For the streusel: 
1/4 cup granulated sugar
1/3 cup light brown sugar, lightly packed
1 teaspoon ground cinnamon
1/4 pound (1 stick) unsalted butter, melted
1 cups all-purpose flour
1/3 cup rolled oats
1/4 cup chopped walnuts (optional)

For the cake:
6 tablespoons unsalted butter, at room temperature (3/4 stick)
3/4 cup granulated sugar
2 extra-large eggs, at room temperature
1 teaspoon pure vanilla extract
1/2 teaspoon ground cinnamon
2/3 cup sour cream
1 1/4 cups all-purpose flour
1 teaspoon baking powder
1/4 teaspoon baking soda
1/2 teaspoon kosher salt
1 cup diced apples, (Gala or Granny Smith)

For the icing:
1/2 cup powdered sugar
2 tbsp maple syrup

Directions
Preheat the oven to 350 degrees F. Butter and flour a 9-inch round baking pan.

For the streusel: Combine the granulated sugar, brown sugar, and cinnamon in a bowl. Stir in the melted butter and then the flour, oats and walnuts. Mix well and set aside.

For the cake: Cream the butter and sugar in the bowl of an electric mixer fitted with the paddle attachment on high speed for 4 to 5 minutes, until light. Reduce the speed to low and add the eggs 1 at a time, then add the vanilla, cinnamon, and sour cream. In a separate bowl, sift together the flour, baking powder, baking soda, and salt. With the mixer on low speed, add the flour mixture to the batter until just combined. Fold in the diced apples and stir with a spatula to be sure the batter is completely mixed. Spoon the batter into the prepared pan and spread it out with a knife. With your fingers, crumble the topping evenly over the batter. Bake for 40 to 50 minutes, until a cake tester comes out clean. Cool completely.

For the icing: Combine the powdered sugar and maple syrup until smooth. Drizzle over the cooled cake and allow to harden.

-Aaron John

Saturday, September 15, 2012

Chocolate Raspberry Cake w/ Vanilla Bean Buttercream


Let's face it, cake has become one of those things that don't require a special occasion anymore. Eat at a restaurant. Cake. Walk up that flight of stairs. Cake. Watch some good ol' tv. Cake. Buy a new outfit. Cake.


What ever happened to the days when the only time we had cake was at a birthday party that your friend threw at a bowling alley when you were 10 years old?


Surely, I'm not the only one that noticed this. Whether a cake, a cupcake or an individually packaged slice of cake in the bakery aisle of your nearest grocery store, what have we become?


I'll tell you what we have become. People that live each day like it's a party and don't care who tells us no! So, move over health gurus. Today, WE EAT CAKE!


Don't forget to vote for me in the Evening Magazine Contest for Best Food Blog!!


Chocolate Raspberry Cake w/ Vanilla Bean Buttercream
Makes 1-9 inch 2 layer cake

Hershey's Chocolate Cake
Ingredients
Butter, for greasing the pans 
2 cups sugar
1 3/4 cups all-purpose flour, plus more for pans 
3/4 cups good cocoa powder 
1 1/2 tsp baking powder 
1 1/2 tsp baking soda
1 tsp kosher salt 
2 eggs
1 cup milk
1/2 cup vegetable oil
2 teaspoon pure vanilla extract 
1 cup boiling water

Directions
Heat oven to 350°F. Grease and flour two 9-inch round baking pans. 

Stir together sugar, flour, cocoa, baking powder, baking soda and salt in large bowl. Add eggs, milk, oil and vanilla; beat on medium speed of mixer 2 minutes. Stir in boiling water (batter will be thin). Pour batter into prepared pans.

Bake 30 to 35 minutes or until wooden pick inserted in center comes out clean. Cool 10 minutes; remove from pans to wire racks. Cool completely.

Vanilla Bean Buttercream 
Ingredients
3 sticks unsalted butter, softened
3 cups sifted powdered sugar
1/2 tsp vanilla bean paste
1 tsp pure vanilla extract
pinch of salt

Directions
In the bowl of an electric mixer fitted with the paddle attachment, whip butter until light and fluffy. Add in the powdered sugar, vanilla bean paste, vanilla extract and salt. Mix until smooth and creamy. Set aside.

Final Assembly
2 chocolate cake layers
1/2 cup raspberry jam/preserves
Vanilla bean buttercream
Melted semi-sweet chocolate (optional)

Directions
Place one of the chocolate cake layers on a cake board. Spread the raspberry jam/preserves over the top. Take the second chocolate cake layer and place it on top of the jam layer. Frost with vanilla bean buttercream and decorate with melted semi-sweet chocolate on the sides and pipe the remaining buttercream around the cake to make a border.

-Aaron John

Monday, August 6, 2012

Instagram Quickie: Orange Sherbet


After receiving a gift card from my friends on my 21st birthday to Williams Sonoma, I went ahead and bought myself a Cuisinart Ice Cream Maker. All of my close friends know that one of my guilty pleasures has always been ice cream so why not start making ice cream at home.

I have to say, finding a good recipe for ice cream is hard to do. When it comes to baked goods, I can rule out certain recipes just by the way something looks in the pictures. Ice Cream on the other hand is a totally different monster.

For this recipe on Orange Sherbet, I went ahead and chose one from Alton Brown. Fairly simple to make with minimal steps, just the way I like it. As of the moment, I literally just pulled it out of the Ice Cream Maker 20 minutes ago and it is in the freezer hardening up. Fingers crossed that it will be delicious!

Update: This was a bit too sweet for my taste so I would definitely reduce the sugar. Other than that, it tasted like a frozen orange julius.

Orange Sherbet
Recipe by Alton Brown

Ingredients
7 ounces sugar
1 1/2 tablespoons finely grated orange zest
1/4 teaspoon kosher salt
2 cups freshly squeezed orange juice, approximately 2 to 3 pounds oranges
1 tablespoon freshly squeezed lemon juice
1 teaspoon vanilla extract
1 1/2 cups very cold whole milk

Directions
In the bowl of a food processor combine all of the ingredients except the milk and process until the sugar is dissolved, approximately 1 minute. Transfer the mixture to a mixing bowl and whisk in the milk. Cover the bowl and place in the refrigerator until the mixture reaches 40 degrees F or below, approximately 1 hour.

Pour the mixture into an ice cream maker and process until it is the consistency of soft serve ice cream. You may serve now or transfer to a lidded container and place in freezer until firm, approximately 3 hours.

-Aaron John

Monday, June 18, 2012

Turon (Filipino Banana Lumpia/Egg Roll)


I must confess, even though I'm a foodie, I am a picky one at that. There are just certain foods that I can't stand. One of them that is at the top of my list is Bananas. I don't know what it is about Bananas but there is something about the skinny grocery store bananas that I don't like. However, if you're like me, I have the answer for you. Throw away those skinny grocery store bananas and listen to what I have to say. 


While growing up, the only time I would eat a banana was when it was in the form of a Turon which is a Filipino banana lumpia/egg roll. They are so addictive it's not even funny. I can eat four of these no problem. 


Let me tell you, Filipino's don't use any ordinary skinny grocery bananas. We use the Saba Banana which is fatter and so much sweeter. It doesn't have the intense banana flavor like the traditional banana which is why I believe makes it appealing to the banana hater in me.


This is the Saba Banana. See how much fatter and shorter it is?! The trick here is you do not want to use Saba Bananas that are completely yellow. You want one that has tons of brown/black marks on it, because otherwise, they are not ripe enough to work with. Even the one in the picture is not that ripe enough! 


Now, the most important part of the Turon in my opinion has to be the Jackfruit. It adds more flavor to the dish that it is just not the same without it. You may search "Jackfruit"and see that it kind of looks like the famously stinky Durian, but no they are not the same. The Jackfruit is very tropical in flavor.


So, if you're a hater of the banana, the Turon will change your life!

Turon (Filipino Banana Egg Rolls)
Recipe by Me
Makes 12

Ingredients
4 Saba Bananas (You can substitute regular bananas if you can't find Saba)
3/4 cup Dark Brown Sugar
1-12 oz jar Jackfruit in syrup, 6 pieces drained
12 Egg Roll Wrappers

Directions
Begin to heat up a pan with about 1/4 inch of vegetable oil on medium-low heat. In the mean time, take a plate and spread the brown sugar on the plate evenly, set aside. Begin to peel the Saba Bananas and slice them lengthwise about 1/4 to 1/2 inch thick.

Take the slices of Saba and coat them each in the brown sugar then place one slice on an egg roll wrapper. Take about 1/2 of a Jackfruit piece and make strips of it to run down the length of the Saba. Now roll the egg roll exactly like rolling a burrito.  Repeat for all the Saba pieces.

When the oil is hot, add in the finished egg rolls seam side down into the pan. You should see a light sizzle but nothing too intense. Keep the heat at medium low to prevent the sugar from burning. Fry until golden brown on each side which usually takes about 4 minutes per side. Patience is key! Cool on a cooling rack and serve!

-Aaron John
Friday, June 1, 2012

Orange Chicken


Ever have that feeling where you want to buy food that you haven't had in a long time but simply don't want to buy it? You know, the feeling where you just need that Americanized Chinese Food that you find at the Mall? Not catching on? Well, how about the Americanized Chinese Food from a certain Panda who serves some delicious Orange Chicken? How about now?


As I was headed home from my last day of class this quarter, I knew I had the full capabilities to go and buy Orange Chicken but why not make it? It may not be the same exact thing but if I can somehow manage to have all the flavors of Orange Chicken and yet still have a fat wallet, I think that is a good day's work.


Thus, I combined a couple of recipes on Orange Chicken, such as one from Sunny Anderson, and came up with this one. It is sweet, salty, somewhat tangy, a little spicy and of course, it tasted like orange. That Panda isn't going to be eating more of my money.

Orange Chicken
Recipe adapted by Me

Ingredients
Vegetable oil, for frying
2 chicken breasts, cut into bite sized pieces
2 eggs
Salt and freshly ground black pepper
1 cup all-purpose flour
1/2 cup cornstarch

Sauce
1 1/2 cups orange juice
1/3 cup golden brown sugar
1 1/2 tablespoons Worcestershire sauce
1 tablespoon Soy Sauce
Pinch of Red Pepper Flakes
1 tsp cornstarch

Directions
In a pot or a fryer, heat the oil to 350 degrees F.

In a saucepan, combine the orange juice, brown sugar, worcestershire sauce and soy sauce together and heat it on the stove. Bring it to a boil and continue to boil it until is is reduced and has become slightly thicker, about 8-10 minutes. Add in red pepper flakes to taste. In a small cup combine the cornstarch with about 1 tbsp of water to make a slurry. Add the slurry into the sauce while whisking and cook for another minute or two. Set aside and keep warm.

Using a medium sized bowl, combine the flour and cornstarch. Then in another bowl, whisk together the eggs, salt and pepper. Add in the chicken to the egg and mix until everything is coated. Next, take the chicken pieces only and coat them in the flour mixture. Add the coated chicken to the oil and cook for about 5 minutes until the chicken is golden brown and crispy. Remove from the oil and place on a wire rack to cool.

When all the chicken pieces are cooked, add the pieces to the sauce and mix thoroughly. Cook them together on medium heat for about 2 to 3 minutes so that the chicken has a chance to absorb the sauce.  Remove from the pot and serve with rice.

-Aaron John

Sunday, May 20, 2012

Apple Chips


"An apple a day keeps the doctor away", but what about 15 apple chips? When I was younger, there was one thing I always got at the McChord AFB Commissary and that was Apple chips. Why? No clue. To think that Apple Chips are sold in essentially every store and yet the only time I got them was from a place 40 miles away from my home is crazy. It became somewhat of a ritual, something that felt more special then.


These days, my family rarely goes there; it's sort of an "out of the way" kind of thing. Gone are those days but those tiny food memories are something I will always remember. So, in a time where I purchased mealy apples and was set to throw them in the trash, this memory inspired me to use up the apples and create new memories.


Slowly cooking the apples in the oven until crisp, having that intense sweet apple flavor with a hint of spice and the disappearance of that "mealy apple" texture, not to mention the health factor, these are a great alternative to the store bought Apple Chips or potato chips in general.

Apple Chips
Recipe by Me

Ingredients
2 large apples
1/4 cup granulated sugar
1 tbsp ground cinnamon
1 cup water
Juice from half a lemon

Directions
Preheat the oven to 200 degrees F. In the meantime, line 2 baking sheets with silpat non stick baking mats or parchment paper to prevent the apples from sticking. In a small bowl, combine the cinnamon and sugar and set aside. Next, place your water and the juice of half a lemon into a medium sized bowl. This will prevent the apples from oxidizing and turning brown.

Once everything is set to go, with a knife or using a mandolin, begin to slice the apples into 1/8 inch slices and place the slices directly into the water and lemon juice mixture. There is no need to peel the apples before hand. If desired, you can core the apple as well. If you are not coring them, make sure to remove the seeds before baking.

When everything is sliced, pat the apple slices dry and begin putting the slices on the the baking sheet in a single layer. Sprinkle the top with cinnamon sugar and place in the oven for 2 1/2 hours, flipping halfway through the baking process. Remove from the oven when the apples are not pliable and crisp all the way through. If not crisp by 2 1/2 hours, turn up the heat to 275 degrees and bake for 5 more minutes while keeping an eye on them!

-Aaron John

Sunday, May 6, 2012

Pineapple Upside Down Cake


What screams "lounging in the sun, that warm tropical breeze running through your hair, warm sand between your toes, the sound of waves crashing onto the shore and an ice cold drink in one hand" more than Canned Pineapple?! Uh, an actual Fresh Pineapple? Yes, yes, a Fresh Pineapple screams all those things 10X better but what are you to do when all you have is the canned stuff?


Ok, maybe for a Canned Pineapple it's more like sitting on your couch, an electric fan running, your feet up on the coffee table, the sound of a great movie and a soda in one hand.


The two may be different but they both encompass being relaxed and the pineapple both encompass a Pineapple Upside Down Cake. However, we can all agree that sometimes one method packs more of a punch than the other. In this case, Canned Pineapple will just have to do.

Pineapple Upside Down Cake
Recipe by Eva Longoria


Ingredients
2/3 cup unsalted butter, at room temperature (1/3 cup for topping, 1/3 cup for cake)
1/2 cup packed light brown sugar
7 slices pineapple
7 drained maraschino cherries, or as needed (optional)
1 1/2 cups cake flour or all-purpose flour
1 cup sugar
2 teaspoons baking powder
1/2 teaspoon table salt
2/3 cup milk
1 teaspoon vanilla
1 large egg

Directions
Preheat the oven to 350°F. In a flameproof 9-inch cake pan, melt 1/3 cup of the butter over low heat. Sprinkle the brown sugar evenly over the butter and cook, stirring, until the sugar and butter are blended and there are no pools of melted batter, 2 to 4 minutes.

Arrange the pineapple on top of the caramel. Decorate with cherries if desired, placing them in the center of each pineapple slice. Set the pan aside.

In the work bowl of an electric stand mixer fitted with the paddle attachment, or in a large mixing bowl with a handheld mixer, place the flour, sugar, baking powder, and salt and mix on low speed until well combined. Add the remaining 1/3 cup of butter along with the milk and vanilla. Beat on medium speed for 2 minutes. Scrape down the sides of the bowl. Add the egg and beat on medium speed for 2 minutes. Pour the batter over the pineapple.

Bake until the cake is golden brown and a toothpick inserted in the center comes out clean, 40 to 50 minutes. Remove the pan from the oven and carefully tilt it in all directions to release the cake from the sides of the pan. Let cool in the pan for about 3 minutes. Turn the pan over onto a serving plate and let stand for 2 to 3 minutes. Carefully lift the pan off the cake. Use a spatula to remove any fruit that is stuck to the pan and place it on the cake. Serve warm or at room temperature.

-Aaron John

Sunday, November 20, 2011

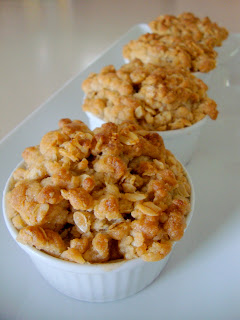
Apple Crisp


4 days until Thanksgiving and counting!! So, what desserts do you have planned on this day that's all about food, friends, and family? Tired of the boring old apple pie. What about that classic Pumpkin Pie. Even though, this Apple crisp has no pumpkin in it what so ever, it is filled with apple upon apples to turn that apple pie around into something different than that staple.

The crunchy, buttery, sweet, nutty tasting topping has cookie qualities to it almost like a lace cookie. Alone, it's just as good as the whole dessert. The apples and the acidity from the lemon cuts through the sweetness just enough so that you want to take that extra bite. 

Still think this is boring? Try adding pears to give a different dimension of flavor. Even add dried cranberries to mirror the flavor of cranberry sauce. Want to intensify this apple flavor? Why not add a little apple cider (maybe 1/4 cup) and a bit of flour to thicken the sauce to "confit" the apples as they are baking. There are many variations to a crisp and since it is the fall season after all, you are more than likely to have a couple of apples laying around to make this sweet dessert.

Apple Crisp
Recipe by Ina Garten

Ingredients
5 pounds McIntosh or Macoun apples
Grated zest of 1 orange
Grated zest of 1 lemon
2 tablespoons freshly squeezed orange juice
2 tablespoons freshly squeezed lemon juice
1/2 cup granulated sugar
2 teaspoons ground cinnamon
1 teaspoon ground nutmeg

For the topping:
1 1/2 cups flour
3/4 cup granulated sugar
3/4 cup light brown sugar, packed
1/2 teaspoon kosher salt
1 cup oatmeal
1/2 pound cold unsalted butter, diced

Directions
Preheat the oven to 350 degrees F. Butter a 9 by 14 by 2-inch oval baking dish.

Peel, core, and cut the apples into large wedges. Combine the apples with the zests, juices, sugar, and spices. Pour into the dish.

To make the topping, combine the flour, sugars, salt, oatmeal, and cold butter in the bowl of an electric mixer fitted with the paddle attachment. Mix on low speed until the mixture is crumbly and the butter is the size of peas. Scatter evenly over the apples.

Place the crisp on a sheet pan and bake for 1 hour until the top is brown and the apples are bubbly. Serve warm.

-Aaron John

Saturday, June 18, 2011

Peach Cobbler


When I think of Peach Cobbler, I think of the South. When I think of the South, I think of Southern Food. When I think of Southern food, I think of Paula Deen, the queen of Southern Cuisine. This lady really loves her butter. She may even deep fry butter and eat the whole thing. But hey, who hasn't thought of doing that themselves? ha. So, who better to get a Peach Cobbler recipe from than the good ol' Paula Deen.

I've been wanting to make a Peach Cobbler for a long time. However, I couldn't find any fresh peaches! I thought Summer was here already? Well, I went to the second best thing, frozen peaches. Supposedly, frozen fruit and vegetables are "picked at the peak of freshness" and I would have to agree. Sweet yet tangy, tender yet had a bite. It's all you want in fruit without all the work of peeling and chopping. Thus, when life gives you peaches, make a Peach Cobbler.

Tips
-I halved this recipe and baked it in a 9 in pie pan
-Instead of the fresh peaches, I used one 16 ounce bag of frozen. If making the full recipe, use two 16 ounce bags
-Don't mix the layers or butter, batter and peach. Leave it as is.

Results
Taste: Surprisingly, not overpoweringly sweet. There was a nice balance between the somewhat tart peaches, and the sweetness of it's syrup with the sweetness from the crust and added cinnamon to give some spice. 

Texture: The peaches were tender and not overcooked and the batter that did not brown on the top gave the cobbler a creamy aspect. However, it did have a gummy quality to it. The best part had to be the browned crust. It gave a nice textural difference with it being crunchy. But, I would love to try to make a cobbler using layers of pie crust instead because the gummy quality was not liked by my familia. 

Peach Cobbler
Recipe by Paula Deen

Ingredients
4 cups peeled, sliced peaches
2 cups sugar, divided
1/2 cup water
8 tablespoons butter
1 1/2 cups self-rising flour
1 1/2 cups milk
Ground cinnamon, optional

Directions
Preheat oven to 350 degrees F.

Combine the peaches, 1 cup sugar, and water in a saucepan and mix well. Bring to a boil and simmer for 10 minutes. Remove from the heat.

Put the butter in a 3-quart baking dish and place in oven to melt.

Mix remaining 1 cup sugar, flour, and milk slowly to prevent clumping. Pour mixture over melted butter. Do not stir. Spoon fruit on top, gently pouring in syrup. Sprinkle top with ground cinnamon, if using. Batter will rise to top during baking. Bake for 30 to 45 minutes.

To serve, scoop onto a plate and serve with your choice of whipped cream or vanilla ice cream

-Aaron John

Saturday, February 19, 2011

Blueberry Scones Part Deux


This week, I had this extreme craving for a Blueberry Scone that I actually went and bought two Blueberry Scones this week. With one bite of the Blueberry Scones, time had stopped. Everything moved slowly and images of the past flowed through my mind. What images of my past flowed through my mind you ask? The Blueberry Scone disaster I had about 8 months ago.

Was that a disaster or what? I can remember it as if it were yesterday. The frustration, the despair, the feeling of failure. I couldn't just let that event be. It was time to tackle those Blueberry Scones once again and show them who's boss.

Did I finally triumph over this recipe? No. Were these scones a complete success? Not quite. Were these an improvement from the first time around? Absolutely!

Just like everything, practice makes perfect. I definitely need more practice in the Scone making department but I will get there soon enough! Until then, it's back to square one! These scones will eventually be conquered!

Tips
-Instead of heavy cream, I decided to use half and half because the first time I made them, it did not work well with cream.

-I used frozen blueberries in this recipe. It's important to NOT THAW the blueberries when mixing in.

Results
Taste: Buttery and slight sweet "scone bread" with the tang of the blueberries.

Texture: The scones came out to be more doughy than I would have liked. 

Blueberry Scones with Lemon Glaze (Makes 8 scones)
Recipe by Tyler Florence
Ingredients
Blueberry Scones:
2 cups all-purpose flour
1 tablespoon baking powder
1/2 teaspoon salt
2 tablespoons sugar
5 tablespoons unsalted butter, cold, cut in chunks
1 cup heavy cream, plus more for brushing the scones (1 cup half and half)
1 cup fresh blueberries

Lemon Glaze:
1/2 cup freshly squeezed lemon juice
2 cups confectioners' sugar, sifted
1 lemon, zest finely grated
1 tablespoon unsalted butter

Directions
Preheat the oven to 400 degrees F.

Sift together the dry ingredients; the flour, baking powder, salt, and sugar. Using 2 forks or a pastry blender, cut in the butter to coat the pieces with the flour. The mixture should look like coarse crumbs. Make a well in the center and pour in the heavy cream. Fold everything together just to incorporate; do not overwork the dough. Fold the blueberries into the batter. Take care not to mash or bruise the blueberries because their strong color will bleed into the dough.

Press the dough out on a lightly floured surface into a rectangle about 12 by 3 by 1 1/4 inches. Cut the rectangle in 1/2 then cut the pieces in 1/2 again, giving you 4 (3-inch) squares. Cut the squares in 1/2 on a diagonal to give you the classic triangle shape. Place the scones on an ungreased cookie sheet and brush the tops with a little heavy cream. Bake for 15 to 20 minutes until beautiful and brown. Let the scones cool a bit before you apply the glaze.

Technically you should make this simple lemon glaze in a double boiler (i.e. over a pot of simmering water with a heatproof bowl set on top) but it's even simpler to zap it in the microwave. Mix the lemon juice and confectioners' sugar together in a microwave-safe bowl. Stir until the sugar dissolves. Add the lemon zest and butter. Nuke it for 30 seconds on high. Whisk the glaze to smooth out any lumps, then drizzle the glaze over the top of the scones. Let it set a minute before serving.

-Aaron John

Friday, November 19, 2010

Apple Crostata


So, this past week was a week of decisions. First, I needed to decide what classes to take this coming Winter Quarter. Second, I had decide what major would be best for me. Third, I had to decide what to do with my other blog "AJ's Food Adventure". Well, I decided on things for all three. I've decided to go along the Biochemistry path. I figured, it may be hard and difficult but if I keep giving up, where will I end up? I need to stick to this major, not have doubts and have confidence that I can pull through. Second, going on the Biochemistry path involves taking the next level of Biology classes which I am fully prepared to do. Finally, I have decided to discontinue my other blog "AJ's Food Adventure" within the next week or two. Why? I don't use that blog that often, if at all. "AJ's Food Adventure" started my "blogging career" and now it's time to let it go. It's sad to have to let it go but I feel it's time. Overall, life is full of decisions so "Live YOUR Life. Choose YOUR Path"

With the kind of weeks I've been having, I needed comfort in the form of Apple Crostata. An opened faced pie that doesn't require a pie pan? Say Whaaa?! In addition, it's extremely easier to slice a piece from this "circle of goodness" than it does by digging into a full deep dish apple pie. Sure, deep dish apple pies are a show stopper but this Crostata has the same flavors in a nice compact little package. :)

Tips
-Feel free to make the dough in a bowl with pastry cutters or forks. I, myself, used the fork method. The trick is to break down the butter enough to where the butter is the size of peas. With chunks of butter running through the dough, it guarantees a flakey Crostata

-The dough will seem dry when using pastry cutters/forks. My suspicion is using the forks doesn't produce heat whereas a food processor does. This heat will cause a tiny bit of the butter to melt slightly to add moisture to the dough. Don't get nervous though. Just work the dough a little bit until it comes together. Don't handle it too much because you want butter pieces. 

-When the baked Apple Crostata is cool enough to handle, lift the parchment paper and slide the Apple Crostata on your serving platter. Lifting the Crostata with spatulas will cause the Crostata to break. 

Results
Taste: A slight tang from the apples, sweet yet savory and buttery quality to the crust, and "spicyness" from the addition of cinnamon to scream Fall/Winter. Essentially, an apple pie that's 10 times easier

Texture: Apples were tender yet still al-dente and the crust was flakey. Definitely a great sign of a properly baked apple dessert! 

Apple Crostata
Recipe by Giada De Laurentiis

Ingredients
Crust:
1 1/2 cups all-purpose flour
2 tablespoons sugar
1/2 teaspoon salt
10 tablespoons (1 1/4 sticks) unsalted butter, chilled, cut into 1/2-inch pieces
3 tablespoons ice water
Filling:
2 small Golden Delicious apples, peeled, halved, cored, cut into 1/8-inch-thick slices
1 Pippin apple, peeled, halved, cored, cut into 1/8-inch-thick slices
1/4 cup plus 1 tablespoon sugar
1 teaspoon fresh lemon juice
1 large egg white beaten with 1 tablespoon of water (for egg wash)
2 tablespoons sliced almonds, toasted

Directions
To make the crust: Mix the flour, sugar, and salt in a processor. Add the butter. Pulse until the mixture resembles a coarse meal. Add the ice water and pulse until moist clumps form. Gather the dough into a ball; flatten into a disk. (If the dough still crumbles and does not form into a ball, add another tablespoon of ice water.) Wrap the dough in plastic and refrigerate until firm, about 1 hour.

For the filling: Position the rack in the center of the oven and preheat the oven to 400 degrees F.

Combine the apples, 1/4 cup of sugar, and lemon juice in large bowl; toss gently to blend. Set aside for 10 minutes.

Meanwhile, dust a large sheet of parchment paper with flour and roll out the dough on the paper to an 11-inch round. Transfer the dough on the parchment paper to a heavy large baking sheet. Spoon the apple mixture over the dough, leaving a 2-inch border. Fold the dough border over the filling to form an 8-inch round, leaving the apples exposed in the center. Pleat loosely and pinch the dough to seal any cracks. Brush the crust with the egg wash and sprinkle with the remaining 1 tablespoon of sugar.

Bake the crostata until the crust is golden and the apples are tender, about 40 minutes. Transfer the baking sheet to a rack; cool for 10 minutes. Slide a metal spatula under the crust to free the crostata from the baking sheet. Cool the crostata to lukewarm. Sprinkle with the almonds and serve.

-Aaron John

Wednesday, October 13, 2010

Love Potion #31 And A Giveaway


Oh Seattle weather, how you ruin my pictures by hiding the sun with your clouds... haha

I guess today's your lucky day because it's once again time for another Giveaway courtesy of CSN Stores. Woot! I guess this is my thank you to you for helping me out in the Project Food Blog Competion.Like I've said many times before, CSN stores has so many great products to buy. Whether you need some new Bed Sets or even a kitchen table, they've got it. Seriously, if you still haven't checked out CSN yet (even though I've said it multiple times), go and do it! ha. Plus, you can think of what you can buy with this Gift Certificate! :)

Let's get back to the giveaway a little later. This post is going to be somewhat short since I have so much work to do! lol. But, in continuation of my "Ice Cream Into Cookies" project, I decided to do another cookie. This cookie is mirrored after Baskin Robbins "Love Potion #31" Ice Cream. In honor of that ice cream, this "Love Potion #31" cookie is simply a chocolate chip cookie dough mixed with white and milk chocolate chips and is baked with raspberry jam in the center. Think of it as a chocolate chip cookie meets a thumbprint cookie.


Now, back to what you've all been waiting for, the giveaway. Like I said before, I was approached by CSN to do a giveaway. This time, CSN Stores is giving you the chance to win a $55 Gift Certificate for any of their online stores! I repeat, $55 Gift Certificate!! Here's how to enter:

You must be a follower of "AJ's Cooking Secrets" through the Google Friend Connect located on the left side bar of my blog to enter this giveaway. If you are not a follower, your entry and/or entries will not be counted.

You have FOUR chances to enter!!
1. Leave a comment stating what you would like to buy from CSN Stores with the $55 Gift Certificate, along with your email.
2. Follow my other blog, AJ's Food Adventure, and leave a comment below stating that you have become a follower. If you are already a follower of my other blog, leave a comment stating that you are.
3. Become a fan/liker of my Facebook Fan Page : AJ's Cooking Secrets and leave a comment below stating that you have become a fan/liker. If you are already a fan/liker of my FB Fan Page, leave a comment stating that you are.
4. Follow me on Twitter @aaronjohn04 and leave a comment below stating that you have become a follower. If you are already a follower of my twitter page, leave a comment stating that you are.

**If entering all four times, leave four different comments.

Important Guidelines:
-Must be a follower of this blog, "AJ's Cooking Secrets", through Google Friend Connect located on the left side bar for your entry/entries to count. Anyone who "enters" without being a follower of this blog will not be entered into the drawing.
-The Giveaway will last until Sunday, October 20, 2010 at 11:59 PM PST. The winner will be drawn using Random.org. The winner will then be announced in a blog post, on my facebook page and emailed that they are the winner. From there, the winner will be contacted by CSN Stores where you will receive a Gift Certificate Code.

Results
Taste: Combination of the classic milk chocolate flavor and vanilla flavored white chocolate topped off with tart raspberry jam to cut the sweetness

Texture: Classic chewiness from the cookie but with an extra added chewiness from the raspberry jam that cooked in the oven.

Tips
-There aren't really many tips to this cookie, I guess a key tip is to not overfill each scoop of cookie dough with chocolate chips? You're probably saying to yourself, "Whaaa? You're crazy! I want my chocolate!" but seriously, it helps when you go to make an indentation for the jam.


"Love Potion #31" Cookie (Makes 1 Dozen 5 inch Cookies or 4 Dozen Mini Cookies)
Ingredients
2 1/2 cups all-purpose flour
1 teaspoon baking soda
1 teaspoon salt
1 cup (2 sticks) unsalted butter, at room temperature
1/2 cup white sugar
3/4 cup packed light brown sugar
1 teaspoon pure vanilla extract
2 large eggs
1 1/2 cups white chocolate chips
1 1/2 cups milk chocolate chips
1/2 cup Raspberry Jam

Directions
Preheat the oven to 350 degrees F.

Line 2 cookie sheets with parchment paper. Sift together the flour, baking soda, and salt into a medium bowl and set aside.

Place the butter, sugar, and brown sugar in the bowl of an electric mixer; cream together on medium speed until light and fluffy. Scrape down the sides of the bowl with a rubber spatula. Beat in the vanilla and eggs. Gradually add the dry ingredients to the creamed mixture and continue to mix until a smooth batter forms. Turn off the mixer and fold in the chocolate chips using the spatula.

To form the cookies, scoop about 1/4 cup of cookie dough into your hands and roll it around into a ball; place them about 3-inches apart onto the prepared cookie sheets; you should get about 4 cookies on each pan. Press down the tops of the dough slightly and make an indentation in the center. Fill the center with about 1/2 tsp of raspberry jam. Bake until the cookies are light brown, 12 minutes for chewy cookies, or about 15 minutes for crispy cookies.

Allow the cookies to cool on the baking sheets for 5 minutes before transferring to a wire rack to cool completely. Repeat with remaining dough/cookie sheets.

Saturday, October 9, 2010

Blueberry Crumb Cake

The Project Food Blog Competition has now ended for me
Sad to say, but it just had to be
So, one last rhyme to end it right
Since the road to make it this far was quite a sight
Thanks to everyone who helped me along the way
Without you, I would have nothing to say
You voted and turned my hearts into the color of red
Even when you could've voted for others instead
I'm so grateful for the opportunities the competition gave
It allowed me to improve and the experiences I will save
It's bittersweet to be out so fast
But, the competition was definitely a blast 
To be honest, this competition gave me stress
Trying to finish a post and impress
Barely finishing on time because of school
At the end of the day it was all cool
I discovered new blogs to follow and read
Even new twitter followers, yes indeed!
Now I'm back to my usual blogging days, 
Focusing on school and cooking whenever I may
Once again Thank you so much for all your help because it was a lot of fun
PFB 2010, for me, is officially done.

Yes, you've read right. I've been eliminated out of the Project Food Blog 2010 Competition. Sad. ha. But I think the timing was right for me. My work for classes is increasing by the days and I don't know how much longer I would have been able to keep up with the competition and school work at the same time. I mean, I start everyday by waking up at 5:30 AM and don't sleep until all my work is done which is usually at midnight every night. This cycle repeats over and over. A bit much don't ya' think? In fact, after I make this blog post, it's back to getting all this work done. Oh college...

Anyway, what better way to have UW spirit than making a cake with our school colors, Purple and Gold?! A blueberry crumb cake that is bursting with purple blueberries and surrounded with a golden cake and streusel. YUM!! Even though I'm bombarded with school work, I still have the school spirit!! :D Everything I'm going through now will be worth it in the end.

Results
-Taste: The lemon in the cake added just enough flavor without overpowering the whole cake. The blueberries gave a tartness which cut down on some of the sweetness. Don't get me wrong, it wasn't a sweet cake but the added blueberries worked well with the lemon. The cake was just sweet enough. In the streusel, you can definitely taste the nutmeg and it wasn't too sweet either. Great combo of flavors!

-Texture: Streusel gave a crunchy layer that worked well in contrast to the soft, fluffy and moist cake. However, the streusel was dry. It may have been because I had to bake the cake longer or I would simply reduce the flour to 1 cup.

Tips
-I added a bit more lemon zest than what was called for to have more flavor. Usually the zest of one lemon has a little over 1/2 tsp of lemon zest so I went ahead and used the zest of one lemon instead.

-Toss your blueberries in flour before adding to the batter. Supposedly it's supposed to prevent the blueberries from sinking but that didn't help with mine. ha

-Feel free to use frozen blueberries. However, don't over mix because your batter WILL begin to turn blue-ish in color. I would even suggest to not mix the blueberries into the batter. Instead, pour the batter into the pan, spread it out, sprinkle in the blueberries over the top and press the blueberries gently into the batter until they are covered. I think this would also help in "suspending" the blueberries in the batter. In addition, it will cook a little longer. Mine cooked for about an hour instead of the 40-50 min since I used the frozen.

-Some people suggest to use a spring form pan instead of a cake pan for a "nicer" presentation and losing less streusel but I made mine in a cake pan and I had no problem. I only lost about a tablespoon of streusel while inverting the cake so it wasn't a problem. I would say either method would work fine.

-When using a regular cake pan and inverting the cake, first take something flat such as a plate of cardboard cake round, and place it on top. Invert the cake quickly so that now, the streusel is on the bottom. Next take your cooking rack, place that on top, and invert the cake a second time to finish off the cooling. Once cooled, you can easily pick up the cake and place it on your serving platter.

Blueberry Crumb Cake (6-8 Servings)
Recipe by Ina Garten
Ingredients
For the streusel:
1/4 cup granulated sugar
1/3 cup light brown sugar, lightly packed
1 teaspoon ground cinnamon
1/8 teaspoon ground nutmeg
1/4 pound (1 stick) unsalted butter, melted
1 1/3 cups all-purpose flour

For the cake:
6 tablespoons unsalted butter, at room temperature (3/4 stick)
3/4 cup granulated sugar
2 extra-large eggs, at room temperature
1 teaspoon pure vanilla extract
1/2 teaspoon grated lemon zest
2/3 cup sour cream
1 1/4 cups all-purpose flour
1 teaspoon baking powder
1/4 teaspoon baking soda
1/2 teaspoon kosher salt
1 cup fresh blueberries
Confectioners' sugar for sprinkling

Directions
Preheat the oven to 350 degrees F. Butter and flour a 9-inch round baking pan.

For the streusel:
Combine the granulated sugar, brown sugar, cinnamon, and nutmeg in a bowl. Stir in the melted butter and then the flour. Mix well and set aside.

For the cake:
Cream the butter and sugar in the bowl of an electric mixer fitted with the paddle attachment on high speed for 4 to 5 minutes, until light. Reduce the speed to low and add the eggs 1 at a time, then add the vanilla, lemon zest, and sour cream. In a separate bowl, sift together the flour, baking powder, baking soda, and salt. With the mixer on low speed, add the flour mixture to the batter until just combined. Fold in the blueberries and stir with a spatula to be sure the batter is completely mixed.

Spoon the batter into the prepared pan and spread it out with a knife. With your fingers,

crumble the topping evenly over the batter. Bake for 40 to 50 minutes, until a cake tester comes out clean. Cool completely and serve sprinkled with confectioners' sugar.

-Aaron John

LinkWithin

Related Posts with Thumbnails