Showing posts with label baking. Show all posts

Saturday, August 23, 2014

Cinnamon Roll Pull Apart Coffee Cake with Pecans


I think I'm just slightly obsessed with cinnamon rolls. Maybe it's the cinnamon sugar? Maybe it's the cream cheese frosting? Maybe it's the bread? Maybe it's an excuse to eat something sweet for breakfast? Either way, who can resist a cinnamon roll? I know I can't.


In about two weeks, I'll be headed to San Diego and a part of me is looking forward to buying a Cinnabon cinnamon roll at the airport before the flight. Those oversized cinnamon rolls are so freaken' delicious! The smell alone is just so badass! Please...can I just have one now?


It's been years since I've made cinnamon rolls but I didn't want to make a cinnamon roll. I'll leave that up to Cinnabon. But I still had a craving for it, two weeks is way too long of a wait. I just had to have something cinnamon-y. Therefore, this Cinnamon Roll Pull Apart Coffee Cake with Pecans will do!


If you are a fan of the innards of a cinnamon roll, this is for you. Innards is probably not the best word to describe something so delicious, but who cares. It's fluffy, sweet and reminds me of the center of cinnamon rolls. The pecans give it a little somethin' somethin' to cut through the sweetness and give a little crunch. Don't like pecans? Leave it out or substitute it. I'm not one to judge what you do in your kitchen. Either way, it will be delicious!


Cinnamon and Lemon Pull-Apart Coffee Cake
Original recipe by Flo Braker
Makes a 9″x 5″ pan 

Ingredients
Sweet Yeast Dough
About 2 3/4 cups (12 1/4 ounces) all-purpose flour
1/4 cup (1 3/4 ounces) granulated sugar
2 1/4 teaspoons (1 envelope) instant yeast
1/2 teaspoon salt
1/3 cup (2 1/2 fluid ounces) whole milk
2 ounces unsalted butter
1/4 cup (2 fluid ounces) water
1 1/2 teaspoons pure vanilla extract
2 large eggs, at room temperature

Cinnamon Sugar Filling
1/2 cup golden brown sugar
1 tablespoon ground cinnamon
1/4-1/2 cup chopped pecans

2 ounces unsalted butter, melted to be spread over the dough

Tangy Cream Cheese Icing
3 ounces cream cheese, softened
1/3 cup (1 1/4 ounces) powdered sugar
1 tablespoon whole milk
1 tablespoon fresh lemon juice

Directions
Make the Sweet Yeast Dough
Mix two cups (nine ounces) flour, the sugar, yeast, and salt in a medium bowl with a rubber spatula. Meanwhile, in a small saucepan or in the microwave, combine the milk and the butter and heat until the butter is melted. Remove from the heat, add the water, and let rest a minute until just warm (120 to 130°F [49 to 54°C]). Stir in the vanilla extract.

Pour the milk mixture over the flour-yeast mixture and, using a rubber spatula, mix until the dry ingredients are evenly moistened. Attach the bowl to the mixer, and fit the mixer with the paddle attachment. With the mixer on low speed, add the eggs, one at a time, mixing after each addition just until incorporated. Stop the mixer, add 1/2 cup (2 1/4 ounces) of the remaining flour, and resume mixing on low speed until the dough is smooth, 30 to 45 seconds. Add 2 more tablespoons flour and mix on medium speed until the dough is smooth, soft, and slightly sticky, about 45 seconds.

Lightly flour a work surface and knead the dough gently until smooth and no longer sticky, about one minute. Add an additional 1-2 tablespoons of flour only if the dough is too sticky to work with. Place the dough in a large bowl, cover it with plastic wrap, and let it rise in a warm place (about 70°F [21°C]) for 45-60 minutes or until doubled in size. An indentation made with your finger should keep its shape.

Meanwhile, make the cinnamon sugar mixture by combining the brown sugar and cinnamon together in a bowl. Set aside.

Center a rack in the oven and preheat the oven to 350°F (175°C). Grease a 9″x5″ loaf pan.

Gently deflate the dough with your hand. Flour a work surface and roll the dough into a 20″ by 12″ rectangle. [I suggest using a ruler and getting this as accurate as possible, for a prettier loaf that will fit better in the pan. I also suggest making sure both sides are floured, so that the dough will be easy to lift up later.] Use a pastry brush to spread the melted butter evenly and liberally over the dough.

Use a pizza cutter to cut the dough crosswise in five strips, each about 12″ by 4″. With the dough sliced but still together, sprinkle the dough lengthwise with the cinnamon sugar mixture, followed by the pecans. Take each rectangle and top one over the other. Continue to top with rectangles, so you have a stack of five 12″ by 4″ rectangles, all buttered and topped with the cinnamon sugar.

Slice this new stack crosswise, through all five layers, into 6 equal rectangles (each should be 4″ by 2″.) Carefully transfer these strips of dough into the loaf pan, cut edges up, side by side. It might be a little roomy, but the bread will rise and expand after baking. Loosely cover the pan with plastic wrap and let the dough rise in a warm place (70 °F [21°C]) until puffy and almost doubled in size, 30 to 50 minutes. When you gently press the dough with your finger, the indentation should stay.

Bake the loaf until the top is golden brown, 30 to 35 minutes.

Meanwhile, make the cream cheese icing. Beat the cream cheese and powdered sugar in a medium bowl with a wooden spoon until smooth, then add the milk and lemon juice. Stir until creamy and smooth.

The recipe recommends you tilt and rotate the pan while tapping on a table to release the loaf. I just carefully ran a knife around it. Flip the loaf over onto a cooling rack, then flip onto another rack so that it’s right side up. Spread the top of the warm cake with the cream cheese icing, using a pastry brush to fill in all the cracks.

-Aaron John

Saturday, April 6, 2013

Cinnamon Roll Bread Pudding


A couple weeks ago, I tried to love pudding by making Aborio Rice Pudding. Sad to say, that didn't go over so well. After watching the "Worst Cooks in America" finale last week and seeing Bobby Flay's mentee making Bread Pudding, it gave me the next opportunity to take another stab at Pudding. 


I assumed Bread Pudding would be something I would like because it contained bread and if you know me, you know I'm a carb-aholic. But, you never know, pudding is a pudding, no matter how you slice it. Plus, I'm not exactly the type to like mushy bread so I was cautiously optimistic.


Did this Cinnamon Roll Bread Pudding taste like a Cinnamon Roll? Not exactly. More like Cinnamon Bread with custard. Was it able to convert me? Not exactly either. I wasn't really feeling the texture so much. Once again, texture comes into play as to why I'm not a fan of pudding. By the looks of it, I don't know if I'll ever be a fan of Pudding, but maybe third time's the charm?

Cinnamon Roll Bread Pudding
Recipe by Aida Mollenkamp

Ingredients
2 cups whole milk
3/4 cup heavy cream
4 large eggs
1/2 cup granulated sugar plus 1 tablespoon for garnish
1/3 cup nut-flavored liqueur (recommended: Di Saronno or Frangelico)
1 teaspoon vanilla extract
1/2 teaspoon kosher salt
7 cups large dice cinnamon challah (or plain challah or brioche plus 2 teaspoons ground cinnamon) (about 10 ounces challah)
1 cup walnuts, toasted and coarsely chopped

Directions
Heat the oven to 350 degrees F and arrange a rack in middle.

Whisk together milk, cream, eggs, 1/2 cup sugar, liqueur, vanilla, and salt in a medium bowl until egg is broken up and mixture is smooth. Evenly distribute bread and walnuts in a 2 quart baking dish, pour custard mixture over bread, and allow to soak for at least 15 minutes.

Meanwhile, bring about 8 cups water to a simmer over medium-high heat.

Evenly distribute remaining 1 tablespoon sugar over bread pudding. Set the filled baking dish into a larger roasting pan and add enough of the hot water to reach halfway up the sides of the baking dish. Bake until custard is set and top is lightly browned, about 50 to 60 minutes. Remove from water bath and let sit 5 to 10 minutes before serving. Serve warm, at room temperature.

-Aaron John

Saturday, September 15, 2012

Chocolate Raspberry Cake w/ Vanilla Bean Buttercream


Let's face it, cake has become one of those things that don't require a special occasion anymore. Eat at a restaurant. Cake. Walk up that flight of stairs. Cake. Watch some good ol' tv. Cake. Buy a new outfit. Cake.


What ever happened to the days when the only time we had cake was at a birthday party that your friend threw at a bowling alley when you were 10 years old?


Surely, I'm not the only one that noticed this. Whether a cake, a cupcake or an individually packaged slice of cake in the bakery aisle of your nearest grocery store, what have we become?


I'll tell you what we have become. People that live each day like it's a party and don't care who tells us no! So, move over health gurus. Today, WE EAT CAKE!


Don't forget to vote for me in the Evening Magazine Contest for Best Food Blog!!


Chocolate Raspberry Cake w/ Vanilla Bean Buttercream
Makes 1-9 inch 2 layer cake

Hershey's Chocolate Cake
Ingredients
Butter, for greasing the pans 
2 cups sugar
1 3/4 cups all-purpose flour, plus more for pans 
3/4 cups good cocoa powder 
1 1/2 tsp baking powder 
1 1/2 tsp baking soda
1 tsp kosher salt 
2 eggs
1 cup milk
1/2 cup vegetable oil
2 teaspoon pure vanilla extract 
1 cup boiling water

Directions
Heat oven to 350°F. Grease and flour two 9-inch round baking pans. 

Stir together sugar, flour, cocoa, baking powder, baking soda and salt in large bowl. Add eggs, milk, oil and vanilla; beat on medium speed of mixer 2 minutes. Stir in boiling water (batter will be thin). Pour batter into prepared pans.

Bake 30 to 35 minutes or until wooden pick inserted in center comes out clean. Cool 10 minutes; remove from pans to wire racks. Cool completely.

Vanilla Bean Buttercream 
Ingredients
3 sticks unsalted butter, softened
3 cups sifted powdered sugar
1/2 tsp vanilla bean paste
1 tsp pure vanilla extract
pinch of salt

Directions
In the bowl of an electric mixer fitted with the paddle attachment, whip butter until light and fluffy. Add in the powdered sugar, vanilla bean paste, vanilla extract and salt. Mix until smooth and creamy. Set aside.

Final Assembly
2 chocolate cake layers
1/2 cup raspberry jam/preserves
Vanilla bean buttercream
Melted semi-sweet chocolate (optional)

Directions
Place one of the chocolate cake layers on a cake board. Spread the raspberry jam/preserves over the top. Take the second chocolate cake layer and place it on top of the jam layer. Frost with vanilla bean buttercream and decorate with melted semi-sweet chocolate on the sides and pipe the remaining buttercream around the cake to make a border.

-Aaron John

Saturday, August 18, 2012

Sour Cream Coffee Cake


When I was younger, one of the first "cakes" I made was a coffee cake recipe by Martha Stewart. Well, with a new recipe, a better appreciation for food and many years later, I make a coffee cake that takes me back to the beginning.


Thinking about it now, I used to keep a booklet that contained printed recipes such as the one for the coffee cake. It came to the point where the splatters of vanilla extract, sights of chocolate smears and the dusting of flour just gave it a bit too much character.


Back then, I thought I perfected so many recipes in that little booklet only to find out there were better ones out there. All I have to say is, move over Martha Stewart because Ina Garten is here to stay.


This coffee cake is moist, fluffy, crunchy, nutty and not too sweet which is perfect. It takes me back to the beginning and then some. This is definitely a must make!


Sour Cream Coffee Cake
Recipe by Ina Garten

Ingredients
For the cake:
12 tablespoons (1 1/2 sticks) unsalted butter at room temperature
1 1/2 cups granulated sugar
3 extra-large eggs at room temperature
1 1/2 teaspoons pure vanilla extract
1 1/4 cups sour cream
2 1/2 cups cake flour (not self-rising)
2 teaspoons baking powder
1/2 teaspoon baking soda
1/2 teaspoon kosher salt

For the streusel:
1/4 cup light brown sugar, packed
1/2 cup all-purpose flour
1 1/2 teaspoons ground cinnamon
1/4 teaspoon kosher salt
3 tablespoons cold unsalted butter, cut into pieces
3/4 cup chopped walnuts, optional

For the glaze:
1/2 cup confectioners' sugar
2 tablespoons real maple syrup

Directions
Preheat the oven to 350 degrees F. Grease and flour a 10-inch tube pan.

Cream the butter and sugar in the bowl of an electric mixer fitted with the paddle attachment for 4 to 5 minutes, until light. Add the eggs 1 at a time, then add the vanilla and sour cream. In a separate bowl, sift together the flour, baking powder, baking soda, and salt. With the mixer on low, add the flour mixture to the batter until just combined. Finish stirring with a spatula to be sure the batter is completely mixed.

For the streusel, place the brown sugar, flour, cinnamon, salt, and butter in a bowl and pinch together with your fingers until it forms a crumble. Mix in the walnuts, if desired.

Spoon half the batter into the pan and spread it out with a knife. Sprinkle with 3/4 cup streusel. Spoon the rest of the batter in the pan, spread it out, and scatter the remaining streusel on top. Bake for 50 to 60 minutes, until a cake tester comes out clean.

Let cool on a wire rack for at least 30 minutes. Carefully transfer the cake, streusel side up, onto a serving plate. Whisk the confectioners' sugar and maple syrup together, adding a few drops of water if necessary, to make the glaze runny. Drizzle as much as you like over the cake with a fork or spoon.

-Aaron John

Saturday, August 11, 2012

Jalapeno Cornbread


Cornbread is something I've really come to enjoy, especially Honey Cornbread Muffins. But today, it is all about Jalapeno Cornbread. Cornbread is something that I've found difficult to get just right. With different recipes out there with more cornmeal than flour, less cornmeal than flour and equal parts cornmeal and flour, which do you choose?


With this recipe that I found on All Recipes, it seemed pretty good in terms of ratings but sometimes you can't really trust the ratings unless you make it yourself. As I began, I measured out all my ingredients only to find I only had 3/4 cup of cornmeal left! Instead of halving the recipe, I decided to just increase the flour  to 1 1/4 cups.


This cornbread looked perfect when it came out of the oven; an evenly baked, golden crusted cornbread got my hopes up. It had just enough texture from the cornmeal which I think would have been overkill if I followed the recipe exactly. However, this cornbread was not spicy at all and was BLAND! I would have increased the amount of jalapenos to 4 or left in the seeds because I was not able to taste them. I would have increased the salt just a bit as well. So much for that 4.5 star rating. So what's my choice on the proportions for cornbread? A little less cornmeal than flour or even equal amounts cornmeal and flour. This gives it the right amount of texture without feeling like your eating sand, in my opinion.

Jalapeno Corn Bread
Recipe from Archie Timmons

Ingredients
1 1/2 cups cornmeal
1/2 cup all-purpose flour
6 tablespoons sugar
2 teaspoons baking powder
1 teaspoon salt
1/2 teaspoon baking soda
2 eggs
1 cup buttermilk
1/4 cup olive oil
3 jalapeno peppers, seeded and finely chopped

Directions
In a bowl, combine the first six ingredients. In another bowl, whisk the eggs, buttermilk and oil. Add to the dry ingredients and stir just until moistened. Stir in jalapenos. Pour into a greased 9-in. square baking pan.

Bake at 400 degrees F for 20-22 minutes or until a toothpick inserted near the center comes out clean. Cut into squares or wedges. Serve warm.

-Aaron John

Saturday, March 10, 2012

Buttermilk Biscuits


So, a couple days ago, an interesting thing happened to me. I was on my way to to class and was waiting for the elevator to get to the Light Rail train station to China town. Then the most random guy began to talk to me saying how it's so windy and "You'll turn into an icicle if you don't get inside somewhere warm". We got into the elevator and he continued to talk about the wind. This guy had a lot to say about it!

You may think that the conversation would end after getting out of the elevator but noooooo. We were a good 30 feet apart and all of a sudden he comes walking up to me talking about his life. He was saying how he lived in California and the person down the street from him owned a rooster and it waked him up at 4 AM every morning. But wait! It gets better. He proceeded to imitate, yes IMITATE, what a rooster would do in the morning including making the sound they make. Who does that?!?! Really?!

Now at this point I began to say to myself "Oh my gosh. This guy is crazyyyyy". Then he let out this loud laugh and I began to nod my head and "laugh" quietly as well. I mean, you never know what's going to happen if you don't laugh when the other person begins to laugh. What else are you supposed to do? After taking public transportation for years, I've learned to always agree with the other person. You always have to be on guard. Luckily, a minute after he did his imitation the Light Rail came and I felt saved. 


So what do buttermilk biscuits have to do with this story? Well, when he did his imitation of a rooster, I began to think about what Country style food people would make on a farm and I thought biscuits, especially with saw mill gravy! I didn't have have sausage to make the gravy so I only made the biscuits that went with it using Alton Brown's recipe. 

When all is said and done, if you ever find yourself in a situation like the one I was in, all I have to say is agree, nod and "laugh"! ha

Buttermilk Biscuits
Recipe by Alton Brown

Ingredients
2 cups flour
4 teaspoons baking powder
1/4 teaspoon baking soda
3/4 teaspoon salt
2 tablespoons butter
2 tablespoons shortening
1 cup buttermilk, chilled

Directions
Preheat oven to 450 degrees.

In a large mixing bowl, combine flour, baking powder, baking soda and salt. Using your fingertips, rub butter and shortening into dry ingredients until mixture looks like crumbs. (The faster the better, you don't want the fats to melt.) Make a well in the center and pour in the chilled buttermilk. Stir just until the dough comes together. The dough will be very sticky.

Turn dough onto floured surface, dust top with flour and gently fold dough over on itself 5 or 6 times. Press into a 1-inch thick round. Cut out biscuits with a 2-inch cutter, being sure to push straight down through the dough. Place biscuits on baking sheet so that they just touch. Reform scrap dough, working it as little as possible and continue cutting. (Biscuits from the second pass will not be quite as light as those from the first, but hey, that's life.)

Bake until biscuits are tall and light gold on top, 15 to 20 minutes.

-Aaron John

Saturday, March 3, 2012

Cheesecake Thumbprint Cookies


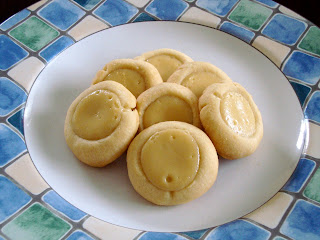
Cheesecake is one of those things that is rich and decadent. It definitely is a "Special Occasion" type of treat. But what about a version that you don't have to feel too guilty about? Why not take it a step forward and make it portable as well? So, what do you get when you merge the two? Cheesecake Thumbprint Cookies.


When searching for a recipe, I ended up with one from Cookie Madness which combined the crunchiness of a cookie and the creaminess of cheesecake in one. It starts off with a shortbread like cookie and is filled with a tangy cream cheese filling. This cookie is a process to make but pretty much has all the flavors of a cheesecake.


I would have loved the cookie to have more of a graham cracker flavor but it still was pretty good. You can even add more flavor by adding some jam into the cookie before filling it with the cheesecake. Now that's something I would love to try.

Cheesecake Thumbprint Cookies
Recipe from Cookie Madness (Adapted from Martha Stewart)

Ingredients
Cheesecake filling
4 ounces cream cheese, softened
1/4 cup granulated sugar
1/8 teaspoon salt
1 large egg yolk
1 1/2 teaspoons sour cream
1/4 teaspoon vanilla

Cookie dough
16 tablespoons unsalted butter, softened
1/4 cup granulated sugar
1/4 teaspoon salt
1 large egg yolk
2 cups all-purpose flour

Directions
For the filling beat cream cheese with the sugar and salt until smooth. Mix in egg yolk, sour cream and vanilla. Place into the refrigerator for 30 minutes.

Preheat oven to 350 degrees

For the cookie dough, beat together butter, sugar and salt until creamy. Add the egg yolk until combined and add the flour until it becomes cookie dough.

Scoop out tablespoons of the dough and roll into balls. Place balls onto parchment-lined baking sheets and make an indentation in the center of each ball with your thumb.

Place into the oven and bake for 10 minutes. Remove from the oven and carefully use your thumb to press the middle of the cookies back down, remaking the indentations. Place cookies back into the oven and continue to bake until slightly golden around the edges, about 7 minutes.

Remove cookies from the oven and fill with the cheesecake filling using a teaspoon. Place back into the oven and bake for 7 minutes. Remove from the oven and transfer cookies to a wire rack to cool. When cool, place cookies into the refrigerator to chill.

-Aaron John

Sunday, February 26, 2012

Frittata w/ Bacon, Scallions and Red Bell Pepper


What screams Sunday more than Brunch. It's not exactly breakfast but it's not exactly lunch either. It's a perfect excuse to eat bacon, sausage and eggs at the same time as eating muffins and scones, all in the same sitting! No need to feel guilty when food like that is being served. I mean, you have to try everything right? Just to make sure it all tastes good. 


If you're hosting a brunch, making a Frittata is the way to go. A Frittata is an egg dish in which you literally throw in anything you have on hand. Mushrooms, zucchini, eggplant, ham or whatever you have lying around, feel free to throw it in. This is the perfect alternative to an omelet. Who really wants to stand at the stove during brunch making everyone omelets anyway?


I didn't really have that many vegetables on hand so my Frittata was made simple. What's more classic that bacon and cheese? I threw in some scallions for that oniony bite and some red bell peppers for texture. Now this is what I call an easy brunch item to make.

Frittata w/ Bacon, Scallions and Red Bell Pepper
Recipe by Me
Serves 4
Ingredients
8 eggs
½ cup milk
¼ cup Parmesan cheese
½ tsp pepper
¼ tsp salt
8 slices bacon, sliced into lardoons
4 scallions, slices on a bias
½ red bell pepper, diced

Directions
Preheat the oven to 350 degrees

In an oven safe sauté pan, begin to crisp up the bacon lardoons for about 5-10 min. While the bacon is crisping, crack 8 whole eggs into a bowl and add the milk, Parmesan cheese, pepper, salt, scallions and red bell peppers. Whisk together until combined.

Once the bacon is crisp, remove most of the fat out of the pan. Add the egg mixture directly into the pan with the bacon and mix. On a medium heat, cook for about 5 minutes until the edges begin to pull away from the sides of the pan. Pop it into the oven and cook for an additional 15 min, or until a knife placed into the center comes out clean. Serve right out of the pan

-Aaron John

Sunday, January 29, 2012

Cinnamon Roll Pound Cake Coffee Cake


After a week of midterms I finally have time to blog again! The other day, I was looking through all the "food porn" sites such as foodgawker and tastespotting and is it weird that I wasn't getting inspiration? I literally couldn't think of what I wanted to blog about or didn't see anything on one of the sites that made me say " I am sooooo making that!!"

I went on other food blogs and still had no luck in what to make so I went to the foodnetwork site where Coffee Cake entered my mind. Don't get me wrong, I love a great coffee cake but when I see recipes that have twice as much butter in the crumb topping than in the cake, meaning TWO STICKS, I have some problems. So I came up with this.


I guess you can say this is an experiment within a recipe test. For the cake base, I went for a pound cake recipe I found, but never tried, by Tish Boyle that looked delicious and moist. I actually halved the pound cake recipe for my cake which was actually not enough for the cake. Definitely make the whole batch of cake for a thick cake!


Anyways, I decided to experiment and top the batter with what I normally put in a cinnamon roll, brown sugar and cinnamon, swirl it in and waited to see how it turned out. I then iced it with a powdered sugar icing. This is exactly why it's a cinnamon roll, in a pound cake, eaten as a coffee cake. This Pound Cake was moist and dense and the topping gave a cinnamon roll flavor with coffee cake texture without all the butter. The pound cake itself was great so if you don't feel like making a Cinnamon Roll Pound Cake Coffee Cake, the pound cake is worth it!

Cinnamon Roll Pound Cake Coffee Cake
Cake Base Adapted from Tish Boyle's Lemon Pound Cake
Makes 1-9 inch cake or 1 Loaf

Ingredients
Cake:
2 cups sifted cake flour
1/4 teaspoon baking powder
1/4 teaspoon salt
1 cup unsalted butter, softened
1 1/4 cups granulated sugar
4 large eggs
1 teaspoon finely grated lemon zest
1 tablespoon vanilla extract
1/3 cup heavy cream

Topping
1/3 cup brown sugar
1 tsp cinnamon

Icing
1 tbsp butter
1/2 tsp vanilla
1/4 lb powdered sugar
2 tbsp milk

Directions
Position a rack in the center of the oven and preheat the oven to 325°F. Grease and dust a 9 inch cake pan and set aside. (Or, if you want a plain pound cake, grease the bottom and sides of a 9 1/2 x 5 1/2-inch loaf pan. Dust the pan with flour and set aside.)

In a medium bowl, sift together the flour, baking powder, and salt. Whisk to combine well and set aside.

In the bowl of an electric mixer, using the paddle attachment, beat the butter at medium speed until very creamy, about 2 minutes. Gradually add the sugar and beat the mixture at medium-high speed until very light, about 4 minutes. Reduce the speed to low and add the eggs one at a time, beating well after each addition and scraping down the sides of the bowl occasionally (the mixture should look curdled at this point). Beat in the citrus zest and vanilla extract. Add the flour mixture at low speed in three additions, alternating it with the heavy cream in two additions. Mix just until the flour is incorporated.

Scrape the batter into the prepared pan and smooth the top.

Mix the brown sugar and cinnamon until combines and sprinkle over the top of the batter. Swirl into the cake.

Bake for about 30-40 min. or until the skewer inserted into the center of the cake comes out clean. Allow to cool for about 10 min and remove the cake from the pan to continue cooking on a cooling rack

(If making the plain pound cake, bake the cake for 60 to 70 minutes, until a cake tester inserted into the center of the cake comes out clean.)

Meanwhile make the icing by melting the butter in the microwave. Add the vanilla, powdered sugar and milk and mix until combines and no lumps are present. Drizzle the cake with the icing as you desire.

-Aaron John

Wednesday, January 11, 2012

French Baguette


Things have been so hectic at school already in the two weeks that we have started and I find myself behind. So, here I am, sitting in my bedroom, blasting my music and eating my breakfast of corned beef and rice this morning trying to bust out this blog post that is long overdue. 

Currently, I've wanted to open up a bakery/cafe joint and to do that, you first need some good recipes, mainly bread recipes. I mean, how can you own a cafe/bakery and not make your own bread for sandwiches and such? What kind of bakery/cafe are you?!?! Well, here starts the recipe testing for artisan breads!

What I love about artisan bread is that they have a wonderful crackly crust. Every time I think of that crust, I remember the scene of "Ratatouille" when the woman squeezes the bread to hear that crackling crust to test the freshness. That is exactly what an artisan bread should sound like.

Let's start the artisan bread test with a French baguette. French baguettes are versatile. They can be sliced perpendicular for little crostini or they can be sliced parallel for some long sandwiches. This was my first attempt at this and well, it wasn't the greatest thing ever. When it came out of the oven I literally said "Danggggg, that is one ugly bread!", it definitely was and you know it! haha.

The top didn't have the long scores on them as I was hoping and was definitely over baked but the bottom was just fine. Great texture in this bread as well. Time to go back to the white board with this one.

French Baguette
Recipe by Peter Reinhardt
Makes 3 loaves
Part 1
For the pre-ferment (pâte fermentée):
2 1/4 cups (10 ounces) unbleached bread flour
3/4 teaspoon salt
1/2 teaspoon instant yeast
3/4 cup + 2 tablespoons (7 ounces) water, at room temperature

Directions
Mix all of the ingredients in a bowl until the dough comes together and knead until it goes from a sticky mess to a smooth ball.

Don’t worry too much about developing the gluten at this point.

Let rise in a sealed container for about 1 hour at room temperature or until it expands to 1 1/2 times its size.

Knead lightly for about a minute and return to the sealed container. Keep in the refrigerator overnight. The pre-ferment will be usable for up to 3 days, although I tend to get nervous when it’s been sitting around for more than 24 hours. Sometimes it seems like it’s about to pop out of the container and spill all over the vegetables and eggs in my refrigerator. Not that it’s ever happened before. Be sure that your container can handle a volume at least 3 times as big as the dough.

Part 2
For the final dough:
All of the pâte fermentée
2 1/4 cups (10 ounces) unbleached bread flour
3/4 teaspoon salt
1/2 teaspoon instant yeast
3/4 cup + 2 tablespoons (7 ounces) water, at room temperature

Directions
Take your pre-fermented dough out of the refrigerator and leave it at room temperature for about 1 hour to take off the chill. It will be bubbly and may continue to rise in your container.

Cut up the pre-ferment into small pieces and mix with the second half.

Knead for about 10 minutes.

In a lightly oiled container, ferment at room temperature for about 2 hours or until the dough doubles in size.

It’s very important to put some oil in the container so the dough doesn’t stick when extracting from the bowl later. It should come out as one well-formed blob and feel very slightly sticky to the touch. From this point on, handle the dough as gently as possible to keep the bubbles within from deflating.

Use a weighing scale and divide the dough into 3 equal pieces. It’s okay to cut off small bits of dough to evenly distribute.


Proof the shaped baguettes with the seam side up at room temperature for 45 to 75 minutes or until it expands to 1 1/2 times its size. The loaves in the picture are settled in a floured linen couche, but parchment paper can be used in the same manner. This will keep the loaves from flattening out and help maintain a tubular shape.

Preheat your oven to 500°F with a steam pan, preferably cast iron, in the bottom of the oven. I have a dedicated cast iron skillet used solely for creating steam in the oven. Don’t use your well-seasoned cast iron skillet passed down from grandma. The high oven heat will ruin the seasoning you’ve been painstakingly maintaining all these years. I had to find out the hard way. If you have one of those fancy ovens with built-in steam functionality then we probably won’t get along.

Transfer the proofed baguettes onto parchment paper on the back of a sheet pan. The seams previously on top should now be on the bottom.
Score the baguettes. Imagine a line running down the top of the loaves. Using a very sharp knife or a bread slashing tool called a lamé, create incisions about half an inch deep that overlap and run almost parallel to the imaginary line running down the center of the loaves. Cuts that run from side to side will barely expand because long loaves tend to widen instead of lengthen as a result of oven spring.

Load the oven with the sheet pan or transfer the loaves onto a hot baking stone. Pour 2 cups of boiling water onto the steam pan and immediately close the oven door. Lower the oven to 450°F and bake for 10 minutes. Rotate the loaves 180 degrees and bake for another 10 to 20 minutes until the crust turns golden brown.

Place the baguettes on a cooling rack for about 1 hour. Try to keep yourself from biting the crackly ends off straight from the oven. Each baguette will tip the scales at the traditional weight of approximately 250 grams.

-Aaron John.

Wednesday, December 21, 2011

Speculoos


A couple of days ago, I was exposed to the wonder that is Cookie Butter at one of my friend's house. I know what you're thinking. "Cookie Butter? What in the world is that?". That's exactly what I was thinking. At first I thought it would taste like a chocolate chip cookie made into a spread form. But nope, far from that. 

This Cookie Butter has a similar texture to peanut butter but tastes completely different. It's spicy in flavor. Not chili pepper spicy, but spicy in the terms of cinnamon, nutmeg and that sort of thing. When my friend read the label, he mentioned it being made of Speculoos. Then I had an "Aha!" moment. I remembered "Speculoos" from "Throwdown With Bobby Flay" which featured Belgian Waffles. From that episode, they mentioned Speculoos tasting similar to ginger snaps and/or graham crackers and they are right.


I got on the internet to search for a Speculoos recipe and found one from Dorie Greenspan. This cookie screams Christmas with the spices of cinnamon, ginger and cloves running through this cookie. It taste of the mixture of a ginger snap, graham cracker and ginger thins. If you need a new last minute cookie recipe, this one is it!!


My only complaint with this recipe is that it didn't hold onto its shape when I used a fluted cutter. It still tasted great nonetheless. Another thing, I actually preferred these cookies when they are crisp aka darker around the edges. This way, they were reminiscent of ginger thins. So good! 

Speculoos
Recipe by Dorie Greenspan
Makes about 70 cookies

Ingredients
1 2/3 cups all-purpose flour
1/4 teaspoon salt
1/4 teaspoon baking soda
2 1/2 teaspoons cinnamon
1/4 teaspoon ground ginger
1/8 teaspoon ground cloves
7 tablespoons unsalted butter, at room temperature
1/2 cup sugar
1/2 (packed) cup light brown sugar
1 LARGE EGG, AT ROOM TEMPERATURE

Directions
Whisk the flour, salt, baking soda, and spices together in a bowl.
Working in the bowl of a stand mixer fitted with the paddle attachment or in a bowl with a hand mixer, beat the butter at medium speed until creamy. Add the sugars and beat until well blended, about 2 minutes. ADD THE EGG AND CONTINUE TO BEAT UNTIL IT, TOO, IS BLENDED INTO THE BUTTER AND SUGARS. With the mixer on the lowest speed, add the dry ingredients in 3 additions, mixing only until the flour disappears into the soft dough. You may have some flour at the bottom of the bowl, or the dough may not be entirely smooth, but that’s normal. Using your hands (always my first choice) or a spatula, reach into the bowl and knead or stir the dough 2 or 3 times, just enough to eliminate any dry spots.

Divide the dough in half. (The dough is very soft, even after you refrigerate it for several hours, so if your kitchen is hot, you might want to divide the dough into thirds – that way it won’t take you as long to cut out the cookies and the dough won’t soften as much.) Working with 1 piece of dough at a time, roll the dough between two sheets of wax paper or plastic wrap until you have a circle that’s a scant ¼ inch thick. As you’re rolling, turn the dough over a couple of times and pull away the paper or plastic, so you don’t end up rolling creases into the dough. Put the rolled-out rounds of dough on a tray or cutting board and refrigerate for at least 3 hours. (The dough can be refrigerated for up to 3 days or frozne, well wrapped, for up to 2 months.)

When you’re ready to bake, center a rack in the oven and preheat the oven to 350 degrees F. Have a baking sheet lined with a silicone baking mat or parchment paper.

Choose a cookie cutter – I like to use a scalloped cutter that’s 1 1/4-inches in diameter – and remove 1 circle of dough from the refrigerator. Peel off the top piece of wax paper or plastic and cut out as many cookies as you can from the dough, carefully lifting the cutouts onto the lined baking sheet. Collect the scraps and set them aside to combine with the scraps from the second piece of dough.

Bake the cookies for 8 to 10 minutes, or until they are lightly golden and just slightly brown around the edges. Allow the cookies to rest on the baking sheet for a couple of minutes before transferring them to a cooling rack to cool.

Repeat with the second round of dough, making certain the baking sheet is cool before you put the cutouts on it. To use the scraps, press them together, roll them into a circle, and chill them before cutting and baking.

Serving: The cookies are just right with coffee, made for espresso and tea and really good nibbled as a snack.

Storing: The dough can be wrapped airtight and kept in the refrigerator for up to 3 days or in the freezer for up to 2 months. Kept in an airtight container, the cookies will be fine for a week or more.

-Aaron John

Wednesday, December 14, 2011

Final Project: Cookies and Cake?

L to R: Raspberry Linzer Cookies, Black and White Cookies, Sugar Cookies, Chocolate Chip Cookies dipped in White Chocolate and Red Sprinkles

Vanilla Butter Cake layered with Raspberry Jam and Vanilla Bean Buttercream, drizzled with a Sweet Tea Caramel Sauce

How is it possible to make cookies and cake for a final project you ask? Well, I have no idea either. It's almost unheard of but there I was, making cookies and cake for my AAS 330 final project.

AAS 330 stands specifically for Asian American Studies: Asian American Theater. For our final essay/project, the goal was to either write an essay about an artistic problem in a play or to have an artistic approach to presenting a play, mainly in set design, directing, lighting, etc. and creating a 3D model. To be honest, I was confused as to what to do.

I began to write my essay and I hit a wall, didn't know which way to go. So, I ended up thinking about what I can do artistically. It hit me like a ton of bricks; do something in the culinary arts! Duhhh. So I ended up emailing my Professor about an idea to turn the five characters of the play Tea, into dessert form. To my amazement, the idea was viable!

I debated if it were a smart thing to do. I mean, with finals the same week as the presentation, would it be smart to bake for one whole day and sacrificing a whole day of studying for my other classes? I did it anyway because when will I ever be able to have an opportunity like this to do what I love for a project? Probably never again.

After a day and a half of baking, this is what I came up with:

Sugar Cookie: Represents Teruko. Such a plain character with no sub-text and was one dimensional like a sugar cookie

Black and White Cookie: Represents Setsuko. A calm character that I felt observed both sides of a conversation, weighed her options and tried to reduce conflict as much as possible.

Chocolate Chip Cookie dipped in White Chocolate and Red Sprinkles: Represents Chizuye. As the most assimilated character, she is the most iconic American Cookie. The white chocolate and red sprinkles represents the Japanese flag and culture. She breaks away from her Japanese culture in the form of a chocolate shell and becomes assimilated into America, revealing the Chocolate Chip Cookie.

Raspberry Linzer Cookie: Represents Himiko. She is seen as a ghost throughout the play which explains the dusting of powdered sugar. The Raspberry Jam in the center represents the "pool of blood" she layed in after she shot herself. I specifically wanted her to be a sandwich cookie to represent how easily the two cookies can be ripped apart representing how easily Himiko's life fell apart due to the lack of stability after being controlled by her husband, murder of her daugther and eventually Himiko's death.

Vanilla Butter Cake layered with Raspberry Jam and Vanilla Bean Buttercream, drizzled with a Sweet Tea Caramel Sauce: Represents Atsuko. At first I believed she was a selfish and rude character that tried to take away from the remembrance of Himiko's life and putting attention on herself. However, reading the play over about two times, that wasn't the case at all. She put on a facade of not caring about Himiko, hiding her emotions unlike the rest of the characters, which is why she's a cake and not a cookie. Being a cake and not a cookie provides a difference in how she expressed her emotions vs. the others. Even though she put on a facade, deep down, she truly cared about Himiko which is why the cake is layered with Raspberry Jam to tie it back to Himiko's cookie. The Sweet Tea Caramel was used to bring back the whole notion that the play is called Tea.

Overall, doing this project was the best thing that I could've done. This was the first time I was able to present something I was truly passionate about and I can't tell you enough how great it felt to present this. Never in a million years would I think I would be able to do this and it's all because of my Professor. Thanks Professor!! This was the best class I have ever taken so far!! :)

-Aaron John

Sunday, November 20, 2011

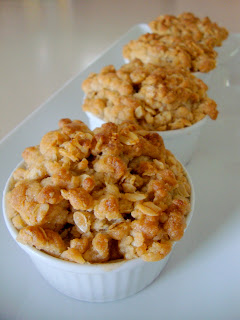
Apple Crisp


4 days until Thanksgiving and counting!! So, what desserts do you have planned on this day that's all about food, friends, and family? Tired of the boring old apple pie. What about that classic Pumpkin Pie. Even though, this Apple crisp has no pumpkin in it what so ever, it is filled with apple upon apples to turn that apple pie around into something different than that staple.

The crunchy, buttery, sweet, nutty tasting topping has cookie qualities to it almost like a lace cookie. Alone, it's just as good as the whole dessert. The apples and the acidity from the lemon cuts through the sweetness just enough so that you want to take that extra bite. 

Still think this is boring? Try adding pears to give a different dimension of flavor. Even add dried cranberries to mirror the flavor of cranberry sauce. Want to intensify this apple flavor? Why not add a little apple cider (maybe 1/4 cup) and a bit of flour to thicken the sauce to "confit" the apples as they are baking. There are many variations to a crisp and since it is the fall season after all, you are more than likely to have a couple of apples laying around to make this sweet dessert.

Apple Crisp
Recipe by Ina Garten

Ingredients
5 pounds McIntosh or Macoun apples
Grated zest of 1 orange
Grated zest of 1 lemon
2 tablespoons freshly squeezed orange juice
2 tablespoons freshly squeezed lemon juice
1/2 cup granulated sugar
2 teaspoons ground cinnamon
1 teaspoon ground nutmeg

For the topping:
1 1/2 cups flour
3/4 cup granulated sugar
3/4 cup light brown sugar, packed
1/2 teaspoon kosher salt
1 cup oatmeal
1/2 pound cold unsalted butter, diced

Directions
Preheat the oven to 350 degrees F. Butter a 9 by 14 by 2-inch oval baking dish.

Peel, core, and cut the apples into large wedges. Combine the apples with the zests, juices, sugar, and spices. Pour into the dish.

To make the topping, combine the flour, sugars, salt, oatmeal, and cold butter in the bowl of an electric mixer fitted with the paddle attachment. Mix on low speed until the mixture is crumbly and the butter is the size of peas. Scatter evenly over the apples.

Place the crisp on a sheet pan and bake for 1 hour until the top is brown and the apples are bubbly. Serve warm.

-Aaron John

Sunday, September 11, 2011

Monkey Bread


With two weeks remaining before class starts up, my time left for working with yeast is slowly decreasing. Why you ask? Yeast simple takes a lot of patience and time and with my school work, that's just a no-no. With my last attempt at bread, I decided to make Monkey Bread. Circular dough balls drenched in butter, rolled in cinnamon sugar with pecans, placed into a bundt pan and baked. Served best when warm. YUM!

Monkey Bread reminds me of an inside out cinnamon roll. Instead of having that delicious gooey centers of cinnamon rolls, monkey bread has more of a crispy sugary crust. With the added crunch of the pecans, it's to die for. This isn't a diet food by any means so if you are on a diet, I apologize. It definitely gives you that sugar rush with every bite you take.

Trust me, with the next two weeks, I'm gonna need that sugar rush. To start off the first two weeks, I'm taking the PCAT for pharmacy this week. EEEEEEEEEKKKK! Super nervous. Just reading through the rules and regulations are freaking me out. The security is crazy! Apparently they have to capture our signature and our PALM VEIN! I thought I was taking the PCAT, not getting arrested! haha. Oh well, I just can't wait to get it over with :)

Monkey Bread
Recipe by Martha Stewart
Makes one 10-inch Bundt Cake
Ingredients
For The Bread:
2 tablespoons solid vegetable shortening, plus more for pan and bowl
1/4 cup warm (110 degrees to 115 degrees) water
1/4 cup granulated sugar, plus a pinch for yeast
1 envelope dry active yeast (scant tablespoon)
3/4 cup warm (110 degrees to 115 degrees) milk
1 teaspoon salt
1 large egg
3 1/4 cups all-purpose flour

For The Coating:
8 tablespoons (1 stick) unsalted butter, melted
3/4 cup firmly packed light-brown sugar
2 teaspoons ground cinnamon
1/2 cup pecans, coarsely chopped
For The Icing:
1/4 cup milk
2 cups confectioners' sugar

Directions
Lightly coat a 10-inch Bundt pan and a medium bowl with shortening; set aside. Put the warm water and a pinch of sugar in a small bowl; sprinkle yeast over top. Stir; let the yeast soften and dissolve, about 5 minutes.

Place shortening, milk, sugar, salt, and egg in the bowl of an electric mixer fitted with the dough hook.

Add yeast mixture to shortening mixture, and beat to combine. Slowly add flour. Knead on medium-low, 1 minute. Transfer dough to the prepared bowl. Cover with plastic wrap, and let stand in a warm place, 20 minutes.

Make coating: Place melted butter in a bowl. In a second bowl, combine brown sugar, cinnamon, and nuts; sprinkle 2 tablespoons nut mixture into prepared Bundt pan.

Cut dough into 1/2-inch pieces. Roll into balls. Coat in butter, then roll in nut mixture, and place in prepared pan. Cover with plastic wrap, and let stand in a warm place until doubled in bulk, about 1 hour.

Preheat oven to 350 degrees. Bake, 30 to 35 minutes. Let cool in pan for 15 minutes. Invert onto a serving plate, and let cool 20 minutes more.

Make icing: In a small bowl, combine milk and confectioners' sugar. Stir until smooth. Drizzle over bread.

-Aaron John

Sunday, August 21, 2011

Pull Apart Coffee Cake Two Ways: Cinnamon and Lemon


What do you get when you mix a cinnamon roll with a loaf of bread? Pull Apart Coffee Cake! Just imagine eating a cinnamon roll, but only the inner layer of it!Soft, buttery and oozing with that cinnamony goodness! Not to mention that decadent cream cheese frosting! Mmmmm, I can already smell those Cinnabon Cinnamon Rolls now. But today is not about the cinnamon roll, it's about Pull Apart Coffee Cake!

I woke up bright and early this morning to put this together. Finally finishing my Summer Quarter at UW, it finally gives me time to bust out the yeast and tackle bread once again. Bread in and of itself is kind of a temperamental thing to begin with. You need patience and even a little muscle power helps along in the process. However, this recipe is one of the easiest bread recipes I have made so don't feel intimidated.

This is my own adaption to the original recipe of a "Lemon Scented Pull Apart Coffee Cake". I wanted that cinnamon roll-esque flavor in the bread but I also wanted to try the lemon of the original recipe. Basically, I made a Half Cinnamon and Half Lemon Pull Apart Coffee Cake. Genius right? Who needs one flavor when you can have two!! If you want a whole loaf of either, just double the sugar filling of whatever you like.

Cinnamon and Lemon Pull-Apart Coffee Cake
Makes a 9″x5″ pan 

Sweet Yeast Dough
About 2 3/4 cups (12 1/4 ounces) all-purpose flour
1/4 cup (1 3/4 ounces) granulated sugar
2 1/4 teaspoons (1 envelope) instant yeast
1/2 teaspoon salt
1/3 cup (2 1/2 fluid ounces) whole milk
2 ounces unsalted butter
1/4 cup (2 fluid ounces) water
1 1/2 teaspoons pure vanilla extract
2 large eggs, at room temperature

Lemon Sugar Filling
1/4 cup granulated sugar
1 tablespoons finely grated lemon zest (1 1/2 lemons)
1/2 tablespoon finely grated orange zest

Cinnamon Sugar Filling
2 tbsp granulated sugar
2 tbsp light brown sugar
1 1/2 tsp cinnamon

2 ounces unsalted butter, melted to be spread over the dough

Tangy Cream Cheese Icing
3 ounces cream cheese, softened
1/3 cup (1 1/4 ounces) powdered sugar
1 tablespoon whole milk
1 tablespoon fresh lemon juice

Make the Sweet Yeast Dough
Mix two cups (nine ounces) flour, the sugar, yeast, and salt in a medium bowl with a rubber spatula. Meanwhile, in a small saucepan or in the microwave, combine the milk and the butter and heat until the butter is melted. Remove from the heat, add the water, and let rest a minute until just warm (120 to 130°F [49 to 54°C]). Stir in the vanilla extract.

Pour the milk mixture over the flour-yeast mixture and, using a rubber spatula, mix until the dry ingredients are evenly moistened. Attach the bowl to the mixer, and fit the mixer with the paddle attachment. With the mixer on low speed, add the eggs, one at a time, mixing after each addition just until incorporated. Stop the mixer, add 1/2 cup (2 1/4 ounces) of the remaining flour, and resume mixing on low speed until the dough is smooth, 30 to 45 seconds. Add 2 more tablespoons flour and mix on medium speed until the dough is smooth, soft, and slightly sticky, about 45 seconds.

Lightly flour a work surface and knead the dough gently until smooth and no longer sticky, about one minute. Add an additional 1-2 tablespoons of flour only if the dough is too sticky to work with. Place the dough in a large bowl, cover it with plastic wrap, and let it rise in a warm place (about 70°F [21°C]) for 45-60 minutes or until doubled in size. An indentation made with your finger should keep its shape.

Meanwhile, make the lemon sugar and cinnamon sugar filling. Mix the sugar, lemon zest, and orange zest in one bowl and mix the sugar, brown sugar and cinnamon in another.

Center a rack in the oven and preheat the oven to 350°F (175°C). Grease a 9″x5″ loaf pan.

Gently deflate the dough with your hand. Flour a work surface and roll the dough into a 20″ by 12″ rectangle. [I suggest using a ruler and getting this as accurate as possible, for a prettier loaf that will fit better in the pan. I also suggest making sure both sides are floured, so that the dough will be easy to lift up later.] Use a pastry brush to spread the melted butter evenly and liberally over the dough.

Use a pizza cutter to cut the dough crosswise in five strips, each about 12″ by 4″. With the dough sliced but still together, sprinkle the dough lengthwise with the all the sugar (half getting the lemon and half the cinnamon). Take each rectangle and top one over the other, making sure the lemon is over the lemon and the cinnamon is over the cinnamon. Continue to top with rectangles, so you have a stack of five 12″ by 4″ rectangles, all buttered and topped with lemon sugar for one half and cinnamon sugar for the other.

Slice this new stack crosswise, through all five layers, into 6 equal rectangles (each should be 4″ by 2″.) 3 should be all lemon and 3 should be all cinnamon. Carefully transfer these strips of dough into the loaf pan, cut edges up, side by side doing cinnamon, cinnamon, cinnamon, lemon, lemon, lemon. it might be a little roomy, but the bread will rise and expand after baking. Loosely cover the pan with plastic wrap and let the dough rise in a warm place (70 °F [21°C]) until puffy and almost doubled in size, 30 to 50 minutes. When you gently press the dough with your finger, the indentation should stay.

Bake the loaf until the top is golden brown, 30 to 35 minutes.

Meanwhile, make the cream cheese icing. Beat the cream cheese and powdered sugar in a medium bowl with a wooden spoon until smooth, then add the milk and lemon juice. Stir until creamy and smooth.

The recipe recommends you tilt and rotate the pan while tapping on a table to release the loaf. I just carefully ran a knife around it. Flip the loaf over onto a cooling rack, then flip onto another rack so that it’s right side up. Spread the top of the warm cake with the cream cheese icing, using a pastry brush to fill in all the cracks.

-Aaron John

Sunday, July 17, 2011

Eclairs


Eclairs are one of those fancy treats that has such an appeal. Let's face it, it's really just a long cream puff. Whether you like the circular pastry or the longer version of it, it tastes the same. A crispy outside and a creamy outside, how can you not like one of these?

To be honest, Eclairs are fairly complicated to make. They involve quite a bit of steps as you can see from the recipe. Despite this, they're definitely a show stopper. People just get so impressed by these but who knows why. Is it because it's French? Is it because it's a pastry? Is it due to the many steps? Does it just have an awe factor? Whatever the answer is, as long as it impresses people, I'll be making them. ha.

All in all, the process to make these are just exciting. To see all the components come together is beyond cool. To have a goal to make something thats fancy and to actually fulfill it is just a confidence boost. So whether it's a cream puff or an eclair, go ahead and take a stab at it! :)

Tips
-I used the same recipe I used to make cream puffs before. It worked out fine.

-When making the pastry cream, only cook it until the cream is thickened after you add in the egg yolks. If you don't, it will have an almost curdled texture instead of creamy. Cook until it coats the back of a spoon and remove immediately.

-When making the pate a choux, after you add the flour stir frequently and cook until a skin begins to form on the bottom of the pan. That's when you know you can take it off and proceed to adding eggs.

-When baking the pate a choux, do on open the oven. It will cause the eclair shells to collapse because the outside of the shell won't have enough time to firm up and hold its shape.

Results
Taste: A slightly eggy tasting shell filled with a vanilla flavored pastry cream and a chocolaty coating. Chocolate and Vanilla? Can't go wrong there

Texture: The eclair shell has a crispness to it which adds a great textural difference with the creamy vanilla pastry cream and smooth chocolate glaze.

Eclairs
Ingredients
For the pastry cream:
2 cups half-and-half
½ cup sugar
Pinch salt
5 large egg yolks
3 tbsp. cornstarch
4 tbsp. cold unsalted butter, cut into 4 pieces
1½ tsp. vanilla extract

For the pâte à choux:
2 large eggs plus 1 large egg white
5 tbsp. unsalted butter, cut into 10 pieces
2 tbsp. whole milk
6 tbsp. water
1½ tsp. sugar
¼ tsp. salt
½ cup (2½ oz.) all-purpose flour

For the chocolate glaze:
3 tbsp. half-and-half
2 oz. semisweet or bittersweet chocolate, finely chopped
1 cup (4 oz.) confectioners’ sugar, sifted

Directions:
To make the pastry cream, heat the half-and-half, 6 tablespoons of the sugar, and the salt in a saucepan over medium-high heat until simmering, stirring occasionally to dissolve the sugar. Meanwhile, combine the egg yolks and remaining 2 tablespoons sugar in a medium bowl and whisk until the sugar has begun to dissolve and the mixture is creamy, about 15 seconds. Whisk in the cornstarch until combined and the mixture is pale yellow and thick, about 30 seconds.

When the half-and-half mixture has reached a simmer, slowly add it to the egg yolk mixture to temper, whisking constantly. Return the mixture to the saucepan, scraping the bowl with a rubber spatula. Return the mixture to a simmer over medium heat, whisking constantly, until a few bubbles burst on the surface and the mixture is thickened and glossy, about 30 seconds. Off the heat, whisk in the butter and vanilla. Strain the pastry cream through a fine mesh sieve set over a medium bowl. Press plastic wrap directly on the surface to prevent a skin from forming and refrigerate until cold and set, at least 3 hours and up to 2 days.

To make the pâte à choux, whisk the eggs and egg white in a liquid measuring cup. You should have ½ cup (discard the excess). Set aside. Combine the butter, milk, water, sugar and salt in a small saucepan. Heat over medium heat and bring to a boil, stirring once or twice. When it reaches a full boil and the butter is fully melted, remove from the heat and stir in the flour until incorporated and the mixture clears the sides of the pan. Return the saucepan to low heat and cook, stirring constantly, using a smearing motion, until the mixture is slightly shiny, looks like wet sand and tiny beads of fat appear on the bottom of the pan (the mixture should register 175-180˚ F on an instant-read thermometer.

Immediately transfer the mixture to a food processor and process with the feed tube open to cool slightly, 10 seconds. With the machine running, gradually add the reserved eggs in a steady stream. When they have been added, scrape down the sides of the bowl, then process 30 seconds more until a smooth, thick, sticky paste forms.

Place an oven rack in the middle position and preheat the oven to 425˚ F. Line a baking sheet with parchment paper. Fill a pastry bag fitted with a ½-inch plain tip with the pâte à choux. Pipe the paste into long strips, about 5 inches, on the prepared baking sheet, spacing them about 1 to 1¼ inches apart.

Bake for 15 minutes (do not open the oven door during baking). Reduce the oven temperature to 375˚ F and continue to bake until golden brown and fairly firm, 8-10 minutes longer. Remove the baking sheet from the oven. Use a paring knife, cut a ¾-inch slit into the side of each strip to release steam; return the puffs to the oven, turn the oven off, and prop open the oven door with the handle of a wooden spoon. Dry the puffs in the turned-off oven until the centers are just moist (not wet) and the eclairs are crisp, about 45 minutes. Use a sharp paring knife to poke a hole through the bottom or side to check the interior. Transfer the puffs to a wire rack to cool completely. (At this point the puffs can be stored at room temperature for up to 24 hours or frozen for up to 1 month in an airtight plastic bag. Before serving, crisp in the oven at 300˚ F – 5-8 minutes for room temperature puffs, 8-10 minutes for frozen puffs.)

To fill the eclairs, use the tip of a paring knife to make a small cut perpendicular to the first, creating an X in the side of each puff. Fill a pastry bag fitted with a ¼-inch plain tip with the pastry cream. Pipe some of the pastry cream through the X into the side of each eclair until it starts to ooze back out. As well, you an cut the eclair shell straight down horizontally and fill it that way.

To make the glaze, place the half-and-half and chocolate in a medium microwave-safe bowl, cover with plastic wrap, and microwave for 20 seconds at a time, until the mixture just begins to steam. Whisk together thoroughly, add the confectioners’ sugar, and whisk until completely smooth. Dip the tops of the filled eclairs in the chocolate glaze and transfer to a wire rack until the glaze has set completely. Serve within several hours.

-Aaron John

LinkWithin

Related Posts with Thumbnails