Showing posts with label bread. Show all posts

Saturday, September 27, 2014

Pan de Sal


No video this week. Instead, it's back to good ol' fashioned pictures and stories. Pan de Sal is a filipino dinner roll. Growing up, we always had Pan de Sal in the house. If we didn't have "tasty", which is what my parent's called regular sliced white bread, we had Pan de Sal.


There's a filipino bakery that's maybe 10 minutes away from our house where we always would get Pan de Sal. I loved going there when I was younger because I was always able to pick one item for myself. Whether it was a chocolate cupcake, black forest slice or a sugar donut, it would just make the weekend that much better. That bakery always brings me back to those memories and what it's like to be a kid again.


To this day, my parent's still go to that bakery and they still get the same three things. Pan de Sal, Pan de Leche and "Butter Bread". However, for some odd reason, they didn't go to that bakery and we didn't have bread for the week. Well, being the baker of the family, it was time to make my own Pan de Sal!


Pandesal
Recipe by Axille's Corner

Ingredients
1/2 warm water (110-115 degrees Fahrenheit)
1 packet or 2 1/4 tsp active dry yeast
3 cups plus 3 tbsp unbleached bread flour or all purpose flour
1/2 cups plus
1 tbsp pure cane sugar or plain sugar
1 tsp fine sea salt or regular salt
1/4 warm water (2nd cup)
1/4 cup vegetable oil or canola oil

Directions
Dissolve the yeast in warm water (between 110-115 degrees Fahrenheit). Add sugar and stir, make sure that the yeast is well dissolved. Place it in a warm area of the kitchen.

In a large bowl, mix the flour, sugar and salt then give it a good stir with a wire whisk or a spatula.

Mix the vegetable oil into the second cup of warm water, stir and set it aside.

After the yeast had been activated and foamy, mix and fold it into the flour. Add the water and oil mixture next but in 2 to 3 batches so it will incorporate evenly into the flour mixture. Once the flour starts to stick together, start kneading (I prefer kneading it in the same bowl but you can use a cutting board or a kneading board) Knead the dough for about 5 to 8 minutes until the dough is somewhat smooth. ***TIP: if dough is too sticky, dust it with a tablespoon of flour at a time. I would recommend no more than 2 tbsp as this may make the bread dry and tough. If the dough is too dry, add a tablespoon of warm water and the same rule as the flour applies.***

Once the dough becomes slightly smooth and elastic, place it in the same bowl and cover it with a plastic wrap, an extra cover and towel will help the dough to rise. (Brushing the the bowl with oil will keep the dough from sticking but not really necessary, using a spatula will also help with scrapping it off the bowl). Let the dough rise for a 1 to 2 hours or until it doubles its size. ***TIP: make sure to place it in a warm area.***

 After the dough had risen, place it on a cutting board or a clean surface and divide it into 16 pieces. Divide the dough in halves to have even size portions. After dividing, take one of the dough and start pinching the opposite ends of the dough together, do a half turn and pinch the ends again. This will help smooth out the uneven sides and helps form it into a ball. You may leave it the way it is or knead the dough with the heel of your palm into a circular motion while cupping to control the dough, this will form the dough into a smooth and firm or tight ball.

Place the dough balls into a baking sheet lined up with parchment paper. This will help the bottom side of the dough from sticking and burning. You may use bread crumbs or corn meal to dredge the dough to have the traditional effect (I prefer to eliminate it completely because it is not necessary if the only purpose is to keep it from sticking on the baking tray and for less cleaning).

Put a plastic wrap gently over the dough then cover it with a kitchen towel to help the dough rise. Let it rise for 1 to 2 hours until it doubles its size. ***TIP: This is the most important part of the proofing process so make sure it rises and doubles its size, otherwise, your bread will not be as fluffy and airy. Check the dough after 1 hour, if it hasn't doubled its size, let it rise for another 30 minutes to an hour. Slow rise is very common during the cold season when there's not enough warm air and humidity in the room. Dough rises quickly and easily during the warm seasons, so factor in these types of conditions when making a bread.***

Once the dough has risen, preheat the oven at 375 degrees. ***TIP: Only remove the towel and plastic wrap once the oven had been preheated, otherwise this might deflate the dough depending on the temperature of the room.***

After the oven's temperature had reached to 375 degrees, place the baking sheet in the middle rack or center of then oven and bake it for 8 to 10 minutes. ***TIP: Depending on the quantity of the dough balls, if it was divided into 12 pieces or less then bake it for 10 to 12 minutes, if 16 pieces, then bake it for 8 to 10 minutes. Use a timer and set it at 8 minutes then keep watching till the bread starts to turn brown. It's better for the color to be light golden brown as this will continue baking even after removing from the oven.***

Place it on a cooling rack and wait for 5 minutes before serving. Serve it with your favor spread or eat it plainly and enjoy.

-Aaron John

Saturday, August 23, 2014

Cinnamon Roll Pull Apart Coffee Cake with Pecans


I think I'm just slightly obsessed with cinnamon rolls. Maybe it's the cinnamon sugar? Maybe it's the cream cheese frosting? Maybe it's the bread? Maybe it's an excuse to eat something sweet for breakfast? Either way, who can resist a cinnamon roll? I know I can't.


In about two weeks, I'll be headed to San Diego and a part of me is looking forward to buying a Cinnabon cinnamon roll at the airport before the flight. Those oversized cinnamon rolls are so freaken' delicious! The smell alone is just so badass! Please...can I just have one now?


It's been years since I've made cinnamon rolls but I didn't want to make a cinnamon roll. I'll leave that up to Cinnabon. But I still had a craving for it, two weeks is way too long of a wait. I just had to have something cinnamon-y. Therefore, this Cinnamon Roll Pull Apart Coffee Cake with Pecans will do!


If you are a fan of the innards of a cinnamon roll, this is for you. Innards is probably not the best word to describe something so delicious, but who cares. It's fluffy, sweet and reminds me of the center of cinnamon rolls. The pecans give it a little somethin' somethin' to cut through the sweetness and give a little crunch. Don't like pecans? Leave it out or substitute it. I'm not one to judge what you do in your kitchen. Either way, it will be delicious!


Cinnamon and Lemon Pull-Apart Coffee Cake
Original recipe by Flo Braker
Makes a 9″x 5″ pan 

Ingredients
Sweet Yeast Dough
About 2 3/4 cups (12 1/4 ounces) all-purpose flour
1/4 cup (1 3/4 ounces) granulated sugar
2 1/4 teaspoons (1 envelope) instant yeast
1/2 teaspoon salt
1/3 cup (2 1/2 fluid ounces) whole milk
2 ounces unsalted butter
1/4 cup (2 fluid ounces) water
1 1/2 teaspoons pure vanilla extract
2 large eggs, at room temperature

Cinnamon Sugar Filling
1/2 cup golden brown sugar
1 tablespoon ground cinnamon
1/4-1/2 cup chopped pecans

2 ounces unsalted butter, melted to be spread over the dough

Tangy Cream Cheese Icing
3 ounces cream cheese, softened
1/3 cup (1 1/4 ounces) powdered sugar
1 tablespoon whole milk
1 tablespoon fresh lemon juice

Directions
Make the Sweet Yeast Dough
Mix two cups (nine ounces) flour, the sugar, yeast, and salt in a medium bowl with a rubber spatula. Meanwhile, in a small saucepan or in the microwave, combine the milk and the butter and heat until the butter is melted. Remove from the heat, add the water, and let rest a minute until just warm (120 to 130°F [49 to 54°C]). Stir in the vanilla extract.

Pour the milk mixture over the flour-yeast mixture and, using a rubber spatula, mix until the dry ingredients are evenly moistened. Attach the bowl to the mixer, and fit the mixer with the paddle attachment. With the mixer on low speed, add the eggs, one at a time, mixing after each addition just until incorporated. Stop the mixer, add 1/2 cup (2 1/4 ounces) of the remaining flour, and resume mixing on low speed until the dough is smooth, 30 to 45 seconds. Add 2 more tablespoons flour and mix on medium speed until the dough is smooth, soft, and slightly sticky, about 45 seconds.

Lightly flour a work surface and knead the dough gently until smooth and no longer sticky, about one minute. Add an additional 1-2 tablespoons of flour only if the dough is too sticky to work with. Place the dough in a large bowl, cover it with plastic wrap, and let it rise in a warm place (about 70°F [21°C]) for 45-60 minutes or until doubled in size. An indentation made with your finger should keep its shape.

Meanwhile, make the cinnamon sugar mixture by combining the brown sugar and cinnamon together in a bowl. Set aside.

Center a rack in the oven and preheat the oven to 350°F (175°C). Grease a 9″x5″ loaf pan.

Gently deflate the dough with your hand. Flour a work surface and roll the dough into a 20″ by 12″ rectangle. [I suggest using a ruler and getting this as accurate as possible, for a prettier loaf that will fit better in the pan. I also suggest making sure both sides are floured, so that the dough will be easy to lift up later.] Use a pastry brush to spread the melted butter evenly and liberally over the dough.

Use a pizza cutter to cut the dough crosswise in five strips, each about 12″ by 4″. With the dough sliced but still together, sprinkle the dough lengthwise with the cinnamon sugar mixture, followed by the pecans. Take each rectangle and top one over the other. Continue to top with rectangles, so you have a stack of five 12″ by 4″ rectangles, all buttered and topped with the cinnamon sugar.

Slice this new stack crosswise, through all five layers, into 6 equal rectangles (each should be 4″ by 2″.) Carefully transfer these strips of dough into the loaf pan, cut edges up, side by side. It might be a little roomy, but the bread will rise and expand after baking. Loosely cover the pan with plastic wrap and let the dough rise in a warm place (70 °F [21°C]) until puffy and almost doubled in size, 30 to 50 minutes. When you gently press the dough with your finger, the indentation should stay.

Bake the loaf until the top is golden brown, 30 to 35 minutes.

Meanwhile, make the cream cheese icing. Beat the cream cheese and powdered sugar in a medium bowl with a wooden spoon until smooth, then add the milk and lemon juice. Stir until creamy and smooth.

The recipe recommends you tilt and rotate the pan while tapping on a table to release the loaf. I just carefully ran a knife around it. Flip the loaf over onto a cooling rack, then flip onto another rack so that it’s right side up. Spread the top of the warm cake with the cream cheese icing, using a pastry brush to fill in all the cracks.

-Aaron John

Saturday, April 6, 2013

Cinnamon Roll Bread Pudding


A couple weeks ago, I tried to love pudding by making Aborio Rice Pudding. Sad to say, that didn't go over so well. After watching the "Worst Cooks in America" finale last week and seeing Bobby Flay's mentee making Bread Pudding, it gave me the next opportunity to take another stab at Pudding. 


I assumed Bread Pudding would be something I would like because it contained bread and if you know me, you know I'm a carb-aholic. But, you never know, pudding is a pudding, no matter how you slice it. Plus, I'm not exactly the type to like mushy bread so I was cautiously optimistic.


Did this Cinnamon Roll Bread Pudding taste like a Cinnamon Roll? Not exactly. More like Cinnamon Bread with custard. Was it able to convert me? Not exactly either. I wasn't really feeling the texture so much. Once again, texture comes into play as to why I'm not a fan of pudding. By the looks of it, I don't know if I'll ever be a fan of Pudding, but maybe third time's the charm?

Cinnamon Roll Bread Pudding
Recipe by Aida Mollenkamp

Ingredients
2 cups whole milk
3/4 cup heavy cream
4 large eggs
1/2 cup granulated sugar plus 1 tablespoon for garnish
1/3 cup nut-flavored liqueur (recommended: Di Saronno or Frangelico)
1 teaspoon vanilla extract
1/2 teaspoon kosher salt
7 cups large dice cinnamon challah (or plain challah or brioche plus 2 teaspoons ground cinnamon) (about 10 ounces challah)
1 cup walnuts, toasted and coarsely chopped

Directions
Heat the oven to 350 degrees F and arrange a rack in middle.

Whisk together milk, cream, eggs, 1/2 cup sugar, liqueur, vanilla, and salt in a medium bowl until egg is broken up and mixture is smooth. Evenly distribute bread and walnuts in a 2 quart baking dish, pour custard mixture over bread, and allow to soak for at least 15 minutes.

Meanwhile, bring about 8 cups water to a simmer over medium-high heat.

Evenly distribute remaining 1 tablespoon sugar over bread pudding. Set the filled baking dish into a larger roasting pan and add enough of the hot water to reach halfway up the sides of the baking dish. Bake until custard is set and top is lightly browned, about 50 to 60 minutes. Remove from water bath and let sit 5 to 10 minutes before serving. Serve warm, at room temperature.

-Aaron John

Saturday, March 2, 2013

Donuts or Doughnuts. It's Whatever Name You Choose


"Hi, my name is Aaron John and I have a problem. I love donuts. There I said it. 'I LOVE DONUTS!'"

Phew, I'm glad I got that off my chest. Is there anything better than a Donut/Doughnut. BTW, is it a Donut or Doughnut? I've always wondered that...Either way, it's some delicious fried goodness. Glazed, chocolate, maple or sugar, just give me a donut and I'll be happy. Even the ones covered in glaze, chocolate, then dipped in sprinkles always find some way into my hands. Somehow, I feel sprinkles make doughnuts taste so much better than the plain jane donuts.


Donuts and I go way back and I remember it like it was yesterday. As my dad and I dropped off my older brother to kindergarten when I was a wee little child, we would always go to the 7-11 that was down the hill from our house so that he could buy me a donut. Chocolate or Maple, those were the only one's I would eat. No donuts filled with jam or cream for me. Just give me that fried bread with frosting and hold the filling, no questions asked.

When we drove back home, I stared at that donut as if that golden ring of bread was actually some sort of expensive jewelry. At the time, that donut was worth it's weight in gold to me. When we got home, my dad would go to sleep after working long night shifts and I would sit on the couch savoring every bite of that donut as I watched Nickelodeon cartoons. Now that's what I call memories.


Ever since then, donuts and I developed some sort of a relationship. When I need to get back to those memories, donuts will always be there. Call me a fat ass, donut junkie, unhealthy, diabetes bound, the man who's arteries are clogging with every bite, but sometimes, we have to live a little, right? For every pound I gain in donuts, that's a memory I was able to relive and I'm A-OK with that. Well...let's just keep it in moderation for now.


These donuts brought me right back to moments like that. These were light and fluffy, just the way I like them. Make sure you invest in a thermometer for your oil if you're making this recipe. It makes your life that much easier.

Donuts/Doughnuts
Recipe by Ree Drummond (The Pioneer Woman)

Ingredients
Doughnuts
1-1/8 cup Whole Milk, Warm
1/4 cup Sugar
2-1/4 teaspoons (one Package) Instant Or Active Dry Yeast
2 whole Large Eggs, Beaten
1-1/4 stick Unsalted Butter, melted
4 cups All-purpose Flour
1/4 teaspoon Salt
Shortening

Glaze
3 cups Powdered Sugar
1/2 teaspoon Salt
1/2 teaspoon Vanilla
1/2 cup Cold Water Or Milk

Cinnamon Sugar
1/2 cup granulated sugar
1/2 tsp to 1 tsp ground cinnamon

Directions
To Make the Dough:
1. Make sure milk is nice and warm, but not overly hot.
2. Add sugar to milk. Stir to dissolve.
3. Add yeast into a small bowl.
4. Pour milk/sugar mixture over yeast. Stir gently, then let sit for 10 minutes.
5. Melt butter in separate bowl until butter is almost melted. Stir to finish melting so butter won't be overly hot.
6. Add beaten eggs to melted butter, stirring constantly to make sure the butter's not too hot for the eggs.
7. Add the egg/butter mixture to the bowl of an electric mixer fitted with the dough hook.
8. With the mixer on 3 or medium-low speed, pour in the yeast mixture.
9. Allow the dough hook to stir this mixture for a couple of minutes, making sure it's thoroughly combined.
10. With the mixer still going, add helpings of the flour mixture in 1/4 to 1/2 cup increments until all the flour is gone.
11. Stop the mixer, scrape the bowl, then turn the mixer on the same speed for five whole minutes.
12. After five minutes, stop the mixer and scrape the bottom of the bowl.
13. Turn on the mixer for 30 seconds.
14. Turn off the mixer and allow the dough to sit in the bowl undisturbed for 10 minutes.
15. After 10 minutes, transfer dough to a lightly oiled bowl. Toss the dough to coat, then cover the bowl with plastic wrap and place straight in the fridge.
16. Refrigerate dough for at least 8 hours, or overnight.

To Make the Doughnuts: 
1. Remove bowl from fridge and turn out dough onto a lightly floured surface.
2. Roll out to 1/4 to 1/3-inch thickness.
3. Using a 3-inch cutter, cut as many rounds as you can, then roll out remaining dough and cut as much as you can, etc.
4. Cut holes out of each round using a 1 1/2-inch cutter.
5. Place both doughnuts and holes on a floured baking sheet.
6. Cover with large tea towel and place in a warm place in your kitchen; my kitchen is very drafty, so I have to briefly warm the griddle, then turn it off and set the sheets on top to keep warm.
7. Allow doughnuts to rise undisturbed for at least 1 hour; 1 hour 15 minutes if necessary. Doughuts should be visibly puffier and appear to be airy.

To Fry the Donuts/Dougnuts 
1. Heat plenty of vegetable shortening in a large pot until the temperature reaches 375 to 380 degrees---do not let it get hotter than 380 degrees! 375 is ideal; keep the thermometer in the pan to continually monitor.
2. One to two at a time, gently grab doughnuts and ease them into the hot oil. Allow them to cook 1 minute on each side; they will brown very quickly.
3. Remove doughnuts from the oil with a slotted spoon, allowing all oil to drip off.
4. Place doughnut immediately on several layers of paper towels. Count to five, then flip it over onto a clean part of the paper towels. Count to five, then flip it over again; the purpose, obviously, is to drain as much grease as possible before it soaks into the doughnut. 5. Repeat with remaining doughnuts and holes. The holes will cook more quickly than the doughnuts; about 30 seconds per side. 6. Allow doughnuts to slightly cool.

To Glaze 
1. Mix all glaze ingredients in a bowl until completely smooth.
2. One by one, dip doughnuts into the glaze until halfway submerged. (Note: completely submerge doughnut holes, then remove with slotted spoon.)
3. Remove from glaze, then turn right side up on a cooling rack over a cookie sheet (to catch dripping glaze.)
4. Serve warm if possible, or room temperature.

Using Cinnamon Sugar
1. Mix the granulated sugar with the cinnamon
2. Dip the freshly fried donuts/doughnuts into the cinnamon sugar mixture.

-Aaron John

Saturday, August 11, 2012

Jalapeno Cornbread


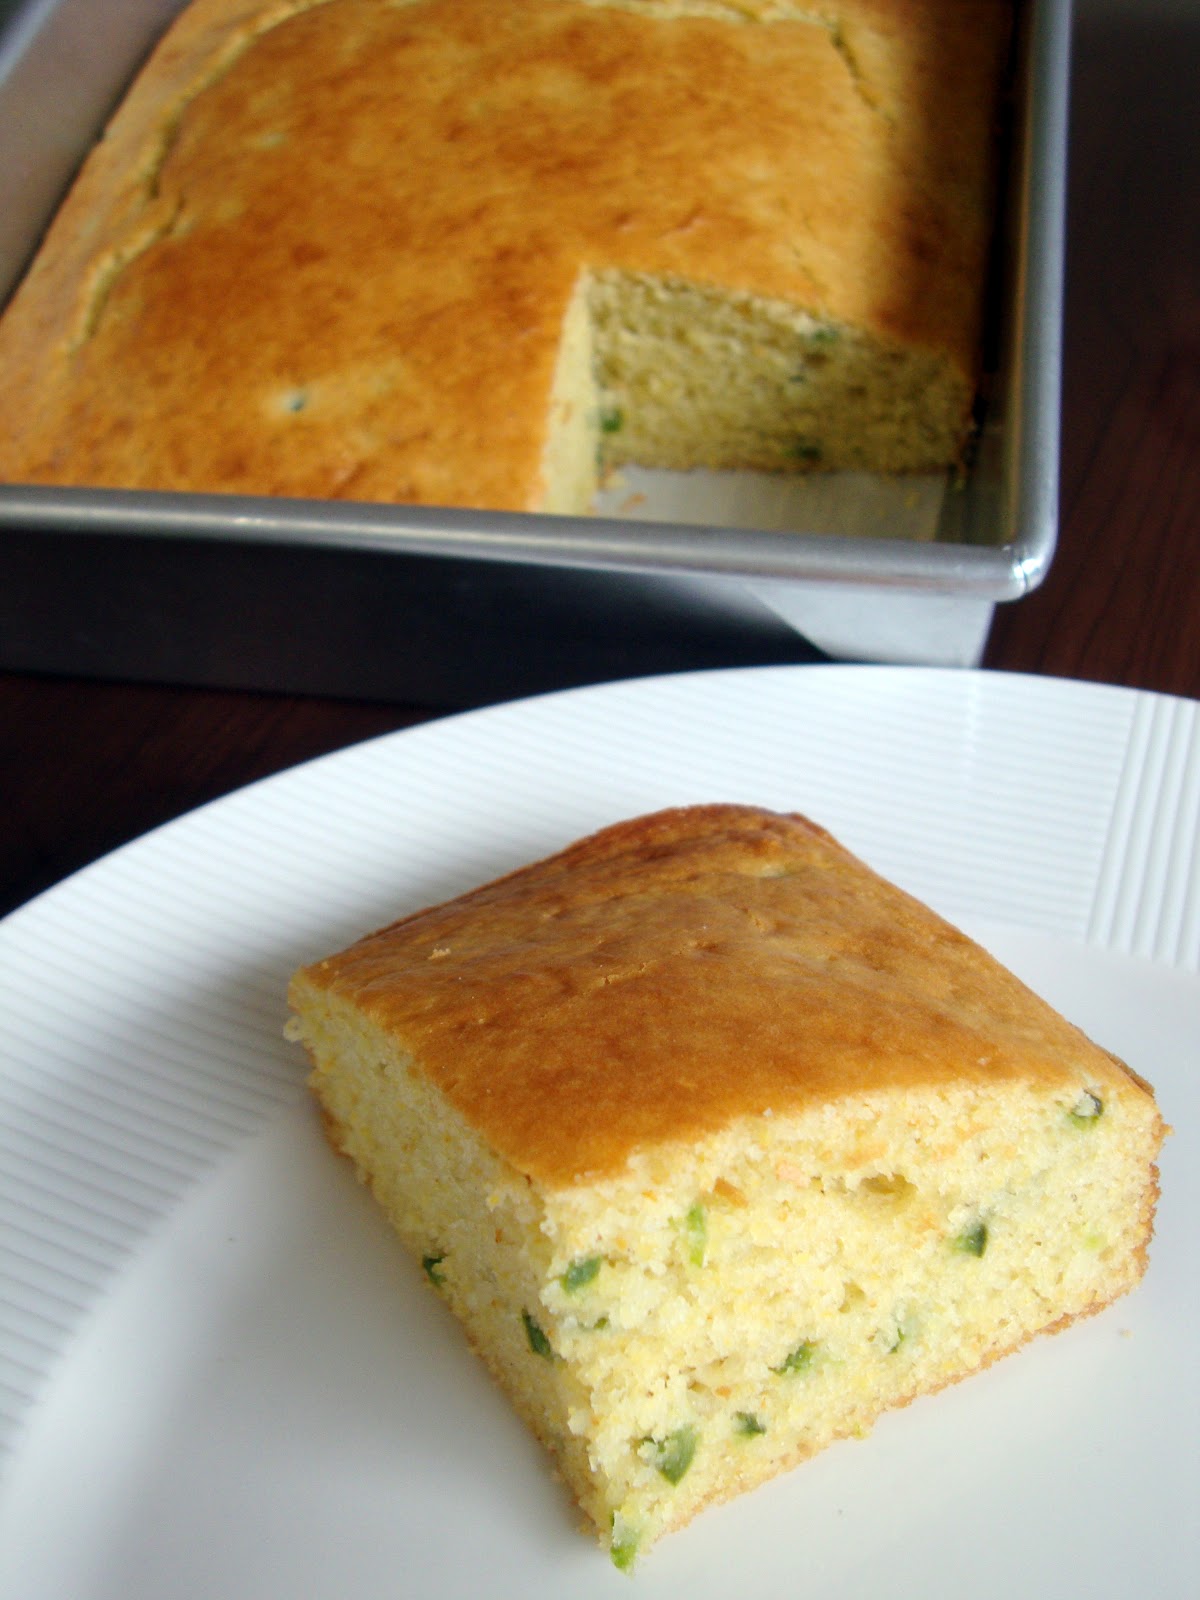
Cornbread is something I've really come to enjoy, especially Honey Cornbread Muffins. But today, it is all about Jalapeno Cornbread. Cornbread is something that I've found difficult to get just right. With different recipes out there with more cornmeal than flour, less cornmeal than flour and equal parts cornmeal and flour, which do you choose?


With this recipe that I found on All Recipes, it seemed pretty good in terms of ratings but sometimes you can't really trust the ratings unless you make it yourself. As I began, I measured out all my ingredients only to find I only had 3/4 cup of cornmeal left! Instead of halving the recipe, I decided to just increase the flour  to 1 1/4 cups.


This cornbread looked perfect when it came out of the oven; an evenly baked, golden crusted cornbread got my hopes up. It had just enough texture from the cornmeal which I think would have been overkill if I followed the recipe exactly. However, this cornbread was not spicy at all and was BLAND! I would have increased the amount of jalapenos to 4 or left in the seeds because I was not able to taste them. I would have increased the salt just a bit as well. So much for that 4.5 star rating. So what's my choice on the proportions for cornbread? A little less cornmeal than flour or even equal amounts cornmeal and flour. This gives it the right amount of texture without feeling like your eating sand, in my opinion.

Jalapeno Corn Bread
Recipe from Archie Timmons

Ingredients
1 1/2 cups cornmeal
1/2 cup all-purpose flour
6 tablespoons sugar
2 teaspoons baking powder
1 teaspoon salt
1/2 teaspoon baking soda
2 eggs
1 cup buttermilk
1/4 cup olive oil
3 jalapeno peppers, seeded and finely chopped

Directions
In a bowl, combine the first six ingredients. In another bowl, whisk the eggs, buttermilk and oil. Add to the dry ingredients and stir just until moistened. Stir in jalapenos. Pour into a greased 9-in. square baking pan.

Bake at 400 degrees F for 20-22 minutes or until a toothpick inserted near the center comes out clean. Cut into squares or wedges. Serve warm.

-Aaron John

Sunday, April 29, 2012

Garlic Bread


Last week I made Pasta Bolognese, and what I didn't show is that I served it with Garlic Bread. Whether or not Garlic Bread is actually served with dishes like this in Italy, it has become a great pairing. It's like shopping and becoming broke, flying on airplanes and getting little packets of peanuts, being in Seattle and wearing North Face Jackets, sitting outside on Red Square at UW and doing some good ol' fashioned people watching. Well, maybe not everything is a great pairing, but they do seem to go together.


Now, I used to get those all ready and prepared garlic breads in the foil packages that are smothered with butter which you stick into the oven and forget about it but that can't be too healthy for right? But times have changed, it's time to expose yourself to some simple garlic bread that lets the bread and garlic do all the talking. Plus, it's not even funny how much more garlic bread you get by doing it this way, and can we all say, life is just better with more bread?


I've seen this method of garlic bread many times on TV so I don't really call it a recipe. It's more like a method. Toast some bread, rub some garlic, spread some butter. Done, done and done. I don't know how much more simple it can get. You end up with something thats buttery, crisp, chewy and garlic-y that still has a bit of a bite to it and it's oh so good!

Garlic Bread
"Recipe" by Me

Ingredients
1 loaf of Artisan bread, (Pugliese, Sour Dough, French, etc)
2 cloves of garlic
Butter

Directions
Cut the "root end" off of the garlic cloves and simply peel off the paper skin. It's important not to smash the garlic to remove the paper skin easier. A whole, intact, clove is much easier to use in this recipe. Set aside.

Take the artisan bread of choice and using a serrated knife, cut the bread in 1/2 to 3/4 inch thick slices. At this point there are many options to take in toasting the bread. You can use a grill pan and grill the bread until golden brown, you can use a preheated oven at 350 degrees F and bake until golden brown. However, what I like to do is actually use a regular toaster since I usually only need a couple of slices of bread. Whichever you prefer, the goal is a golden brown piece of bread that's crisp on the outside, yet soft and chewy on the inside.

Take the toasted bread and while it's still hot, begin to rub the cut side of the garlic clove onto the bread. You know you've rubbed enough garlic when you do not hear the sound of the scraping garlic on the toasty bread. Immediately, spread butter on the bread and enjoy!

-Aaron John

Saturday, March 10, 2012

Buttermilk Biscuits


So, a couple days ago, an interesting thing happened to me. I was on my way to to class and was waiting for the elevator to get to the Light Rail train station to China town. Then the most random guy began to talk to me saying how it's so windy and "You'll turn into an icicle if you don't get inside somewhere warm". We got into the elevator and he continued to talk about the wind. This guy had a lot to say about it!

You may think that the conversation would end after getting out of the elevator but noooooo. We were a good 30 feet apart and all of a sudden he comes walking up to me talking about his life. He was saying how he lived in California and the person down the street from him owned a rooster and it waked him up at 4 AM every morning. But wait! It gets better. He proceeded to imitate, yes IMITATE, what a rooster would do in the morning including making the sound they make. Who does that?!?! Really?!

Now at this point I began to say to myself "Oh my gosh. This guy is crazyyyyy". Then he let out this loud laugh and I began to nod my head and "laugh" quietly as well. I mean, you never know what's going to happen if you don't laugh when the other person begins to laugh. What else are you supposed to do? After taking public transportation for years, I've learned to always agree with the other person. You always have to be on guard. Luckily, a minute after he did his imitation the Light Rail came and I felt saved. 


So what do buttermilk biscuits have to do with this story? Well, when he did his imitation of a rooster, I began to think about what Country style food people would make on a farm and I thought biscuits, especially with saw mill gravy! I didn't have have sausage to make the gravy so I only made the biscuits that went with it using Alton Brown's recipe. 

When all is said and done, if you ever find yourself in a situation like the one I was in, all I have to say is agree, nod and "laugh"! ha

Buttermilk Biscuits
Recipe by Alton Brown

Ingredients
2 cups flour
4 teaspoons baking powder
1/4 teaspoon baking soda
3/4 teaspoon salt
2 tablespoons butter
2 tablespoons shortening
1 cup buttermilk, chilled

Directions
Preheat oven to 450 degrees.

In a large mixing bowl, combine flour, baking powder, baking soda and salt. Using your fingertips, rub butter and shortening into dry ingredients until mixture looks like crumbs. (The faster the better, you don't want the fats to melt.) Make a well in the center and pour in the chilled buttermilk. Stir just until the dough comes together. The dough will be very sticky.

Turn dough onto floured surface, dust top with flour and gently fold dough over on itself 5 or 6 times. Press into a 1-inch thick round. Cut out biscuits with a 2-inch cutter, being sure to push straight down through the dough. Place biscuits on baking sheet so that they just touch. Reform scrap dough, working it as little as possible and continue cutting. (Biscuits from the second pass will not be quite as light as those from the first, but hey, that's life.)

Bake until biscuits are tall and light gold on top, 15 to 20 minutes.

-Aaron John

Wednesday, January 11, 2012

French Baguette


Things have been so hectic at school already in the two weeks that we have started and I find myself behind. So, here I am, sitting in my bedroom, blasting my music and eating my breakfast of corned beef and rice this morning trying to bust out this blog post that is long overdue. 

Currently, I've wanted to open up a bakery/cafe joint and to do that, you first need some good recipes, mainly bread recipes. I mean, how can you own a cafe/bakery and not make your own bread for sandwiches and such? What kind of bakery/cafe are you?!?! Well, here starts the recipe testing for artisan breads!

What I love about artisan bread is that they have a wonderful crackly crust. Every time I think of that crust, I remember the scene of "Ratatouille" when the woman squeezes the bread to hear that crackling crust to test the freshness. That is exactly what an artisan bread should sound like.

Let's start the artisan bread test with a French baguette. French baguettes are versatile. They can be sliced perpendicular for little crostini or they can be sliced parallel for some long sandwiches. This was my first attempt at this and well, it wasn't the greatest thing ever. When it came out of the oven I literally said "Danggggg, that is one ugly bread!", it definitely was and you know it! haha.

The top didn't have the long scores on them as I was hoping and was definitely over baked but the bottom was just fine. Great texture in this bread as well. Time to go back to the white board with this one.

French Baguette
Recipe by Peter Reinhardt
Makes 3 loaves
Part 1
For the pre-ferment (pâte fermentée):
2 1/4 cups (10 ounces) unbleached bread flour
3/4 teaspoon salt
1/2 teaspoon instant yeast
3/4 cup + 2 tablespoons (7 ounces) water, at room temperature

Directions
Mix all of the ingredients in a bowl until the dough comes together and knead until it goes from a sticky mess to a smooth ball.

Don’t worry too much about developing the gluten at this point.

Let rise in a sealed container for about 1 hour at room temperature or until it expands to 1 1/2 times its size.

Knead lightly for about a minute and return to the sealed container. Keep in the refrigerator overnight. The pre-ferment will be usable for up to 3 days, although I tend to get nervous when it’s been sitting around for more than 24 hours. Sometimes it seems like it’s about to pop out of the container and spill all over the vegetables and eggs in my refrigerator. Not that it’s ever happened before. Be sure that your container can handle a volume at least 3 times as big as the dough.

Part 2
For the final dough:
All of the pâte fermentée
2 1/4 cups (10 ounces) unbleached bread flour
3/4 teaspoon salt
1/2 teaspoon instant yeast
3/4 cup + 2 tablespoons (7 ounces) water, at room temperature

Directions
Take your pre-fermented dough out of the refrigerator and leave it at room temperature for about 1 hour to take off the chill. It will be bubbly and may continue to rise in your container.

Cut up the pre-ferment into small pieces and mix with the second half.

Knead for about 10 minutes.

In a lightly oiled container, ferment at room temperature for about 2 hours or until the dough doubles in size.

It’s very important to put some oil in the container so the dough doesn’t stick when extracting from the bowl later. It should come out as one well-formed blob and feel very slightly sticky to the touch. From this point on, handle the dough as gently as possible to keep the bubbles within from deflating.

Use a weighing scale and divide the dough into 3 equal pieces. It’s okay to cut off small bits of dough to evenly distribute.


Proof the shaped baguettes with the seam side up at room temperature for 45 to 75 minutes or until it expands to 1 1/2 times its size. The loaves in the picture are settled in a floured linen couche, but parchment paper can be used in the same manner. This will keep the loaves from flattening out and help maintain a tubular shape.

Preheat your oven to 500°F with a steam pan, preferably cast iron, in the bottom of the oven. I have a dedicated cast iron skillet used solely for creating steam in the oven. Don’t use your well-seasoned cast iron skillet passed down from grandma. The high oven heat will ruin the seasoning you’ve been painstakingly maintaining all these years. I had to find out the hard way. If you have one of those fancy ovens with built-in steam functionality then we probably won’t get along.

Transfer the proofed baguettes onto parchment paper on the back of a sheet pan. The seams previously on top should now be on the bottom.
Score the baguettes. Imagine a line running down the top of the loaves. Using a very sharp knife or a bread slashing tool called a lamé, create incisions about half an inch deep that overlap and run almost parallel to the imaginary line running down the center of the loaves. Cuts that run from side to side will barely expand because long loaves tend to widen instead of lengthen as a result of oven spring.

Load the oven with the sheet pan or transfer the loaves onto a hot baking stone. Pour 2 cups of boiling water onto the steam pan and immediately close the oven door. Lower the oven to 450°F and bake for 10 minutes. Rotate the loaves 180 degrees and bake for another 10 to 20 minutes until the crust turns golden brown.

Place the baguettes on a cooling rack for about 1 hour. Try to keep yourself from biting the crackly ends off straight from the oven. Each baguette will tip the scales at the traditional weight of approximately 250 grams.

-Aaron John.

Saturday, November 5, 2011

French Toast


What do you do with leftover bread? Make French Toast
What do you do with leftover Cinnamon-Raisin Swirl Bread? Make Cinnamon Raisin Swirl Bread French Toast!

Now, I have to admit, there has been plenty of times where I've said on my blog that I'm a carb-a-holic, but even I have my limits. Seriously, who can eat a whole loaf of bread?? That's just absurd. If you can, I would love to see that. ha. Over time, a loaf of bread, as delicious and filled with goodies as it may be, just becomes a loaf of bread. You always need to reinvent that loaf of bread to have some variety. French Toast is the perfect way to continue enjoying a good ol' carb feast.


With my leftover loaf of Cinnamon Raisin Swirl Bread, it already had plenty of flavor that a simple custard base is all I needed. No need for extra flavorings, just something clean in flavor. French Toast is really something that doesn't need a recipe. Simply, get some eggs and milk, whisk that around and add a tad bit of sugar, dip in your bread and griddle until a delicious crusty golden brown.

I guess the real technique to french toast is the soaking period of the bread. Should you soak for long or little? Well, do you like a mushy, custardy french toast or a firm, yet moist french toast. Some people like one or the other. I personally like a firm, moist french toast. I'm sorry but I def. am not a fan of a custardy french toast due to its texture. I soaked my bread literally for 15/20 sec. a side no more, no less. If you like the other way, soak it longer.


If we can't agree on what's the best texture for French Toast, I think we can all agree that the best part is drenching it all in maple syrup! :d ha

French Toast
Recipe by Alton Brown


Ingredients
1 cup half-and-half
3 large eggs
2 tablespoons honey, warmed in microwave for 20 seconds
1/4 teaspoon salt
8 (1/2-inch) slices day-old or stale country loaf, brioche or challah bread
4 tablespoons butter

Directions
In medium size mixing bowl, whisk together the half-and-half, eggs, honey, and salt. You may do this the night before. When ready to cook, pour custard mixture into a pie pan and set aside.

Preheat oven to 375 degrees F. Dip bread into mixture, allow to soak for 30 seconds on each side, and then remove to a cooling rack that is sitting in a sheet pan, and allow to sit for 1 to 2 minutes.

Over medium-low heat, melt 1 tablespoon of butter in a 10-inch nonstick saute pan. Place 2 slices of bread at a time into the pan and cook until golden brown, approximately 2 to 3 minutes per side. Remove from pan and place on rack in oven for 5 minutes. Repeat with all 8 slices. Serve immediately with maple syrup, whipped cream or fruit.

-Aaron John

Saturday, October 29, 2011

Cinnamon-Raisin Swirl Bread


To be honest, I didn't really know about "The Pioneer Woman" until about a couple months ago when she had a show premiering on the Food Network. Shocker!! Thank God for Food Network putting her on the Food Network or else I would have never known about her! Her blog is amazing and filled with food I want to try out. First up was Cinnamon Swirl Bread.

About a year ago, I saw tons of posts on Foodgawker with Cinnamon Swirl Bread. Apparently, it was part of the "Daring Bakers Challenge" and everyone made it. Growing up, my family didn't usually buy these types of breads. It was all about "Pan de Sal" which is a Filipino dinner roll. However, every time my family went to the supermarket, I would always see this "Cinnamon-Raisin Swirl Bread" and I always wanted to try it! Luckily, "The Pioneer Woman" had a post about it!

Nows my chance to eat this bread and man is it good! I've been deprived my whole life! ha. I personally ate a couple of slices as is. That's how good it was. Just imagine if this was used for cinnamon toast or.....FRENCH TOAST!! Definitely going to be on the to-do list before this loaf of bread is gone! :D
BTW, check out "The Pioneer Woman" website for a step by step guide to this bread. I found it extremely useful!

Cinnamon Swirl Bread
Recipe from The Pioneer Woman
Makes 1 loaf
Ingredients
1 cup Milk
6 Tablespoons Butter
2-1/2 teaspoons Active Dry Yeast
2 whole Eggs
1/3 cup Sugar
3-1/2 cups All-purpose Flour
1 teaspoon Salt
1/3 cup Sugar
2 Tablespoons Cinnamon
1/2 cup Raisins (optional)
Egg And Milk, Mixed Together, For Brushing
Softened Butter, For Smearing And Greasing

Directions
Melt butter with milk. Heat until very warm, but don't boil. Allow to cool until still warm to the touch, but not hot. Sprinkle yeast over the top, stir gently, and allow to sit for 10 minutes.
Combine flour and salt.

In the bowl of an electric mixer, mix sugar and eggs with the paddle attachment until combined. Pour in milk/butter/yeast mixture and stir to combine. Add half the flour and beat on medium speed until combined. Add the other half and beat until combined.

Switch to the dough hook attachment and beat/knead dough on medium speed for ten minutes. If dough is overly sticky, add 1/4 cup flour and beat again for 5 minutes.

Heat a metal or glass mixing bowl so it's warm. Drizzle in a little canola oil, then toss the dough in the oil to coat. Cover bowl in plastic wrap and set it in a warm, hospitable place for at least 2 hours.

Turn dough out onto the work surface. Roll into a neat rectangle no wider than the loaf pan you're going to use, and about 18 to 24 inches long. Smear with 2 tablespoons melted butter. Mix sugar and cinnamon together, then sprinkle evenly over the butter-smeared dough. Add the raisins if desiredStarting at the far end, roll dough toward you, keeping it tight and contained. Pinch seam to seal.

Smear loaf pan with softened butter. Place dough, seam down, in the pan. Cover with plastic wrap and allow to rise for 2 hours.

Preheat oven to 350 degrees.

Mix a little egg with milk, and smear over the top. Bake for 40 minutes on a middle/lower rack in the oven.

Remove from the pan and allow bread to cool. Slice and serve, or make cinnamon toast or French toast with it.

-Aaron John

Sunday, September 11, 2011

Monkey Bread


With two weeks remaining before class starts up, my time left for working with yeast is slowly decreasing. Why you ask? Yeast simple takes a lot of patience and time and with my school work, that's just a no-no. With my last attempt at bread, I decided to make Monkey Bread. Circular dough balls drenched in butter, rolled in cinnamon sugar with pecans, placed into a bundt pan and baked. Served best when warm. YUM!

Monkey Bread reminds me of an inside out cinnamon roll. Instead of having that delicious gooey centers of cinnamon rolls, monkey bread has more of a crispy sugary crust. With the added crunch of the pecans, it's to die for. This isn't a diet food by any means so if you are on a diet, I apologize. It definitely gives you that sugar rush with every bite you take.

Trust me, with the next two weeks, I'm gonna need that sugar rush. To start off the first two weeks, I'm taking the PCAT for pharmacy this week. EEEEEEEEEKKKK! Super nervous. Just reading through the rules and regulations are freaking me out. The security is crazy! Apparently they have to capture our signature and our PALM VEIN! I thought I was taking the PCAT, not getting arrested! haha. Oh well, I just can't wait to get it over with :)

Monkey Bread
Recipe by Martha Stewart
Makes one 10-inch Bundt Cake
Ingredients
For The Bread:
2 tablespoons solid vegetable shortening, plus more for pan and bowl
1/4 cup warm (110 degrees to 115 degrees) water
1/4 cup granulated sugar, plus a pinch for yeast
1 envelope dry active yeast (scant tablespoon)
3/4 cup warm (110 degrees to 115 degrees) milk
1 teaspoon salt
1 large egg
3 1/4 cups all-purpose flour

For The Coating:
8 tablespoons (1 stick) unsalted butter, melted
3/4 cup firmly packed light-brown sugar
2 teaspoons ground cinnamon
1/2 cup pecans, coarsely chopped
For The Icing:
1/4 cup milk
2 cups confectioners' sugar

Directions
Lightly coat a 10-inch Bundt pan and a medium bowl with shortening; set aside. Put the warm water and a pinch of sugar in a small bowl; sprinkle yeast over top. Stir; let the yeast soften and dissolve, about 5 minutes.

Place shortening, milk, sugar, salt, and egg in the bowl of an electric mixer fitted with the dough hook.

Add yeast mixture to shortening mixture, and beat to combine. Slowly add flour. Knead on medium-low, 1 minute. Transfer dough to the prepared bowl. Cover with plastic wrap, and let stand in a warm place, 20 minutes.

Make coating: Place melted butter in a bowl. In a second bowl, combine brown sugar, cinnamon, and nuts; sprinkle 2 tablespoons nut mixture into prepared Bundt pan.

Cut dough into 1/2-inch pieces. Roll into balls. Coat in butter, then roll in nut mixture, and place in prepared pan. Cover with plastic wrap, and let stand in a warm place until doubled in bulk, about 1 hour.

Preheat oven to 350 degrees. Bake, 30 to 35 minutes. Let cool in pan for 15 minutes. Invert onto a serving plate, and let cool 20 minutes more.

Make icing: In a small bowl, combine milk and confectioners' sugar. Stir until smooth. Drizzle over bread.

-Aaron John

Sunday, August 21, 2011

Pull Apart Coffee Cake Two Ways: Cinnamon and Lemon


What do you get when you mix a cinnamon roll with a loaf of bread? Pull Apart Coffee Cake! Just imagine eating a cinnamon roll, but only the inner layer of it!Soft, buttery and oozing with that cinnamony goodness! Not to mention that decadent cream cheese frosting! Mmmmm, I can already smell those Cinnabon Cinnamon Rolls now. But today is not about the cinnamon roll, it's about Pull Apart Coffee Cake!

I woke up bright and early this morning to put this together. Finally finishing my Summer Quarter at UW, it finally gives me time to bust out the yeast and tackle bread once again. Bread in and of itself is kind of a temperamental thing to begin with. You need patience and even a little muscle power helps along in the process. However, this recipe is one of the easiest bread recipes I have made so don't feel intimidated.

This is my own adaption to the original recipe of a "Lemon Scented Pull Apart Coffee Cake". I wanted that cinnamon roll-esque flavor in the bread but I also wanted to try the lemon of the original recipe. Basically, I made a Half Cinnamon and Half Lemon Pull Apart Coffee Cake. Genius right? Who needs one flavor when you can have two!! If you want a whole loaf of either, just double the sugar filling of whatever you like.

Cinnamon and Lemon Pull-Apart Coffee Cake
Makes a 9″x5″ pan 

Sweet Yeast Dough
About 2 3/4 cups (12 1/4 ounces) all-purpose flour
1/4 cup (1 3/4 ounces) granulated sugar
2 1/4 teaspoons (1 envelope) instant yeast
1/2 teaspoon salt
1/3 cup (2 1/2 fluid ounces) whole milk
2 ounces unsalted butter
1/4 cup (2 fluid ounces) water
1 1/2 teaspoons pure vanilla extract
2 large eggs, at room temperature

Lemon Sugar Filling
1/4 cup granulated sugar
1 tablespoons finely grated lemon zest (1 1/2 lemons)
1/2 tablespoon finely grated orange zest

Cinnamon Sugar Filling
2 tbsp granulated sugar
2 tbsp light brown sugar
1 1/2 tsp cinnamon

2 ounces unsalted butter, melted to be spread over the dough

Tangy Cream Cheese Icing
3 ounces cream cheese, softened
1/3 cup (1 1/4 ounces) powdered sugar
1 tablespoon whole milk
1 tablespoon fresh lemon juice

Make the Sweet Yeast Dough
Mix two cups (nine ounces) flour, the sugar, yeast, and salt in a medium bowl with a rubber spatula. Meanwhile, in a small saucepan or in the microwave, combine the milk and the butter and heat until the butter is melted. Remove from the heat, add the water, and let rest a minute until just warm (120 to 130°F [49 to 54°C]). Stir in the vanilla extract.

Pour the milk mixture over the flour-yeast mixture and, using a rubber spatula, mix until the dry ingredients are evenly moistened. Attach the bowl to the mixer, and fit the mixer with the paddle attachment. With the mixer on low speed, add the eggs, one at a time, mixing after each addition just until incorporated. Stop the mixer, add 1/2 cup (2 1/4 ounces) of the remaining flour, and resume mixing on low speed until the dough is smooth, 30 to 45 seconds. Add 2 more tablespoons flour and mix on medium speed until the dough is smooth, soft, and slightly sticky, about 45 seconds.

Lightly flour a work surface and knead the dough gently until smooth and no longer sticky, about one minute. Add an additional 1-2 tablespoons of flour only if the dough is too sticky to work with. Place the dough in a large bowl, cover it with plastic wrap, and let it rise in a warm place (about 70°F [21°C]) for 45-60 minutes or until doubled in size. An indentation made with your finger should keep its shape.

Meanwhile, make the lemon sugar and cinnamon sugar filling. Mix the sugar, lemon zest, and orange zest in one bowl and mix the sugar, brown sugar and cinnamon in another.

Center a rack in the oven and preheat the oven to 350°F (175°C). Grease a 9″x5″ loaf pan.

Gently deflate the dough with your hand. Flour a work surface and roll the dough into a 20″ by 12″ rectangle. [I suggest using a ruler and getting this as accurate as possible, for a prettier loaf that will fit better in the pan. I also suggest making sure both sides are floured, so that the dough will be easy to lift up later.] Use a pastry brush to spread the melted butter evenly and liberally over the dough.

Use a pizza cutter to cut the dough crosswise in five strips, each about 12″ by 4″. With the dough sliced but still together, sprinkle the dough lengthwise with the all the sugar (half getting the lemon and half the cinnamon). Take each rectangle and top one over the other, making sure the lemon is over the lemon and the cinnamon is over the cinnamon. Continue to top with rectangles, so you have a stack of five 12″ by 4″ rectangles, all buttered and topped with lemon sugar for one half and cinnamon sugar for the other.

Slice this new stack crosswise, through all five layers, into 6 equal rectangles (each should be 4″ by 2″.) 3 should be all lemon and 3 should be all cinnamon. Carefully transfer these strips of dough into the loaf pan, cut edges up, side by side doing cinnamon, cinnamon, cinnamon, lemon, lemon, lemon. it might be a little roomy, but the bread will rise and expand after baking. Loosely cover the pan with plastic wrap and let the dough rise in a warm place (70 °F [21°C]) until puffy and almost doubled in size, 30 to 50 minutes. When you gently press the dough with your finger, the indentation should stay.

Bake the loaf until the top is golden brown, 30 to 35 minutes.

Meanwhile, make the cream cheese icing. Beat the cream cheese and powdered sugar in a medium bowl with a wooden spoon until smooth, then add the milk and lemon juice. Stir until creamy and smooth.

The recipe recommends you tilt and rotate the pan while tapping on a table to release the loaf. I just carefully ran a knife around it. Flip the loaf over onto a cooling rack, then flip onto another rack so that it’s right side up. Spread the top of the warm cake with the cream cheese icing, using a pastry brush to fill in all the cracks.

-Aaron John

Saturday, June 25, 2011

Roasted Garlic and Rosemary Focaccia


Bread is one of those things that people love or stay away from. Personally, I can't imagine life without bread, can you? It's soft, fluffy, filled with air pockets and sometimes has a fantastic crust. There's nothing like the sound of bread when your slicing through it. That "crackling" sound gets me all the time. Then, to toast it and rub some fresh garlic on it and slap on some butter, woah mama is that heaven. To the people that stay away from bread, I thank you. It just means more bread for the rest of us. ha.

Foccacia is what I like to think of as a cross roads of breads. It's soft like white bread yet has a crisp crust to give it body. It almost reminds me of the pizza crust of Pizza Hut, well, this Foccacia does anyway. I made a plain jane Foccacia once before and although it was quite delicious, it was just that, plain jane. It didn't have a real depth of flavor to tickle your taste buds. So, to "Kick It Up a Notch" according to Emeril, or "Jazz It Up" according to Rachael Ray or even put this Focaccia through a "REMIX!" according to the Neelys, I decided to make it into a Roasted Garlic and Rosemary Focaccia.

Tips
- I made this bread by hand so it took me a good 30 minutes of mixing the dough without a stand mixer.
-Instead of cooking it in a sheet pan, I decided to use a 9 inch cake pan (I used half the recipe so if you're making the the whole recipe, use two 9 inch cake pans)

Results
Taste: The flavor of the olive oil really comes through in this bread. Along with the rosemary and roasted garlic on top, it added an extra punch of flavor! I recommend using those toppings!

Texture: Moist, soft, light and fluffy with crisp edges!

Basic Focaccia
Recipe by Anne Burrell (adapted by me)

Ingredients
1 3/4 cups warm water
1 package active dry yeast
1 tablespoon sugar
5 cups all-purpose flour, plus additional for kneading
1 tablespoon kosher salt, plus coarse sea salt, for sprinkling
1 cup extra-virgin olive oil, divided
1 tsp dried rosemary
2 heads of roasted garlic

Directions
Combine the warm water, yeast and sugar in a small bowl. Put the bowl in a warm, not hot or cool, place until the yeast is bubbling and aromatic, at least 15 minutes.

In the bowl of a mixer fitted with a dough hook, combine the flour, 1 tablespoon of kosher salt, 1/2 cup olive oil and the yeast mixture on low speed. Once the dough has come together, continue to knead for 5 to 6 minutes on a medium speed until it becomes smooth and soft. Give it a sprinkle of flour if the dough is really sticky and tacky.

Transfer the dough to a clean, lightly floured surface, then knead it by hand 1 or 2 times. Again, give it another sprinkle of flour if the dough is really sticky and tacky.

Coat the inside of the mixer bowl lightly with olive oil and return the dough to the bowl. Cover it with plastic wrap and put it in a warm place until the dough has doubled in size, at least 1 hour.

Coat a jelly roll pan with the remaining 1/2 cup olive oil (Or, use two 10 in cake pans). (Chef's Note: This may seem excessive, but focaccia is an oily crusted bread. This is why it is soooooooooo delicious!).

Put the dough onto the jelly roll pan and begin pressing it out to fit the size of the pan. Turn the dough over to coat the other side with the olive oil. Continue to stretch the dough to fit the pan. As you are doing so, spread your fingers out and make finger holes all the way through the dough. (Chef's Note: Yes, this is strange. But when the dough rises again it will create the characteristic craggy looking focaccia. If you do not make the actual holes in the dough, the finished product will be very smooth.)

Put the dough in the warm place until it has doubled in size, about 1 hour. While the dough is rising a second time, preheat the oven to 425 degrees F.

Liberally sprinkle the top of the focaccia with some coarse sea salt, rosemary and diced roasted garlic and lightly drizzle a little oil on top. Bake the dough until the top of the loaf is golden brown, about 25 to 30 minutes. Remove the focaccia from the oven and let it cool before cutting and serving.

-Aaron John

Saturday, May 7, 2011

Vanilla Dutch Baby


It's that time of year again, Mother's Day is just around the corner. Literally, it's tomorrow. ha. When I think of Mother's Day, the first food related event that comes to mind is Brunch. Whoever invented Brunch is a genius. It's not exactly, breakfast, not exactly lunch yet you can eat all the foods that are associated with those two. Another opportunity to pig out? I think so.

While you're contemplating what Brunch meal you'll be making for tomorrow, I've decided to test out a Brunch item, a Vanilla Dutch Baby. Essentially it's just a puffed pancake. Simple to make? Yes. Will  this make it on my brunch table? Not going to happen. ha. I saw this recipe as someone who made crepe batter, was lazy and thus, put all the batter in a pan and baked. For all I know, that's probably what it's supposed to taste like. But I do think you're better off just making crepes instead of making this recipe.

Tips
-I used a hand mixer instead of a blender. Just make sure you add the wet ingredients slowly and try to get the lumps of flour out in the beginning of mixing

Results
Taste: Not sweet, very eggy tasting with a slight hint of vanilla flavor.

Texture: Extremely doughy with no textural difference. Despite the edges being golden brown, it became doughy just like the center. It almost had an "uncooked" feeling when eaten.

Vanilla Dutch Baby
Recipe by Melissa d'Arabian

Ingredients
3 tablespoons butter
3 eggs
3/4 cup all-purpose flour
3/4 cup milk, heated 20 to 30 seconds in the microwave
1 tablespoon plus 1 teaspoon sugar
2 teaspoons vanilla extract
Pinch salt
1 pint fresh or frozen blueberries
1 teaspoon sugar
1/2 teaspoon fresh lemon zest
2 tablespoons confectioners' sugar

Directions
Preheat the oven to 400 degrees F.

Place the butter in a large saute pan and place in the oven to melt.

Meanwhile, in a blender, combine the eggs, flour, hot milk, 1 tablespoon sugar, vanilla extract, and pinch of salt, and blend on medium-high speed until uniform. Cook's Note: If mixing by hand, combine the eggs with the milk until the mixture is light yellow and no longer stringy, about 1 minute. Add the flour, sugar, vanilla, and pinch of salt, and whisk vigorously to remove the lumps, about 30 seconds.

Carefully, remove the hot pan from the oven. The butter should be melted. Swirl the butter around the pan to coat completely, and then pour the remaining butter into the batter and whisk to blend. Pour the batter into the hot pan and return the pan to the oven. Cook the pancake for 20 to 25 minutes, or until the pancake is puffed in the center, and golden brown along the edges.

While the Dutch baby bakes, in a small bowl combine the fresh blueberries, 1 teaspoon sugar, and lemon zest. Stir to coat, and set aside to marinate.

Using a spatula, remove the entire Dutch baby from the pan and place on a cooling rack for a few minutes to allow the steam to escape without condensing along the bottom and rendering the pancake soggy. Slice the pancake into wedges on a serving platter or cutting board and sprinkle with the confectioners' sugar through a sieve. Serve with the marinated blueberries.

-Aaron John

Saturday, October 2, 2010

Project Food Blog: "Luxury Dinner Party"

Yo DJ, Spin That Track!

"Hey, have you heard that you made it to Round Three?"
"OMG! Are you serious?! You all chose me?!"
No words can express how grateful I am
I'm serious, ya'll are just like fam
How great it feels to make it through
*Teardrop* I think I need a tissue
I was debating whether to end the rhymes
But I'm just having a grand ol' time
So here's another rhyme just for you
Hopefully, you'll like this one too
In this competition, I feel like an underdog
Struggling to survive and glad that you all read my blog
To be honest, I was completely in shock
Now, I'm standing my ground and ready to rock!
Have a Luxury Dinner Party and make a post
You, yourself, will be the host
Create a menu and invite some guests
Sounds intimidating? Just do your best
Be comfortable with who you are as a cook
Don't cook a meal from the fanciest of books
Stay true to what you know
Your efforts will definitely show
Your guests will be impressed with what you serve
The compliments, you will surely deserve
All that matters is to have fun with those you care about
So, while you're in the kitchen, don't freak out
You took the time to create a fantastic meal
The memories you make will be unreal

Don't you love parties? The whole passing out invites, calling people and creating events on Facebook to spread the word gets exciting! There's just something about parties that bring back so many memories. Being with family and friends, eating all the food you can eat (buffet style) and of course, singing karaoke, a filipino staple event. When everyone is loud and you are able to hear laughter from everywhere in the house, you definitely know it's a fantastic party. Sometimes our Filipino parties last until 2 AM!! We do whatever it takes to have a great time! Us Filipinos do it big. ha.

For challenge #3 of this competition, I think Ina Garten said it best when hosting dinner parties, "Keep it simple". Who wants to be in the kitchen cooking during a party anyway? Just because a dinner menu is simple, it doesn't mean it can't be delicious. It can be just as delicious, or even more delicious, as the half-dollar sized food you get at fancy restaurants. As long as you have great food and great people around, memories are bound to be made. That's my definition of a "Luxury Dinner Party". There's no need to stress about having a dinner party. Have confidence in yourself and you'll do fine. Even if you burn the meal, you still get points for effort!

What did I plan for this special event? An "american comfort food" dinner with a twist. This twist being a little upscaling of the meal. Don't be worried when I say "upscaling". It's simple, really. You make a concept for a meal and you simply change the components of some of the dishes so it's not the same ol' dish anymore. For instance, instead of a salad dressed with maybe "Thousand Island Dressing", try a vinaigrette instead and even use a variety of lettuces. Mashed potatoes? Change it up and roast baby yukon gold potatoes. These little changes can change up the whole meal instantly and it makes you look even more gourmet than before, not to mention, it can even save you time. I also decided to keep with the "Filipino Tradition" and keep the main course Buffet Style!!


Pesto Crostini 
Make a pesto crostini the way you want it. Extra Pesto? Extra Garlic? It's up to you.

Mixed Green Salad
Tender, crisp lettuces, crisp and nutty almonds, tart and fruity cranberries, salty feta cheese dressed with a tangy yet sweet white balsamic dressing


I just noticed, with the crostini and salad  already eaten, it's kind of empty. ha. Oh well, we were full on the inside. lol

All American Pot Roast
A delicious, mouthwatering, piece of pot roast that has been cooked until fork tender. Cooked with carrots, celery, leeks and red wine. Served with roasted rosemary potatoes that are crisp on the outside and creamy on the inside and simple roasted green asparagus 

Apple Crisp
An All-American Dessert For An All-American Dinner. Tender yet al dente apples that are cooked with cinnamon and nutmeg. Topped with a buttery sweet and crunchy streusel that is to die for.

Tips/Advice For Dinner Parties 
-Make something you can handle. Don't make something you've seen in a magazine and "decide" to make that day. Using guests as guinea pigs is not a great idea at all. 

-When creating a menu, start with the main course and work your way around it to create a theme.

-When prepping for the party, think of what you can do in advance. Whether it be chopping vegetables, making the dessert and whatnot. Luckily for me, my dishes didn't need that much prep work! YAY!!

-Making everything from scratch is not needed. Take all the help you can get and take short cuts along the way. For instance, pre-made salad mixes have really improved over the years. 

-If your friend/relative offers to bring a dish, let them. Why not? At every filipino at my house, there are at least 3 or 4 dishes brought by someone. The more food the merrier, I always say! ha.

-Most importantly, have fun! There's nothing worse than guests seeing you stressed out.


Don't forget to vote again from October 4 to 7. 
It's simple. Just go to my PFB Profile HERE during those dates. 
Thanks for the support! :)

-Aaron John

LinkWithin

Related Posts with Thumbnails