Showing posts with label cream cheese. Show all posts

Saturday, August 23, 2014

Cinnamon Roll Pull Apart Coffee Cake with Pecans


I think I'm just slightly obsessed with cinnamon rolls. Maybe it's the cinnamon sugar? Maybe it's the cream cheese frosting? Maybe it's the bread? Maybe it's an excuse to eat something sweet for breakfast? Either way, who can resist a cinnamon roll? I know I can't.


In about two weeks, I'll be headed to San Diego and a part of me is looking forward to buying a Cinnabon cinnamon roll at the airport before the flight. Those oversized cinnamon rolls are so freaken' delicious! The smell alone is just so badass! Please...can I just have one now?


It's been years since I've made cinnamon rolls but I didn't want to make a cinnamon roll. I'll leave that up to Cinnabon. But I still had a craving for it, two weeks is way too long of a wait. I just had to have something cinnamon-y. Therefore, this Cinnamon Roll Pull Apart Coffee Cake with Pecans will do!


If you are a fan of the innards of a cinnamon roll, this is for you. Innards is probably not the best word to describe something so delicious, but who cares. It's fluffy, sweet and reminds me of the center of cinnamon rolls. The pecans give it a little somethin' somethin' to cut through the sweetness and give a little crunch. Don't like pecans? Leave it out or substitute it. I'm not one to judge what you do in your kitchen. Either way, it will be delicious!


Cinnamon and Lemon Pull-Apart Coffee Cake
Original recipe by Flo Braker
Makes a 9″x 5″ pan 

Ingredients
Sweet Yeast Dough
About 2 3/4 cups (12 1/4 ounces) all-purpose flour
1/4 cup (1 3/4 ounces) granulated sugar
2 1/4 teaspoons (1 envelope) instant yeast
1/2 teaspoon salt
1/3 cup (2 1/2 fluid ounces) whole milk
2 ounces unsalted butter
1/4 cup (2 fluid ounces) water
1 1/2 teaspoons pure vanilla extract
2 large eggs, at room temperature

Cinnamon Sugar Filling
1/2 cup golden brown sugar
1 tablespoon ground cinnamon
1/4-1/2 cup chopped pecans

2 ounces unsalted butter, melted to be spread over the dough

Tangy Cream Cheese Icing
3 ounces cream cheese, softened
1/3 cup (1 1/4 ounces) powdered sugar
1 tablespoon whole milk
1 tablespoon fresh lemon juice

Directions
Make the Sweet Yeast Dough
Mix two cups (nine ounces) flour, the sugar, yeast, and salt in a medium bowl with a rubber spatula. Meanwhile, in a small saucepan or in the microwave, combine the milk and the butter and heat until the butter is melted. Remove from the heat, add the water, and let rest a minute until just warm (120 to 130°F [49 to 54°C]). Stir in the vanilla extract.

Pour the milk mixture over the flour-yeast mixture and, using a rubber spatula, mix until the dry ingredients are evenly moistened. Attach the bowl to the mixer, and fit the mixer with the paddle attachment. With the mixer on low speed, add the eggs, one at a time, mixing after each addition just until incorporated. Stop the mixer, add 1/2 cup (2 1/4 ounces) of the remaining flour, and resume mixing on low speed until the dough is smooth, 30 to 45 seconds. Add 2 more tablespoons flour and mix on medium speed until the dough is smooth, soft, and slightly sticky, about 45 seconds.

Lightly flour a work surface and knead the dough gently until smooth and no longer sticky, about one minute. Add an additional 1-2 tablespoons of flour only if the dough is too sticky to work with. Place the dough in a large bowl, cover it with plastic wrap, and let it rise in a warm place (about 70°F [21°C]) for 45-60 minutes or until doubled in size. An indentation made with your finger should keep its shape.

Meanwhile, make the cinnamon sugar mixture by combining the brown sugar and cinnamon together in a bowl. Set aside.

Center a rack in the oven and preheat the oven to 350°F (175°C). Grease a 9″x5″ loaf pan.

Gently deflate the dough with your hand. Flour a work surface and roll the dough into a 20″ by 12″ rectangle. [I suggest using a ruler and getting this as accurate as possible, for a prettier loaf that will fit better in the pan. I also suggest making sure both sides are floured, so that the dough will be easy to lift up later.] Use a pastry brush to spread the melted butter evenly and liberally over the dough.

Use a pizza cutter to cut the dough crosswise in five strips, each about 12″ by 4″. With the dough sliced but still together, sprinkle the dough lengthwise with the cinnamon sugar mixture, followed by the pecans. Take each rectangle and top one over the other. Continue to top with rectangles, so you have a stack of five 12″ by 4″ rectangles, all buttered and topped with the cinnamon sugar.

Slice this new stack crosswise, through all five layers, into 6 equal rectangles (each should be 4″ by 2″.) Carefully transfer these strips of dough into the loaf pan, cut edges up, side by side. It might be a little roomy, but the bread will rise and expand after baking. Loosely cover the pan with plastic wrap and let the dough rise in a warm place (70 °F [21°C]) until puffy and almost doubled in size, 30 to 50 minutes. When you gently press the dough with your finger, the indentation should stay.

Bake the loaf until the top is golden brown, 30 to 35 minutes.

Meanwhile, make the cream cheese icing. Beat the cream cheese and powdered sugar in a medium bowl with a wooden spoon until smooth, then add the milk and lemon juice. Stir until creamy and smooth.

The recipe recommends you tilt and rotate the pan while tapping on a table to release the loaf. I just carefully ran a knife around it. Flip the loaf over onto a cooling rack, then flip onto another rack so that it’s right side up. Spread the top of the warm cake with the cream cheese icing, using a pastry brush to fill in all the cracks.

-Aaron John

Saturday, March 3, 2012

Cheesecake Thumbprint Cookies


Cheesecake is one of those things that is rich and decadent. It definitely is a "Special Occasion" type of treat. But what about a version that you don't have to feel too guilty about? Why not take it a step forward and make it portable as well? So, what do you get when you merge the two? Cheesecake Thumbprint Cookies.


When searching for a recipe, I ended up with one from Cookie Madness which combined the crunchiness of a cookie and the creaminess of cheesecake in one. It starts off with a shortbread like cookie and is filled with a tangy cream cheese filling. This cookie is a process to make but pretty much has all the flavors of a cheesecake.


I would have loved the cookie to have more of a graham cracker flavor but it still was pretty good. You can even add more flavor by adding some jam into the cookie before filling it with the cheesecake. Now that's something I would love to try.

Cheesecake Thumbprint Cookies
Recipe from Cookie Madness (Adapted from Martha Stewart)

Ingredients
Cheesecake filling
4 ounces cream cheese, softened
1/4 cup granulated sugar
1/8 teaspoon salt
1 large egg yolk
1 1/2 teaspoons sour cream
1/4 teaspoon vanilla

Cookie dough
16 tablespoons unsalted butter, softened
1/4 cup granulated sugar
1/4 teaspoon salt
1 large egg yolk
2 cups all-purpose flour

Directions
For the filling beat cream cheese with the sugar and salt until smooth. Mix in egg yolk, sour cream and vanilla. Place into the refrigerator for 30 minutes.

Preheat oven to 350 degrees

For the cookie dough, beat together butter, sugar and salt until creamy. Add the egg yolk until combined and add the flour until it becomes cookie dough.

Scoop out tablespoons of the dough and roll into balls. Place balls onto parchment-lined baking sheets and make an indentation in the center of each ball with your thumb.

Place into the oven and bake for 10 minutes. Remove from the oven and carefully use your thumb to press the middle of the cookies back down, remaking the indentations. Place cookies back into the oven and continue to bake until slightly golden around the edges, about 7 minutes.

Remove cookies from the oven and fill with the cheesecake filling using a teaspoon. Place back into the oven and bake for 7 minutes. Remove from the oven and transfer cookies to a wire rack to cool. When cool, place cookies into the refrigerator to chill.

-Aaron John

Sunday, August 21, 2011

Pull Apart Coffee Cake Two Ways: Cinnamon and Lemon


What do you get when you mix a cinnamon roll with a loaf of bread? Pull Apart Coffee Cake! Just imagine eating a cinnamon roll, but only the inner layer of it!Soft, buttery and oozing with that cinnamony goodness! Not to mention that decadent cream cheese frosting! Mmmmm, I can already smell those Cinnabon Cinnamon Rolls now. But today is not about the cinnamon roll, it's about Pull Apart Coffee Cake!

I woke up bright and early this morning to put this together. Finally finishing my Summer Quarter at UW, it finally gives me time to bust out the yeast and tackle bread once again. Bread in and of itself is kind of a temperamental thing to begin with. You need patience and even a little muscle power helps along in the process. However, this recipe is one of the easiest bread recipes I have made so don't feel intimidated.

This is my own adaption to the original recipe of a "Lemon Scented Pull Apart Coffee Cake". I wanted that cinnamon roll-esque flavor in the bread but I also wanted to try the lemon of the original recipe. Basically, I made a Half Cinnamon and Half Lemon Pull Apart Coffee Cake. Genius right? Who needs one flavor when you can have two!! If you want a whole loaf of either, just double the sugar filling of whatever you like.

Cinnamon and Lemon Pull-Apart Coffee Cake
Makes a 9″x5″ pan 

Sweet Yeast Dough
About 2 3/4 cups (12 1/4 ounces) all-purpose flour
1/4 cup (1 3/4 ounces) granulated sugar
2 1/4 teaspoons (1 envelope) instant yeast
1/2 teaspoon salt
1/3 cup (2 1/2 fluid ounces) whole milk
2 ounces unsalted butter
1/4 cup (2 fluid ounces) water
1 1/2 teaspoons pure vanilla extract
2 large eggs, at room temperature

Lemon Sugar Filling
1/4 cup granulated sugar
1 tablespoons finely grated lemon zest (1 1/2 lemons)
1/2 tablespoon finely grated orange zest

Cinnamon Sugar Filling
2 tbsp granulated sugar
2 tbsp light brown sugar
1 1/2 tsp cinnamon

2 ounces unsalted butter, melted to be spread over the dough

Tangy Cream Cheese Icing
3 ounces cream cheese, softened
1/3 cup (1 1/4 ounces) powdered sugar
1 tablespoon whole milk
1 tablespoon fresh lemon juice

Make the Sweet Yeast Dough
Mix two cups (nine ounces) flour, the sugar, yeast, and salt in a medium bowl with a rubber spatula. Meanwhile, in a small saucepan or in the microwave, combine the milk and the butter and heat until the butter is melted. Remove from the heat, add the water, and let rest a minute until just warm (120 to 130°F [49 to 54°C]). Stir in the vanilla extract.

Pour the milk mixture over the flour-yeast mixture and, using a rubber spatula, mix until the dry ingredients are evenly moistened. Attach the bowl to the mixer, and fit the mixer with the paddle attachment. With the mixer on low speed, add the eggs, one at a time, mixing after each addition just until incorporated. Stop the mixer, add 1/2 cup (2 1/4 ounces) of the remaining flour, and resume mixing on low speed until the dough is smooth, 30 to 45 seconds. Add 2 more tablespoons flour and mix on medium speed until the dough is smooth, soft, and slightly sticky, about 45 seconds.

Lightly flour a work surface and knead the dough gently until smooth and no longer sticky, about one minute. Add an additional 1-2 tablespoons of flour only if the dough is too sticky to work with. Place the dough in a large bowl, cover it with plastic wrap, and let it rise in a warm place (about 70°F [21°C]) for 45-60 minutes or until doubled in size. An indentation made with your finger should keep its shape.

Meanwhile, make the lemon sugar and cinnamon sugar filling. Mix the sugar, lemon zest, and orange zest in one bowl and mix the sugar, brown sugar and cinnamon in another.

Center a rack in the oven and preheat the oven to 350°F (175°C). Grease a 9″x5″ loaf pan.

Gently deflate the dough with your hand. Flour a work surface and roll the dough into a 20″ by 12″ rectangle. [I suggest using a ruler and getting this as accurate as possible, for a prettier loaf that will fit better in the pan. I also suggest making sure both sides are floured, so that the dough will be easy to lift up later.] Use a pastry brush to spread the melted butter evenly and liberally over the dough.

Use a pizza cutter to cut the dough crosswise in five strips, each about 12″ by 4″. With the dough sliced but still together, sprinkle the dough lengthwise with the all the sugar (half getting the lemon and half the cinnamon). Take each rectangle and top one over the other, making sure the lemon is over the lemon and the cinnamon is over the cinnamon. Continue to top with rectangles, so you have a stack of five 12″ by 4″ rectangles, all buttered and topped with lemon sugar for one half and cinnamon sugar for the other.

Slice this new stack crosswise, through all five layers, into 6 equal rectangles (each should be 4″ by 2″.) 3 should be all lemon and 3 should be all cinnamon. Carefully transfer these strips of dough into the loaf pan, cut edges up, side by side doing cinnamon, cinnamon, cinnamon, lemon, lemon, lemon. it might be a little roomy, but the bread will rise and expand after baking. Loosely cover the pan with plastic wrap and let the dough rise in a warm place (70 °F [21°C]) until puffy and almost doubled in size, 30 to 50 minutes. When you gently press the dough with your finger, the indentation should stay.

Bake the loaf until the top is golden brown, 30 to 35 minutes.

Meanwhile, make the cream cheese icing. Beat the cream cheese and powdered sugar in a medium bowl with a wooden spoon until smooth, then add the milk and lemon juice. Stir until creamy and smooth.

The recipe recommends you tilt and rotate the pan while tapping on a table to release the loaf. I just carefully ran a knife around it. Flip the loaf over onto a cooling rack, then flip onto another rack so that it’s right side up. Spread the top of the warm cake with the cream cheese icing, using a pastry brush to fill in all the cracks.

-Aaron John

Saturday, February 26, 2011

Red Velvet Cookies


What a crazy week! If you live in the Seattle area, you would have experienced this sort of freak "Snow Storm" that occurred this past Wednesday. Sure it was cold and below freezing but I certainly didn't expect it to snow as much as it did, if at all. I mean, it's almost March!  The weather was extremely strange. At first it was raining. After, the rain died down the sun came out, deceiving all of us Seattle-ites. Soon enough the clouds rolled back in, the temperature dropped even more and that ever so classic, snow that you only see during the Holiday season in December, came falling down.

You may think that it's a good thing that there was snow. I mean Snow days?? Oh yeah! Oh wait, but UW doesn't exactly give out Snow Days as if they were free samples at Costco. Nope, the snow has to turn the hills of Seattle into Mountain Passes for them to give them out. Oh did I mention I had midterms on Thursday and Friday as well? Snow + Midterms = Bad News.

I went to bed thinking there would be school despite the snow and boy was I right. As I woke up, I took a peak out my window and the sidewalks were full of snow and the streets were icy. I took a look at the UW website only to find out that they still opened their doors for classes to start as usual. Did I make it to school? Of course! Thankfully in one piece. ha.  Now that was an adventure. Well, that pretty much sums up my week, what about you? ha.

Tips
-Instead of the Icings, I made a basic Cream Cheese Frosting.

Results
Taste: Almost exactly like a Red Velvet Cupcake. A slightly chocolate-ly cookie paired with the tang of the cream cheese frosting

Texture: Cake like cookie with crispier edges and moist center. Topped with the creamy Cream Cheese Frosting.

Red Velvet Black and White Cookies
Recipe via Rachael Ray

Ingredients
Cookie:
1-1/4 cups flour
1 tablespoon unsweetened cocoa powder
1/2 teaspoon baking soda
1/2 teaspoon salt
1 stick (4 ounces) unsalted butter, at room temperature (5 tbsp for the cookie, 3 tbsp for the frosting)
 3/4 cup granulated sugar
 1 large egg
1 tablespoon red food coloring
 1-1/2 teaspoons pure vanilla extract
 1/2 cup buttermilk

Icing:
2 cups confectioners' sugar
2 tablespoons corn syrup
4 ounces semisweet chocolate

Downsize it:
Make mini cookies using 2-tablespoon scoops of batter

Directions
Preheat the oven to 350°. Line a baking sheet with parchment paper. In a medium bowl, sift together the flour, cocoa, baking soda and salt.

Using a mixer, beat 5 tablespoons butter with the granulated sugar until fluffy, 3 minutes. Beat in the egg, food coloring and 1 teaspoon vanilla. Beat in the flour mixture alternately with the buttermilk until smooth.

Place 1/4-cup scoops of batter 2 inches apart on the prepared baking sheet; spread out. Bake until a toothpick inserted in the center comes out dry, 12 to 15 minutes. Let the cookies sit for 5 minutes, then transfer to a rack to cool.

In a bowl, whisk together the confectioners' sugar, remaining 1/2 teaspoon vanilla, 1 tablespoon corn syrup and 2 tablespoons hot water until smooth. In another bowl, combine the chocolate, remaining 3 tablespoons butter and 1 tablespoon corn syrup; microwave until melted, about 1 minute.

Coat the cookies with the vanilla, then the chocolate icing. Refrigerate until set, about 20 minutes.

-Aaron John

Saturday, January 22, 2011

Strawberry Cheesecake


Did anyone hear of the news of Regis Philbin this week?! He's leaving Live with Regis and Kelly! If you're anything like me, you must be extremely saddened by this news! If anything, this was the number one show I would watch on the weekdays if I had the chance. Now, what is it going to be? Live with _____ and Kelly, Live with Kelly and _____? My prediction is going to have to be Neil Patrick Harris. I do have to say, despite being saddened, I really hope Regis has a great retirement! He def. deserves it!

In honor of Regis Philbin, I made cheesecake. Why? When I think of cheesecake, I think New York. When I think New York, I think Regis Philbin! I have to say, some people really despise cheesecake. I, myself, am not a HUGE fan of cheesecake but I'll still eat it. I guess it sort of reminds me of eating frosting with something crunchy. As weird as that sounds, that's really what cheesecake is to me. ha. This cheesecake was delicious though!

Tips
-I would actually like to try cooking this cheesecake without a water bath. The crust on the edges of the cheesecake became "doughy" and unpleasant.
-Even though I wrapped my pan with 4 layers of aluminum foil, water still seemed to make it's way in?
-I would also toast the crust instead of refrigerating it before the cheesecake batter is poured in.
-My cheesecake cooked for about 70 minutes instead of the 45 minutes. 45 minutes was just not enough because the cheesecake was still extremely "jiggly".
-Instead of using the blueberry sauce, I decided to macerate sliced strawberries with about 1/2 a lemon and a couple tablespoons of sugar and use that instead


Results
Taste: Tangy yet sweet cheesecake, with acidity from the strawberries to cut the richness of the cheesecake. Plus that classic "graham cracker" flavor from the crust, my fav. part!

Texture: Creamy cheesecake filling and a bit of crunch from the crust, except for the edges of the cheesecake of course. Oh water bath...why must you be that way?


The Ultimate Cheesecake
Recipe by Tyler Florence
Ingredients
Crust:
2 cups finely ground graham crackers (about 30 squares)
1/2 teaspoon ground cinnamon
1 stick unsalted butter, melted
Filling:
1 pound cream cheese, 2 (8-ounce) blocks, softened
3 eggs
1 cup sugar
1 pint sour cream
1 lemon, zested
1 dash vanilla extract
Warm Lemon Blueberry Topping, recipe follows

Directions
Preheat the oven to 325 degrees F.

In a mixing bowl, combine the ingredients with a fork until evenly moistened. Lightly coat the bottom and sides of an 8-inch springform pan with non-stick cooking spray.

Pour the crumbs into the pan and, using the bottom of a measuring cup or the smooth bottom of a glass, press the crumbs down into the base and 1-inch up the sides. Refrigerate for 5 minutes.

For the Filling:

In the bowl of an electric mixer, beat the cream cheese on low speed for 1 minute until smooth and free of any lumps. Add the eggs, 1 at a time, and continue to beat slowly until combined. Gradually add sugar and beat until creamy, for 1 to 2 minutes.

Add sour cream, lemon zest, and vanilla. Periodically scrape down the sides of the bowl and the beaters. The batter should be well-mixed but not overbeaten. Pour the filling into the crust-lined pan and smooth the top with a spatula.

Set the cheesecake pan on a large piece of aluminum foil and fold up the sides around it. Place the cake pan in a large roasting pan. Pour boiling water into the roasting pan until the water is about halfway up the sides of the cheesecake pan; the foil will keep the water from seeping into the cheesecake. Bake for 45 minutes. The cheesecake should still jiggle (it will firm up after chilling), so be careful not to overcook. Let cool in pan for 30 minutes. Chill in the refrigerator, loosely covered, for at least 4 hours. Loosen the cheesecake from the sides of the pan by running a thin metal spatula around the inside rim. Unmold and transfer to a cake plate. Using a spatula spread a layer of Warm Lemon Blueberry topping over the surface.

Slice the cheesecake with a thin, non-serrated knife that has been dipped in hot water. Wipe dry after each cut.

Warm Lemon Blueberries:
1 pint blueberries
1 lemon, zested and juiced
2 tablespoons sugar
In a small saucepan add all the ingredients and simmer over medium heat for 5 minutes or so until the fruit begins to break down slightly. Leave to cool before spreading on cheesecake.

-Aaron John

Saturday, October 16, 2010

Coconut Cupcakes


These last couple of weeks, I've been bombarded with a plethora of school work! (Don't you just love my sophisticated language? ha). From readings, to assignments, to labs and post labs and now midterms, I have been super busy. I've been SOOOO determined to do extremely well in my full load of classes though so hopefully it will be worth it. Also, I have narrowed my major down to two choices! Either Biochemistry/Pharmacy or Pre-Nursing. I guess we'll find out what I choose by the end of the year! :)

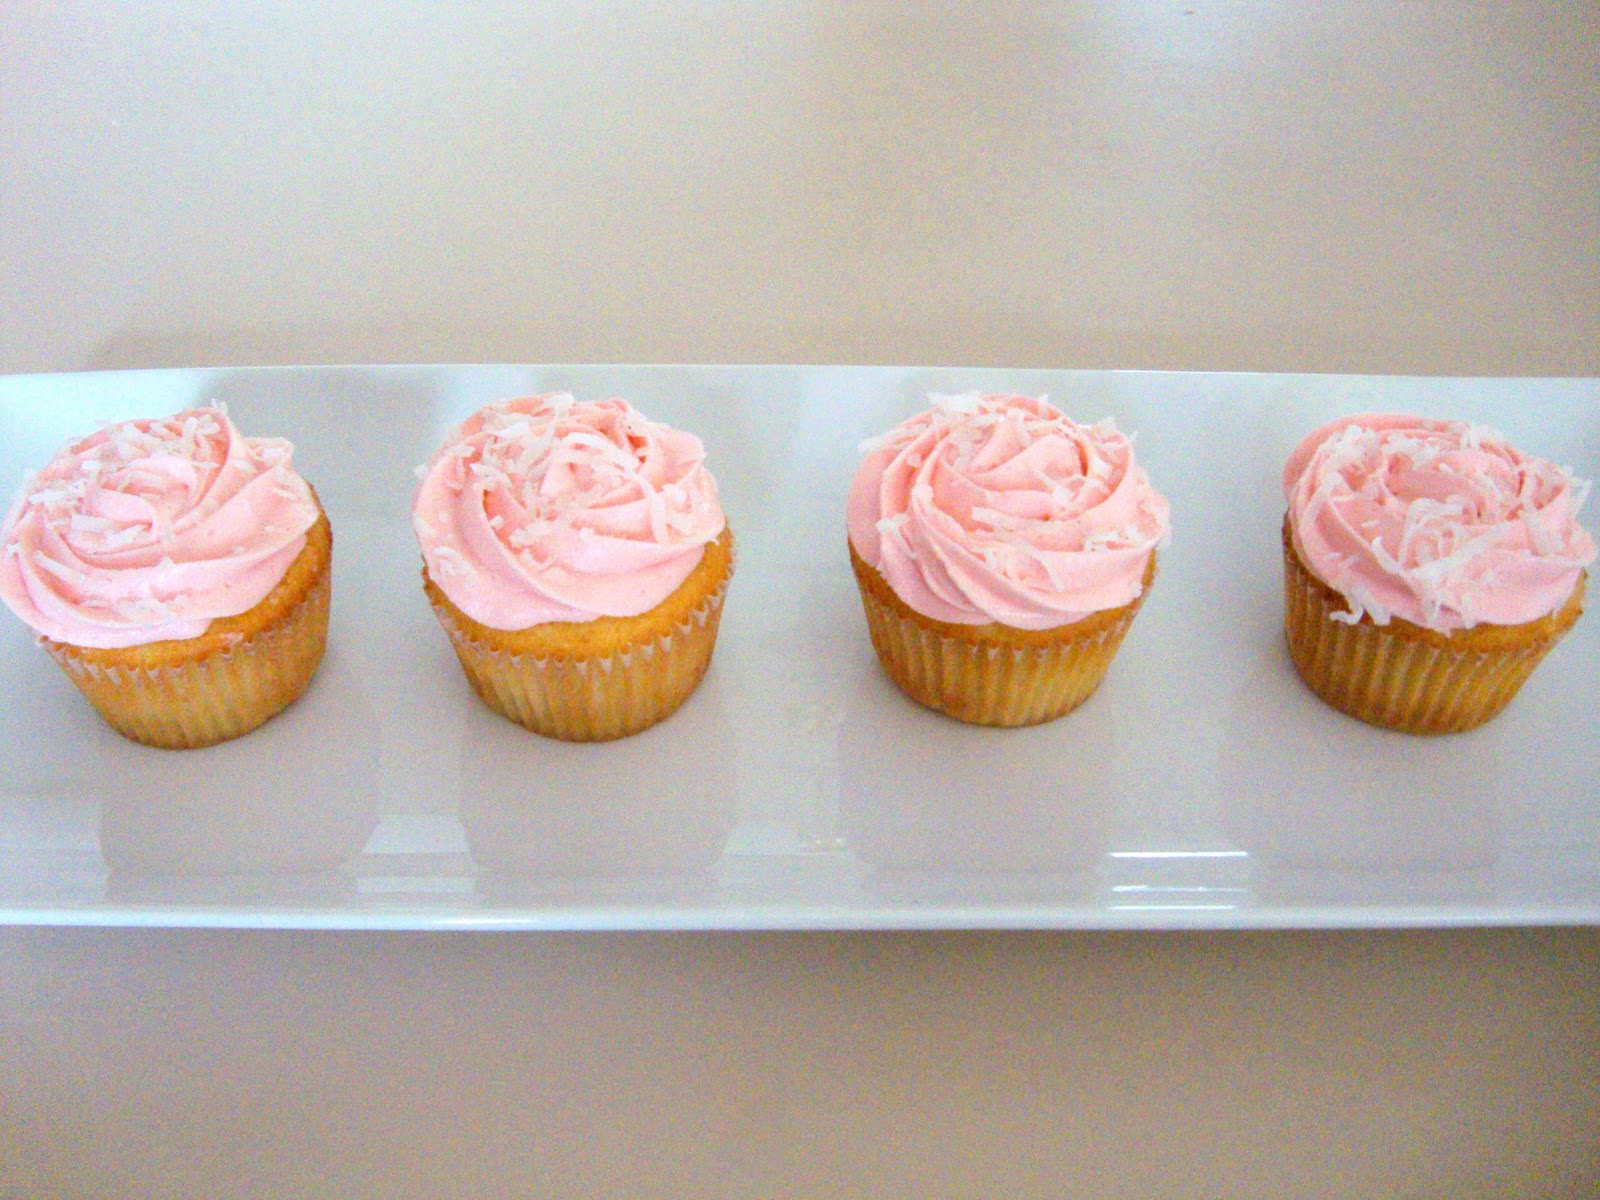
Back to this week's post for Coconut Cupcakes. If you have a facebook account, you may have noticed, in the last couple of weeks, that your friends may be posting a status that says 'I like it on the ___(Fill In The Blank)___". In addition, you may have noticed that only females were posting this. I'm about to de-mystify what this means! So what was this about? Breast Cancer Awareness Month..Duhhhh! lol. How this status relates to Breast Cancer Awareness, I have no clue, but the message does have us ask "Why the status?" and thus, it brings awareness. To bring awareness to Breast Cancer, I made Coconut Cupcakes with a Pink Buttercream. I only felt it would be right to do something for Breast Cancer Awareness since it is this month. Plus, since it is Breast Cancer Awareness Month, you definitely have to have something Pink inspired. ha. How will you honor Breast Cancer Awareness?

Also, if you still haven't entered my giveaway for a $55 Gift Certificate for CSN Stores, just check out my post for "Love Potion #31 Cookies". You can enter until October 20th.

Results
Taste: The cake had a distinct almond-vanilla flavor which brings out the flavor of the coconut. I wasn't able to test out the cream cheese frosting however...

Texture: Not exactly a soft and fluffy cake. More dense than a regular cupcake but not as dense as a pound cake. The coconut that was mixed into the batter gave a nice textural difference to the cake. 

Tips
-I did not fill the cupcake liners to the top as the recipe says. If you do, your cupcakes will rise too much and bake onto the cupcake pan. I filled mine with about 3 tbsp of batter so about 2/3 to 3/4 of the way up.

-Other people have variations of this recipe. I even saw some using toasted coconut instead! :)


Coconut Cupcakes (Makes 24 Cupcakes)
Recipe by Ina Garten
Ingredients
3/4 pound (3 sticks) unsalted butter, room temperature
2 cups sugar
5 extra-large eggs at room temperature
1 1/2 teaspoons pure vanilla extract
1 1/2 teaspoons pure almond extract
3 cups flour
1 teaspoon baking powder
1/2 teaspoon baking soda
1/2 teaspoon kosher salt
1 cup buttermilk
14 ounces sweetened, shredded coconut

For the frosting:
1 pound cream cheese at room temperature
3/4 pound (3 sticks) unsalted butter, room temperature
1 teaspoon pure vanilla extract
1/2 teaspoon pure almond extract
1 1/2 pounds confectioners' sugar, sifted

Directions
Preheat the oven to 325 degrees F.

In the bowl of an electric mixer fitted with the paddle attachment, cream the butter and sugar on high speed until light and fluffy, about 5 minutes. With the mixer on low speed, add the eggs, 1 at a time, scraping down the bowl after each addition. Add the vanilla and almond extracts and mix well.

In a separate bowl, sift together the flour, baking powder, baking soda, and salt. In 3 parts, alternately add the dry ingredients and the buttermilk to the batter, beginning and ending with the dry. Mix until just combined. Fold in 7 ounces of coconut.

Line a muffin pan with paper liners. Fill each liner to the top with batter. Bake for 25 to 35 minutes, until the tops are brown and a toothpick comes out clean. Allow to cool in the pan for 15 minutes. Remove to a baking rack and cool completely.

Meanwhile, make the frosting. In the bowl of an electric mixer fitted with the paddle attachment, on low speed, cream together the cream cheese, butter, and vanilla and almond extracts. Add the confectioners' sugar and mix until smooth.

Frost the cupcakes and sprinkle with the remaining coconut.

-Aaron John

Saturday, July 31, 2010

Strawberry Cheese Danish


So I haven't had a post in more than a week! 0.0 This week, I've been so busy hanging out with friends, watching Inception (Really great movie btw. It's mind boggling! haha), playing some mini golf, eating out, and playing pool and video games at Gameworks, that I didn't have time to really make anything and have a post. But here I am, back with another post just for you guys! :) As I type this, I am pretty much exhausted so I'm going to keep it short and simple. Hope that's alright! This week's creation was Strawberry Cheese Danish. Ina Garten has another appearance this week. This recipe is extremely simple to follow! The filling is the only thing that you have to work to put together but I was able to whip that up in no time. I made a few changes to the recipe though because the original recipe is for a Cheese Danish not a Strawberry Cheese Danish. I put all the measurements I used below. Overall, the flavor was great. It almost tasted like strawberry cheesecake! However, I did not like the texture of the filling at all. Maybe I'm wrong but shouldn't the filling be creamy? Instead of being creamy, the filling had more of a "curdled" texture which I believe came from the egg yolk. I searched other recipes and they also said to add an egg yolk. But!! I did find a recipe that used flour instead of the egg yolk! That might create a smoother filling than what I had. Here's the recipe and changes to it!!

Strawberry Cheese Danish (Makes 8 Danishes)
Ingredients
8 ounces cream cheese, at room temperature
1/3 cup sugar
2 extra-large egg yolks, at room temperature (Another recipe called for 2 tbsp of flour)
2 tablespoons ricotta cheese (I completely omitted this)
1 teaspoon pure vanilla extract
1/4 teaspoon kosher salt
1 tablespoon grated lemon zest (2 lemons)
1/2 cup Strawberry Preserves or Jam
2 sheets (1 box) frozen puff pastry, defrosted
1 egg beaten with 1 tablespoon water, for egg wash

Directions
Preheat the oven to 400 degrees F. Line a sheet pan with parchment paper.

Place the cream cheese and sugar in the bowl of an electric mixer fitted with a paddle attachment and cream them together on low speed until smooth. With the mixer still on low, add the egg yolks, ricotta, vanilla, salt, and lemon zest and mix until just combined. Don't whip!

Unfold 1 sheet of puff pastry onto a lightly floured board and roll it slightly with a floured rolling pin until it's a 10 by 10-inch square. Cut the sheet into quarters with a sharp knife. Place a heaping tablespoon of cheese filling into the middle of each of the 4 squares. Then place a tablespoon of the strawberry preserves or jam onto the cheese filling. Brush the border of each pastry with egg wash and fold 2 opposite corners to the center, brushing and overlapping the corners of each pastry so they firmly stick together. Brush the top of the pastries with egg wash. Place the pastries on the prepared sheet pan. Repeat with the second sheet of puff pastry and refrigerate the filled Danish for 15 minutes.

Bake the pastries for about 20 minutes, rotating the pan once during baking, until puffed and brown. Serve warm.

Cream Cheese Danish on Foodista
-Aaron John
My Food Outings: AJ's Food Adventure
Facebook Fan Page

Thursday, July 22, 2010

Carrot Cake


Raw carrots are difficult for me to eat. Cooked carrots are hard for me to eat. Cooked carrots that have their flavors hidden are easier for me to eat. Call me crazy but I'm not crazy for carrots. I cringe at the thought of eating a raw carrot. Even drenched in ranch dressing, I just can't eat it. BTW, a little fun fact. So I was watching the Dr. Oz show and carrots actually don't help your eyesight as much as everyone say they do. It's actually a myth!! Instead, dark green leafy vegetables help more!! Anyway, once the carrot's flavor is disguised with something flavorful, I eat them with ease. That's why Carrot Cake is so delicious to me. Its flavor is disguised with spices and it's just so darn good! I'd like to think that this cake is healthy. I mean, it's a cake that uses VEGETABLES!! How can it be bad? This has to be another semi-healthy dessert!! Carrots already have a natural sweetness so we're just enhancing it here with more sugar! :D

Now, I can't give away the recipe for this carrot cake. Sorry I'm not sharing again!! (I'll explain later in this post). I'm probably getting on your nerves for not posting recipes, huh? Well, I'll talk about it later. But today, yes today, July 22nd, is one of my best friend's birthday! Happy Birthday to Michael Appelgate!! Woot Woot!! Happy Birthday bro!! I met Michael my freshmen year of high school. I don't think we started talking until we were both on our high school swim team. Let me tell you, that swim team was a doozy!! Waking up at 5:00 AM everyday to go to swim practice for about 2 hrs, go to school for another 6 hrs, then having land practice for another hour, was TOUGH!! Not to mention smelling like chlorine the whole day. It was through joining this team that enabled me to make great friends on that swimming team and even though I didn't enjoy the practices so much, it was all worth it. So once again, Happy Birthday Michael!! Oh, it's also my cousin, Jeremiah's birthday as well. Happy Birthday to him too!! haha.

So, why am I not going to post the recipe for my carrot cake? Like I said before I want to own a cupcake shop. But, this recipe is a serious secret as well. It's kind of hard to explain. My family wasn't supposed to have this recipe. In fact, I don't think anyone was supposed to have this recipe. My mom got it from a co-worker who got it from another co-worker somehow and I had to "drag" the recipe out of my mom. My mom specifically said not to share it. So, there you go. I did find a recipe that is similar to the one I use so here's the similar recipe. (Betty Crocker's Carrot Cake) P.S. I need to work on my piping skills.....

Carrot Cake
Ingredients
1 1/2 cups granulated sugar
1 cup vegetable oil
3 eggs
2 cups Gold Medal® all-purpose flour
2 teaspoons ground cinnamon
1 teaspoon baking soda
1 teaspoon vanilla
1/2 teaspoon salt
3 cups shredded carrots (5 medium)
1 cup coarsely chopped walnuts

Cream Cheese Frosting
Ingredients
1 package (8 oz) cream cheese, softened
1/4 cup butter or margarine, softened
2 to 3 teaspoons milk
1 teaspoon vanilla
4 cups powdered sugar

Directions
Heat oven to 350°F. Grease bottom and sides of one 13x9-inch pan or two 8-inch or 9-inch round pans with shortening; lightly flour. In large bowl, beat granulated sugar, oil and eggs with electric mixer on low speed about 30 seconds or until blended. Add flour, cinnamon, baking soda, 1 teaspoon vanilla and the salt; beat on low speed 1 minute. Stir in carrots and nuts. Pour into pan(s).

Bake 13x9-inch pan 40 to 45 minutes, round pans 30 to 35 minutes, or until toothpick inserted in center comes out clean. Cool rectangle in pan on cooling rack. Cool rounds 10 minutes; remove from pans to cooling rack. Cool completely, about 1 hour.

In medium bowl, beat cream cheese, butter, milk and vanilla with electric mixer on low speed until smooth. Gradually beat in powdered sugar, 1 cup at a time, on low speed until smooth and spreadable. Frost 13x9-inch cake or fill and frost round layers with frosting. Store in refrigerator.

Carrot Cake on Foodista
-Aaron John
My Food Outings: AJ's Food Adventure
Facebook Fan Page

Thursday, July 1, 2010

Red Velvet Cupcakes And A Day That Only Comes Once A Year!!


Okay, guess what today is? No, I'm not talking about the 4th of July or Canada Day. This day only comes once a year...It usually involves cakes and candles...Sometimes there are balloons and streamers...Got it yet? Nope? Well, what if I tell you that it is one person's special day that comes once a year? Now? Well, I'll just tell you!! Today, July 1st, is my birthday!! :D I'm turning, what I think is a weird number, 19 years old! The last year in the teen years. Boy do I feel old.....JKJK But really, I can't believe I'm already 19 years old. It seems like it was yesterday when I was sitting in my living room watching my top 3 Disney movies of all time: "The Lion King", "Aladdin" and "Mulan". Then there is Toy Story. Sadly to say, I haven't seen the third movie yet but every time I hear the song from Toy Story, "You've Got a Friend In Me", I think about my childhood.

Anyway, so I'm turning 19 years old, but what's special about 19 years old? when you turn 16, you can get your license. When you're 17, you get to see Rated R movies. When you're 18, you're legal. When you're 20, you're out of the teen years. When you're 21, you are at the legal age to drink and what not. BUT, what is special about 19? I guess I'll find out this year. Today will be filled with hanging out with some of my good friends from High School, watching a movie, eating at the Cheesecake Factory and whatever I may want to do. I'm prepared to do anything. Well....maybe not everything.....

So, what goes better with birthdays than cake?! What is better than cake than CUPCAKES!! That's what I made today, just for my birthday. So how did I decide on Red Velvet for my birthday? Well, I have yet to find a great vanilla cake recipe (which is my favorite), but I wasn't craving chocolate cake either. Thus, I have made Red Velvet Cupcakes. I think it's really a combination of a vanilla cake and a chocolate cake. It has a slight hint of both chocolate and vanilla without them overpowering one another. Plus, I have found that there has been a craze over Red Velvet Cupcakes for some reason. So here goes. I made my Red Velvet Cupcakes, piped them on with cream cheese frosting, sprinkled them with red sugar and topped it with a birthday candle. Does this scream "Birthday" or what...Maybe it screams 4th of July because of the blue candle...but NO! It's my birthday. haha.

I actually won't be posting the recipe for my Red Velvet Cupcakes. Sorry!! I'll explain. I actually want to open a Cupcake Shop and so will my Cupcake Shop be successful if my recipes for them are posted on the web? I think not. You see, if my cupcake recipes are posted on the web, why would anyone want to go to my shop if they can make it at home? I have already perfected my Red Velvet Cupcake recipe and I can't find it in me to post it. Don't be sad though!! I have decided that I will meet you guys half way. I'll find recipes that are close to mine but are not the same. Sounds good? kk. Here's a similar recipe!

Red Velvet Cupcakes
Ingredients
Cupcakes:
10 ounce cake flour (about 2 1/2 cups)
2 tablespoons unsweetened cocoa
1 teaspoon baking soda
1 teaspoon baking powder
1 teaspoon kosher salt
1 1/2 cups granulated sugar
6 tablespoons unsalted butter, softened
2 large eggs
1 1/4 cups buttermilk
1 1/2 teaspoons white vinegar
1 1/2 teaspoons vanilla extract
2 tablespoons red food coloring (about 1 ounce)

Frosting:
5 tablespoons butter, softened
4 teaspoons buttermilk
1 (8-ounce) block cream cheese, softened
3 1/2 cups powdered sugar (about 1 pound)
1 1/4 teaspoons vanilla extract

Directions
Preheat oven to 350°.

To prepare the cupcakes, place 24-30 (depending on how big you want your cupcakes to be) paper muffin cup liners in muffin cups; coat with cooking spray.

Weigh or lightly spoon cake flour into dry measuring cups; level with a knife. Combine cake flour, unsweetened cocoa, baking soda, baking powder, and salt in a medium bowl; stir with a whisk. Place granulated sugar and unsalted butter in a large bowl; beat with a mixer at medium speed until well blended (about 3 minutes). Add eggs, 1 at a time, beating well after each addition. Add flour mixture and 1 1/4 cups buttermilk alternately to sugar mixture, beginning and ending with flour mixture. Add white vinegar, 1 1/2 teaspoons vanilla, and food coloring; beat well.

Spoon batter into prepared muffin cups. Bake at 350° for 20 minutes or until a wooden pick inserted in center comes out clean. Cool in pan 10 minutes on wire rack; remove from pan. Cool completely on wire racks.

To prepare frosting, beat 5 tablespoons butter, 4 teaspoons buttermilk, and cream cheese with a mixer at high speed until fluffy. Gradually add powdered sugar; beat until smooth. Add 1 1/4 teaspoons vanilla; beat well. Spread frosting evenly over cupcakes.

Red Velvet Cupcake on Foodista
-Aaron John
My Food Outings: AJ's Food Adventure
Facebook Fan Page

Saturday, June 19, 2010

Mini Cheesecakes


From my personal experience, I've learned that you either love cheesecake or you hate it. For me personally, I actually dislike plain-old-cheesecake. However, once it is ice cold and topped with a flavorful sauce, perhaps a strawberry or BLUEBERRY SAUCE, it becomes tastier for me. Yes, that's right, you've waited long enough. I planned to use Ina Garten's Blueberry Sauce I made a week ago and froze, right here on this cheesecake. After a constant nagging from my brother to make cheesecake, I decided that I would. This was the first time making cheesecake so I searched the internet for the best cheesecake recipe. The recipe I ended up with came from Tyler Florence yet again. Remember what a flop of a recipe Tyler Florence's Blueberry Scones with Lemon Glaze came out to be for me? Well, hopefully Tyler Florence can redeem himself with this cheesecake recipe.

Now when making this cheesecake, I very well knew that I didn't have a spring form pan. I mean, I didn't want to go out and buy a new pan that was designated for a cheesecake so I decided to make mini cheesecakes by baking them in a cupcake pan. I thought this would be a great thing to do. It creates a great portion size and doesn't it just look, well, cool? Don't you just want to have one all for yourself? Plus, this way, you can make a bunch of Mini Cheesecakes with the same batter and change their flavors by the different toppings you can add. With this, you can offer your guests a variety of flavored Mini Cheesecakes instead of having one huge cheesecake that is flavored one way like what Tyler Florence's recipe suggests. So, I followed the recipe exactly and simply used a cupcake pan lined with cupcake papers. (When using the Mini Cheesecake method, it makes about 24). I added about 1 tbsp of the graham cracker mixture into the pan and flattened it out. Then I filled them almost to the top with the cheesecake batter. I then baked it in a water bath for about 22 minutes. It takes between 20 and 25 mins in the oven. It should be just set when you take it out of the oven. I then placed it into the refrigerator to finish setting up. After being in the refrigerator over night, I topped them with either the Blueberry Sauce, a home made Strawberry Sauce or Melted Chocolate. I then went overboard and put a bunch of home-made whipped cream on them that I made by HAND. Remember? I broke my mixer last week making Sticky Buns.....

These Mini Cheesecakes were actually really good! Tyler Florence redeemed himself. These were creamy, had the right amount of tang, a hint of lemon and vanilla flavor and the graham cracker crust had a nice hint of spice from the cinnamon and gave a great textural difference. Then, the different toppings really rounded out the flavors. Thumbs up to Tyler Floernce. I will be posting the recipe for the Strawberry Sauce in a couple of days so look out for that. Here's the cheesecake recipe!!

The Ultimate Cheesecake (6-8 servings)
Ingredients
Crust:
2 cups finely ground graham crackers (about 30 squares)
1/2 teaspoon ground cinnamon
1 stick unsalted butter, melted

Filling:
1 pound cream cheese, 2 (8-ounce) blocks, softened
3 eggs
1 cup sugar
1 pint sour cream
1 lemon, zested
1 dash vanilla extract
Warm Lemon Blueberry Topping, recipe follows

Directions
Preheat the oven to 325 degrees F.

In a mixing bowl, combine the crust ingredients with a fork until evenly moistened. Lightly coat the bottom and sides of an 8-inch springform pan with nonstick cooking spray. Pour the crumbs into the pan and, using the bottom of a measuring cup or the smooth bottom of a glass, press the crumbs down into the base and 1-inch up the sides. Refrigerate for 5 minutes.

For the Filling:

In the bowl of an electric mixer, beat the cream cheese on low speed for 1 minute until smooth and free of any lumps. Add the eggs, 1 at a time, and continue to beat slowly until combined. Gradually add sugar and beat until creamy, for 1 to 2 minutes. Add sour cream, lemon zest, and vanilla. Periodically scrape down the sides of the bowl and the beaters. The batter should be well mixed but not over-beaten. Pour the filling into the crust-lined pan and smooth the top with a spatula.

Set the cheesecake pan on a large piece of aluminum foil and fold up the sides around it. Place the cake pan in a large roasting pan. Pour boiling water into the roasting pan until the water is about halfway up the sides of the cheesecake pan; the foil will keep the water from seeping into the cheesecake. Bake for 45 minutes. The cheesecake should still jiggle (it will firm up after chilling), so be careful not to overcook. Let cool in pan for 30 minutes. Chill in the refrigerator, loosely covered, for at least 4 hours. Loosen the cheesecake from the sides of the pan by running a thin metal spatula around the inside rim. Unmold and transfer to a cake plate. Using a spatula spread a layer of Warm Lemon Blueberry topping over the surface.

Slice the cheesecake with a thin, non-serrated knife that has been dipped in hot water. Wipe dry after each cut.

Warm Lemon Blueberries
1 pint blueberries
1 lemon, zested and juiced
2 tablespoons sugar
In a small saucepan add all the ingredients and simmer over medium heat for 5 minutes or so until the fruit begins to break down slightly. Leave to cool before spreading on cheesecake.

Miniature Cheesecakes on Foodista
-Aaron John
My Food Outings: AJ's Food Adventure
Facebook Fan Page

Saturday, May 1, 2010

Rugelach


Do you know what "Rugelach" is, let alone how to say the word? What?! You mean you don't? I have to say, I myself didn't know what "Rugelach" was. Well, that's my job this week then isn't it? So, "Rugelach". "Rugelach" is a Jewish pastry/cookie that somewhat resembles a mini croissant. It is filled with things that range from fruit preserves to chocolate. Your choice in filling is all up to you. I first saw this recipe years ago, bookmarked it, and never once tried this recipe out. However, there were great reviews made by people that have made this "Rugelach" and now I actually got to make it. This is another recipe that comes from Ina Garten. In making this recipe, the dough was super simple to make. It took only 5 minutes making it by hand. I did substitute the filling. Instead of apricot preserves, I used strawberry preserves simply because strawberry preserves is my favorite and I didn't want to go out and buy a whole jar of apricot preserves that I have never tried before. I was a little skeptical of changing the preserve flavor because I wondered if I had to omit the raisins or change the nuts. After thinking about it, I decided to keep the filling as is, with the alteration of the preserves, and see what happens. The cookies came out of the oven and were delicious! When you take that first bite, the dough is buttery and flakey, then you begin to taste the strawberry preserves, then you get a hint of cinnamon and then you taste the walnuts and raisins. I loved the layers of flavors in this cookie. Overall, I was glad I kept the recipe as is, with the alteration of the preserves. It came out to be one great cookie. Here's the recipe!

Rugelach
Ingredients
8 ounces cream cheese, at room temperature
1/2-pound unsalted butter, at room temperature
1/4 cup granulated sugar plus 9 tablespoons
1/4 teaspoon kosher salt
1 teaspoon pure vanilla extract
2 cups all-purpose flour
1/4 cup light brown sugar, packed
1 1/2 teaspoons ground cinnamon
3/4 cup raisins
1 cup walnuts, finely chopped
1/2 cup apricot preserves, pureed in a food processor (I used strawberry preserves!)
1 egg beaten with 1 tablespoon milk, for egg wash
Directions
Cream the cheese and butter in the bowl of an electric mixer fitted with the paddle attachment until light. Add 1/4 cup granulated sugar, the salt, and vanilla. With the mixer on low speed, add the flour and mix until just combined. Dump the dough out onto a well-floured board and roll it into a ball. Cut the ball in quarters, wrap each piece in plastic, and refrigerate for 1 hour.

To make the filling, combine 6 tablespoons of granulated sugar, the brown sugar, 1/2 teaspoon cinnamon, the raisins, and walnuts.

On a well-floured board, roll each ball of dough into a 9-inch circle. Spread the dough with 2 tablespoons apricot preserves and sprinkle with 1/2 cup of the filling. Press the filling lightly into the dough. Cut the circle into 12 equal wedges—cutting the whole circle in quarters, then each quarter into thirds. Starting with the wide edge, roll up each wedge. Place the cookies, points tucked under, on a baking sheet lined with parchment paper. Chill for 30 minutes.

Preheat the oven to 350 degrees F.

Brush each cookie with the egg wash. Combine 3 tablespoons granulated sugar and 1 teaspoon cinnamon and sprinkle on the cookies. Bake for 15 to 20 minutes, until lightly browned. Remove to a wire rack and let cool.

Buttery Rugelach on Foodista
-Aaron John
My Food Outings: AJ's Food Adventure
Facebook Fan Page

LinkWithin

Related Posts with Thumbnails