Friday, December 24, 2010

Holiday Biscotti


Merry Christmas Eve and Merry Christmas to others!! Christmas is upon us. The tree is up, the decorations fill the house with joy, and the food, oh the food...fills the house with that wondrous smell. So, get out those pajamas and those fuzzy slippers, find your cameras and video recorders, get off your diet and splurge a little bit, and get ready to have some fun.

Christmas is always full of fun but food preparation may be stressful but I can help with your desserts. Do you still need a last minute cookie recipe to fill up your cookie tray? Why not make a cookie with the colors of Christmas, red and green? Holiday Biscotti is the cookie that will round out your tray. Simple to make and rather quick to bake. Aren't you impressed with how they look? Well, I hope so! 

Once again, Happy Holidays everyone! Remember, it's not about the presents, it's about spending time with family and friends (and the food of course! :D). 

Tips
-When you form the dough into a log, I find that having it be about 1/2 inch thick created the best thickness after being baked.
-When baking for the second time, I like to flip the biscotti half way through the baking process.
-Don't bake the biscotti for too long. I notice that baking dried fruit for too long can cause it to become hard instead of chewy


Results
Taste: The biscotti has a light lemon flavor with a nuttyness from the pistachios, a tart, sweetness from the cranberries and a vanilla flavor from the white chocolate.


Texture: The biscotti has a "light crunch" and not the "hard crunch" of store bought biscotti which is nice. The pistachios gave a slight "soft crunch", the cranberries gave a chewiness and the white chocolate gave a creaminess to tie the whole cookie together.


Holiday Biscotti (Makes 2 dozen)
Recipe by Giada de Laurentiis

Ingredients
2 cups all-purpose flour
1 1/2 teaspoons baking powder
3/4 cup sugar
1/2 cup (1 stick) unsalted butter, room temperature
1 teaspoon grated lemon zest
1/4 teaspoon salt
2 large eggs
3/4 cup pistachios, coarsely chopped
2/3 cup dried cranberries
12 ounces good-quality white chocolate, chopped
Red and green sugar crystals, for garnish

Directions
Preheat the oven to 350 degrees F.

Line a heavy large baking sheet with parchment paper. Whisk the flour and baking powder in a medium bowl to blend. Using an electric mixer, beat the sugar, butter, lemon zest, and salt in a large bowl to blend. Beat in the eggs 1 at a time. Add the flour mixture and beat just until blended. Stir in the pistachios and cranberries.

Form the dough into a 13-inch long, 3-inch wide log on the prepared baking sheet. Bake until light golden, about 40 minutes. Cool for 30 minutes.

Place the log on the cutting board. Using a sharp serrated knife, cut the log on a diagonal into 1/2 to 3/4-inch-thick slices. Arrange the biscotti, cut side down, on the baking sheet. Bake the biscotti until they are pale golden, about 15 minutes. Transfer the biscotti to a rack and cool completely.

Stir the chocolate in a bowl set over a saucepan of simmering water until the chocolate melts. Dip half of the biscotti into the melted chocolate. Gently shake off the excess chocolate. Place the biscotti on the baking sheet for the chocolate to set. Sprinkle with the sugar crystals. Refrigerate until the chocolate is firm, about 35 minutes.

The biscotti can be made ahead. Store them in an airtight container up to 4 days, or wrap them in foil and freeze in resealable plastic bags up to 3 weeks.

-Aaron John

Saturday, December 18, 2010

Pandan Chiffon Cupcakes


Today is my favorite time of year for watching shows on the Food Network. It's the holiday episodes! Yes! I've been waiting all year for this. Is it just me or does all the food just look exceptionally delicious this time of year? I just want to make everything they make and then some. Boy, would that be a lot of food or what?! One day, one day it will happen... Here's to hoping! ha. Until then, I'll just stick to "Christmas-y" type desserts like this Pandan Chiffon Cake.

Have you ever used pandan before? Me neither! Using this ingredient was something extremely new to me. At first, I thought I never heard of it before. However, when I got to thinking, Filipino's have a dessert called buko pandan. I couldn't believe how I forgot about it. So, I got my pandan and got to making these little chiffon cupcakes. Look at that green color, just in time for Christmas! Can you believe all that color came from just one teaspoon of pandan paste? I was in shock! No food coloring here, just the natural pandan extract color.

Tips
-Before whipping your egg whites, wipe your bowl with a teaspoon of vinegar. It simply makes sure that your bowl is extra clean

-Fold in all the egg whites until white steaks are no more

Results
Taste: The cake as a slight coconut flavor with hints of pandan flavor which is similar in taste to a vanilla, hazelnut and coconut combo. 

Texture: The cake was light and fluffy, what a chiffon should be like.

Pandan Chiffon Cake (Makes 1 10-inch tube cake)
Recipe from Kirbie's Cravings
Ingredients
(A)
1 3/4 cup all-purpose flour, sifted
1 Tbp. baking powder
1 tsp. salt
1/2 cup sugar

(B)
1/2 cup vegetable or canola oil
6 egg yolks
3/4 cup coconut milk
1 tsp. pandan paste

(C)
6 egg whites
1/2 tsp. cream of tartar
3/4 cup sugar

Directions
Preheat oven to 350'F (175'C).

Combine (A) in a bowl. Stir well to blend. Add (B). Beat with an electric mixer until smooth.

Beat (C) (egg whites and cream of tartar) in a separate bowl until moist peaks formed. Gradually add 3/4 cup sugar, beating until stiff and shiny peaks are formed. Fold 1/3 of the egg whites into the egg yolks mixture, fold to mix and then add the rest of the egg whites. Fold gently but thoroughly, so no white streaks remain. Turn batter into ungreased 10" tube pan.

Bake for 60 mins or until a toothpick inserted in the center comes out clean. Invert cake and cool completely in pan. Make sure oven has reached 350 F before putting cake in oven. When cool, loosen the edges and shake pan to remove

-Aaron John

Wednesday, December 15, 2010

Blog Award!


Where has the time gone? Only 10 days left until Christmas?! Who's as shocked as I am? Wasn't Thanksgiving, like, yesterday? ha. I think I've lost track of time, being it was Finals Week at UW. Let's hope I get the grades I want. *Fingers Crossed* That would be the greatest gift of all...that and a dslr camera *cough cough*

Anywho, now that I'm on my winter break, I finally have more time for my blog especially checking out other blogs and responding to comments/emails (Sorry for being so delayed!). The first stop is this award a got a couple weeks ago from Michael of Me, My Food and I. Have you checked out his blog yet? His food makes me want to make more savory dishes. Here's to hoping!  He definitely has posts on sweets too! His blog really has everything, savory, sweet, simple and some dishes that will surely impress. 

So I guess I must pass this award along. Here's my top 5 blogs I love to check out everyday! Congrats you guys! :)

1. Korean American Mommy - Lisa of "Korean American Mommy" is one of my favorite bloggers. Her pictures of food are just mouthwatering and I love the blending of her Korean heritage in some of her dishes. I hope one day, my blog can be at the same level are her's. :)

2. swEEts by e - Evan decorates cakes like no ones business! I love the detail work in all of her cakes and how they look so professional! 

3. Becoming Lola - I love this blog because of the writing style that Letitia has. Sometimes, her posts make you laugh, sometimes her blogs make you feel all warm and fuzzy inside. haha. With such great pictures on her blog, I can't keep my eyes off it. Not to mention, she loves the blogger community and loves to create events/challenges where us bloggers can interact!

4. Bittersweet - If you're looking for creativity, Rick's blog is the one for you! His food is creative and looks delicious! Not to mention, a lot of the recipes are simple!

5. Baking Serendipity - Another favorite blog of mine. I love how she is so creative with making pancakes! If you think Chocolate Chip Pancakes are the only kind of creative pancake, you've thought wrong! So many pancakes and other dishes. YUM!

-Aaron John

Saturday, December 11, 2010

Donut Muffins


This past week, I gave away "goodie bags" to 20 lucky friends since it is the season of giving after all. Boy, was that time-consuming. ha. It took me about 6 hours to fully complete the baking and about 30 minutes to package them all up. In the time leading up to these "goodie bag" giveaways, I had to decide what I was going to put in them first of all. I was going over all my recipes figuring out what would work best. I definitely knew I wanted some sort of a cake and cookie combination. Then, I had to choose exactly what. Well, for the cookie part of the bags, I wanted something that would last and not be affected by sitting over night. From this, I chose my Chocolate and Almond Biscotti and Raspberry Thumbprint Cookies. But what cake can I make?

When deciding the cake aspect, I had different ideas floating around in my head. Making whole cupcakes, mini cupcakes, cake truffles, cake pops, cake petit fours. The list went on and on. I narrowed down my choices to either Donut Muffins or Red Velvet mini cupcakes/petit fours. However, I had never made Donut Muffins before and I wasn't about to let my friends become guinea pigs.

So, these were the Donut Muffins I tested out. Sad to say, these didn't make the cut of my giveaway. Instead I made Mini Red Velvet Cupcakes. Overall, the giveaway was a success and was worth every minute of it. Too bad I didn't take pictures of the gift bags....I did take pictures of the Donut Muffins though! ha.

Tips
-Don't over-mix the batter. The batter will seem rather thick and not combined but a few mixes and it should be good to go.

-I used paper liners to bake them up simply for easier cleanup.

-I found that after the muffins came out of the oven and you are ready to cover them in sugar, dunking them in butter and letting them sit for about 30 seconds before dipping them into the cinnamon sugar worked best. It prevented clumps of sugar to accumulate on the muffin.

Results
Taste: Actually tasted close to a cake donut with the addition of cinnamon and nutmeg. However, something seemed to be missing for me in these muffins.

Texture: The muffin itself was moist and the cinnamon-sugar topping gave a nice crunch. The muffin had a texture close to a coffee cake, not as dense as a real donut which is probably the reason why I felt it was "off"

Donut Muffins (Makes 12 Muffins)
Recipe Found Through The Pioneer Woman @ Tasty Kitchen

Ingredients
1 3/4 cup Flour
1 1/2 teaspoon Baking Powder
1/2 teaspoons Salt
1/2 teaspoons Nutmeg
1/2 teaspoons Cinnamon
1/3 cups Oil
3/4 cups White Sugar
1 whole Egg
3/4 cups Milk

FOR THE TOPPING:
1/4 cups Butter
1/3 cups White Sugar
1 Tablespoon Cinnamon

Directions
Combine flour, baking powder, salt, nutmeg and cinnamon.
Combine oil, sugar, egg and milk. Add dry ingredients and stir only to combine.
Bake at 350 degrees for 15-20 minutes. Meanwhile, melt the butter in a bowl. Combine the white sugar with the cinnamon in another bowl.
Shake muffins out while still hot. Dip muffins in butter, then into the sugar/cinnamon mix. Let cool.

-Aaron John

Saturday, December 4, 2010

7-Up Cupcakes


Finally, the last week of the classes is here! So excited. But, we all know what comes after the last week of the classes, FINALS WEEK! With four final's that need to be taken, I need to be on my game. That's why I have to start studying now. Am I the only one that has trouble studying? It seems as if I always can find ways to distract myself for random reasons. Whether, I get up to walk around the house or go on....Facebook, I just can't seem to study. Maybe I should just lock up my laptop until I finish Finals Week. ha.

Back to what we're all here for, Food! 7-Up Cupcakes to be exact. I first heard about this type of cake years ago while watching the Food Network. I don't exactly remember how 7-Up Cake came about but I do remember Giada de Laurentiis being in the episode judging. The cake was....well....um....just read on.

Tips
-I followed the recipe exactly, including beating the butter and sugar for 20 minutes. I personally thought that 20 min was a bit much but since there's no leavening, you have to. I would assume you can add baking powder to this recipe. Maybe 1 tsp?

Results
Taste: A lemon flavored cake that is sweet but not overly sweet. The lemon glaze added just the right amount of lemon flavor and extra sweetness the the cupcakes.

Texture: The cake was actually moist and not as dense as I expected. However, there was something about the texture of the cupcakes that I didn't like. I don't exactly know what it is but I think it may have been because there was no leavening agents used besides the carbonation from the soda and creaming the butter and sugar. The texture was off to me. Maybe it's just me...

7-Up Cake (Makes 1 Bundt Cake)
Recipe Found Through Food.com
Ingredients
Cake:
3/4 lb butter, softened
3 cups sugar
5 eggs
3 cups flour
2 tablespoons lemon extract
3/4 cup carbonated lemon-lime beverage


Lemon Glaze:
2/3 cup powdered sugar
1 tablespoon lemon juice

Directions
Preheat oven to 325 degrees F.

Cream butter and sugar together for 20 minutes. Add eggs, 1 at a time, beating after each addition. Next, add flour and lemon extract. Fold in 7-Up.

Pour cake batter into a well-greased 12-cup Bundt pan or tube pan. Bake at 325 degrees for 1 to 1 1/4 hours.

Make Lemon Glaze by mixing powdered sugar and lemon juice together. When cake is cooled, dribble with Lemon Glaze.

-Aaron John

Friday, December 3, 2010

And The Winner Is.....


You've waited a week and the results are in. The lucky number is.....11. That means the winner of a $45 Gift Certificate to CSN Stores is Pixie!! Congratulations Pixie!! I will contact you with your prize shortly. Thanks to everyone who entered my giveaway and a special thanks to CSN Stores! Keep checking back on my blog. You never know what surprises are in store.

-Aaron John

Thursday, December 2, 2010

Giveaway Entrants And Your Numbers

As usual, I numbered the entries myself to make it easier in picking the winner through Random.org. Look for your name and numbers and Good Luck!! The winner will be announced tomorrow!

Celeste: 1

Necinco: 2

Vindel: 3, 4, 5

Tim: 6, 7, 8

Mandy: 9

Pixie: 10, 11, 12

Claire: 13

Liz: 14, 15, 16

-Aaron John

Wednesday, November 24, 2010

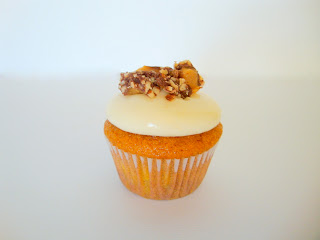
Pumpkin Cupcakes With Maple Cream Cheese Frosting And A Giveaway!


So the past two days have been SNOW DAYS here in Seattle! That makes my Thanksgiving break extended by 2 days! Yay! Speaking of Thanksgiving, Thanksgiving is here! Well, it's tomorrow but still...Thanksgiving is here!! I don't know about you but it has come just at the right time. I'm fully prepared to stuff my face with delicious food and be around family. I live for the holidays because it's one of the only times out of the year where the whole family gets together. There's just something about it that makes you all happy inside. Anywho, so it's Thanksgiving so it only seems logical to have a Thanks-giveaway! So if you haven't checked out CSN Stores after my multiple posts about CSN Stores, get to it!! Get coffee tables, a lamp, heck even get yourself a huge fountain! Whatever makes you happy. I'll talk about this later.

In honor of Thanksgiving, why not make something pumpkin related. This was my first time working with pumpkin and it was well...Interesting? ha. It was fun working with a new ingredient because I was able to increase my "Ingredient Use Count". You can read on for the end results of these cupcakes late on as well.

Now, back to what you've all been waiting for, the Thanks-Giveaway. CSN Stores is giving you the chance to win a $45 Gift Certificate for any of their online stores! I repeat, $45 Gift Certificate!! Here's how to enter:

You must be a follower of "AJ's Cooking Secrets" through the Google Friend Connect located on the left side bar of my blog to enter this giveaway. If you are not a follower, your entry and/or entries will not be counted.

You have THREE chances to enter!!
1. Leave a comment stating what you would like to buy from CSN Stores with the $45 Gift Certificate, along with your email.
2. Become a fan/liker of my Facebook Fan Page : AJ's Cooking Secrets and leave a comment below stating that you have become a fan/liker. If you are already a fan/liker of my FB Fan Page, leave a comment stating that you are.
3. Follow me on Twitter @aaronjohn04 and leave a comment below stating that you have become a follower. If you are already a follower of my twitter page, leave a comment stating that you are.

Important Guidelines:
-Must be a follower of this blog, "AJ's Cooking Secrets", through Google Friend Connect located on the left side bar for your entry/entries to count. Anyone who "enters" without being a follower of this blog will not be entered into the drawing.
-The Giveaway will last until Wednesday, December 1st, 2010 at 11:59 PM PST. The winner will be drawn using Random.org. The winner will then be announced in a blog post, on my facebook page and emailed that they are the winner. From there, the winner will be contacted by CSN Stores where you will receive a Gift Certificate Code.

Tips
-It's a fairly straightforward recipe so don't over mix the batter and don't over bake your cupcakes. Stick a toothpick into the cupcake and if there's a tiny bit of crumbs that stick, it's ready to take out. Some people say to take them out when a toothpick is clean but you have to remember that the cupcakes will somewhat continue to cook because of the heat that is retained in the pan and the cupcake itself.

Results
Taste: The cupcake itself was very reminiscent of a carrot cake in terms of the flavor of the spices but with the slight flavor of pumpkin instead of carrots. I personally felt it was missing an a "lil' somethin' somethin'". The Maple Cream Cheese frosting didn't taste like Maple. Maybe because I used a tablespoon of maple syrup instead? But it was missing that Maple flavor. 

Texture: Definitely a moist cupcake because of the use of the pumpkin and the oil. The frosting was smooth and creamy.


Pumpkin Cupcakes With Maple Cream Cheese Frosting (Makes 10 cupcakes)
Recipe by Ina Garten

Ingredients
1 cup all-purpose flour
1 teaspoon baking powder
1/2 teaspoon baking soda
1/2 teaspoon kosher salt
1 teaspoon ground cinnamon
1/2 teaspoon ground ginger
1/2 teaspoon ground nutmeg
2 extra-large eggs, at room temperature
1 cup canned pumpkin purée (8 ounces), not pie filling
1/2 cup granulated sugar
1/2 cup light brown sugar, lightly packed
1/2 cup vegetable oil
Maple Frosting (recipe follows)
1/2 cup coarsely chopped Heath bars, for serving (2 1.4-ounce bars)

Directions
Preheat the oven to 350 degrees. Brush or spray the top of 10 muffin tins with vegetable oil and line them with 10 paper liners.

Into a medium bowl, sift together the flour, baking powder, baking soda, salt, cinnamon, ginger, and nutmeg. In a larger bowl, whisk together the eggs, pumpkin purée, granulated sugar, brown sugar, and vegetable oil. Add the flour mixture and stir until combined.

Divide the batter among the prepared tins (I use a level 2 1/4-inch ice cream scoop) and bake for 20 to 25 minutes, until a toothpick inserted in the center comes out clean. Set aside to cool completely.

Spread the cupcakes with the Maple Frosting and sprinkle with the chopped toffee bits.

Maple Cream Cheese Frosting
6 ounces cream cheese, at room temperature
3 tablespoons unsalted butter, at room temperature
1/4 teaspoon Boyajian Natural Maple Flavor
1/2 teaspoon pure vanilla extract
2 cups sifted confectioners' sugar

In the bowl of an electric mixer fitted with the paddle attachment, cream the cream cheese and butter on low speed until smooth. Stir in the maple flavoring and vanilla extract. With the mixer still on low, slowly add the confectioners' sugar and mix until smooth.

-Aaron John

Friday, November 19, 2010

Apple Crostata


So, this past week was a week of decisions. First, I needed to decide what classes to take this coming Winter Quarter. Second, I had decide what major would be best for me. Third, I had to decide what to do with my other blog "AJ's Food Adventure". Well, I decided on things for all three. I've decided to go along the Biochemistry path. I figured, it may be hard and difficult but if I keep giving up, where will I end up? I need to stick to this major, not have doubts and have confidence that I can pull through. Second, going on the Biochemistry path involves taking the next level of Biology classes which I am fully prepared to do. Finally, I have decided to discontinue my other blog "AJ's Food Adventure" within the next week or two. Why? I don't use that blog that often, if at all. "AJ's Food Adventure" started my "blogging career" and now it's time to let it go. It's sad to have to let it go but I feel it's time. Overall, life is full of decisions so "Live YOUR Life. Choose YOUR Path"

With the kind of weeks I've been having, I needed comfort in the form of Apple Crostata. An opened faced pie that doesn't require a pie pan? Say Whaaa?! In addition, it's extremely easier to slice a piece from this "circle of goodness" than it does by digging into a full deep dish apple pie. Sure, deep dish apple pies are a show stopper but this Crostata has the same flavors in a nice compact little package. :)

Tips
-Feel free to make the dough in a bowl with pastry cutters or forks. I, myself, used the fork method. The trick is to break down the butter enough to where the butter is the size of peas. With chunks of butter running through the dough, it guarantees a flakey Crostata

-The dough will seem dry when using pastry cutters/forks. My suspicion is using the forks doesn't produce heat whereas a food processor does. This heat will cause a tiny bit of the butter to melt slightly to add moisture to the dough. Don't get nervous though. Just work the dough a little bit until it comes together. Don't handle it too much because you want butter pieces. 

-When the baked Apple Crostata is cool enough to handle, lift the parchment paper and slide the Apple Crostata on your serving platter. Lifting the Crostata with spatulas will cause the Crostata to break. 

Results
Taste: A slight tang from the apples, sweet yet savory and buttery quality to the crust, and "spicyness" from the addition of cinnamon to scream Fall/Winter. Essentially, an apple pie that's 10 times easier

Texture: Apples were tender yet still al-dente and the crust was flakey. Definitely a great sign of a properly baked apple dessert! 

Apple Crostata
Recipe by Giada De Laurentiis

Ingredients
Crust:
1 1/2 cups all-purpose flour
2 tablespoons sugar
1/2 teaspoon salt
10 tablespoons (1 1/4 sticks) unsalted butter, chilled, cut into 1/2-inch pieces
3 tablespoons ice water
Filling:
2 small Golden Delicious apples, peeled, halved, cored, cut into 1/8-inch-thick slices
1 Pippin apple, peeled, halved, cored, cut into 1/8-inch-thick slices
1/4 cup plus 1 tablespoon sugar
1 teaspoon fresh lemon juice
1 large egg white beaten with 1 tablespoon of water (for egg wash)
2 tablespoons sliced almonds, toasted

Directions
To make the crust: Mix the flour, sugar, and salt in a processor. Add the butter. Pulse until the mixture resembles a coarse meal. Add the ice water and pulse until moist clumps form. Gather the dough into a ball; flatten into a disk. (If the dough still crumbles and does not form into a ball, add another tablespoon of ice water.) Wrap the dough in plastic and refrigerate until firm, about 1 hour.

For the filling: Position the rack in the center of the oven and preheat the oven to 400 degrees F.

Combine the apples, 1/4 cup of sugar, and lemon juice in large bowl; toss gently to blend. Set aside for 10 minutes.

Meanwhile, dust a large sheet of parchment paper with flour and roll out the dough on the paper to an 11-inch round. Transfer the dough on the parchment paper to a heavy large baking sheet. Spoon the apple mixture over the dough, leaving a 2-inch border. Fold the dough border over the filling to form an 8-inch round, leaving the apples exposed in the center. Pleat loosely and pinch the dough to seal any cracks. Brush the crust with the egg wash and sprinkle with the remaining 1 tablespoon of sugar.

Bake the crostata until the crust is golden and the apples are tender, about 40 minutes. Transfer the baking sheet to a rack; cool for 10 minutes. Slide a metal spatula under the crust to free the crostata from the baking sheet. Cool the crostata to lukewarm. Sprinkle with the almonds and serve.

-Aaron John

Saturday, November 13, 2010

Black And White Cookies


Once again, I'm at the point where I'm confused about school and major. Just a month ago I said I was either going into Pre-Nursing or Biochemistry/Pre-Pharmacy. However, after receiving my Biology Midterm yesterday, I felt so depressed because I bombed it. I studied hard for this test, read the book, went over reading quizzes and practice exams, did a plethora of past exam questions and I still did badly. When going into the test, I felt somewhat confident that I can get an 80% but my grade said otherwise. 

I don't believe that the problem is me or the professor. I believe the problem is in the grading techniques of the TA's. They are brutal in grading that if one misses one part of the question, one essentially gets the whole question wrong. For instance, in one of the questions I had, it was a three part question. It was essentially simple math. The answers were t + 1/2 U, 0.13 and 0.185. My answers were t + 1/2 U, 0.06 and 0.185 which meant I only got the second part wrong. This question was worth 6 points and I only got 2 points when I had 2/3 of the question right! Shouldn't I get 4 points?! There are a bunch of these types of grading on my test. I'm definitely taking this in for a re-grade. 

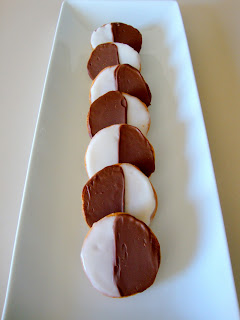
Enough of my rant, but I'm still confused about what I'm going to do with my life. Why can't life be clear cut like Black and White Cookies? It's either chocolate or vanilla, the simplest flavors that are the best out there. Why can't my life be as easy as choosing whether I like chocolate or vanilla better? Why can't I get a good grade in this Biology Class? If I were to take this Biology Class somewhere else, I would probably be excelling but I guess I will never know...But most of all, where is this road of life going to take me?

Tips
-I actually had difficulty with the chocolate glaze. It didn't come together when I made it in the microwave. Now, you may be saying "This guy probably doesn't know how to melt chocolate in the microwave" but let me tell you, I have melted chocolate in the microwave 43829025489042 times without any problems. lol. In fact, because of the failure of the chocolate glaze I melted milk chocolate in the microwave and slathered it on the cookie instead. I don't know what exactly went wrong with the glaze but it ended up becoming extremely grainy. Instead of microwaving it, I would suggest using a double boiler to do it.

Results
Taste: Beyond delicious!! Chocolate Lover? Vanilla Lover? This cookie has the best of both worlds. A subtle vanilla flavored cookie that has half tasting like vanilla and the other tasting like chocolate. My personal favorite was the chocolate part. hehe

Texture: The cookie is very cake like. Somewhat crisp around the edges. The slathering of icing gives another textural difference to the cookie. Almost crisp and creamy at the same time. 

Black and White Cookies (Makes about 16 large cookies)
adapted from Gourmet Cookbook via Joy The Baker
Ingredients
For the Cookies:
2 1/2 cups all-purpose flour
1 teaspoon baking soda
1 teaspoon salt
2/3 cup well-shaken buttermilk
1 teaspoon vanilla
2/3 cup unsalted butter, softened
1 cup granulated sugar
2 large egg

For Vanilla Glaze:
2 cups powdered sugar
1 Tablespoon light corn syrup
1/2 teaspoon vanilla extract

For Chocolate Glaze:
4 ounces semi-sweet chocolate
3 Tablespoons butter
1 Tablespoon light corn syrup

Directions
Preheat oven to 350°F.

Whisk together flour, baking soda, and salt in a bowl. Stir together buttermilk and vanilla in a cup.

Beat together butter and sugar in a large bowl with an electric mixer until pale and fluffy, about 3 minutes, then add eggs, beating until combined well. Mix in flour mixture and buttermilk mixture alternately in batches at low speed (scraping down side of bowl occasionally), beginning and ending with flour mixture. Mix until smooth.

Spoon 1/4 cups of batter about 2 inches apart onto a buttered large baking sheet. Bake in middle of oven until tops are puffed and pale golden, and cookies spring back when touched, 15 to 17 minutes. Transfer with a metal spatula to a rack and chill (to cool quickly), about 5 minutes.

To make the glazes-

In a bowl, whisk together the powdered sugar, 1/2 teaspoon vanilla extract, 1 tablespoon of corn syrup and 2 tablespoons hot water, until smooth. That’s your vanilla glaze.

In a separate bowl, melt the butter and the chocolate in a microwave for about 1 minute. Add the corn syrup and stir until smooth. That’s your chocolate glaze!

Once the cookies are cooled, face them all bottom side up of a clean surface. Spread half of the cookie with vanilla glaze and the other half with chocolate glaze. Refrigerate for 20 minutes to set. And…Yum!

-Aaron John

Saturday, November 6, 2010

Peanut Butter Cookies


I'm excited for this weekend because we get an extra hour of weekend!! So, don't forget you turn that clock one hour back. Anytime you have an extra hour to do anything, it's always a good thing! :)

Today, I am reintroducing myself to the Peanut Butter Cookie. Now, I say "reintroducing" because many years ago in probably the 3rd grade, I ate a Peanut Butter Cookie for the first time and it was horrible. I remember it was from the "Grandma's" cookie package. You know, the one that came with two huge cookies? Well, I ate one of them and it was super soft, almost soggy. Generally, I don't enjoy eating the "Grandma's" cookies because of this overly soft, weird soggy texture. Am I the only one that feels this way? There is definitely a difference between these cookies and a home made one. Just because I haven't eaten a Peanut Butter Cookie since this incident, it doesn't mean I haven't eaten a cookie with peanut butter. I love Nutter Butters. Those are super delicious. A peanut butter flavored crunchy cookie filled with peanut butter! Say Whaaa?! So GOOD! However, today we're talking about the circular, chewy, Peanut Butter Cookie.

As usual, I began my search for a Peanut Butter Cookie with great reviews and so I ended up with this recipe from Gale Gand. I remember when she was on the Food Network and had her show "Sweet Dreams". I loved that show! However, her show always aired when I was at school. So, every time we had a half day at my elementary school, I would rush home just to watch it. I'm sad to say, that show is now gone :( At least now I can re-live this show by making some of the desserts she made like these cookies.

Tips
-These Peanut Butter Cookies are supposed to be sandwich cookies but I didn't make them into sandwiches.

-Don't be afraid of the baking temperature of 400 degrees F. I was skeptical of the temperature but I just went with it and my cookies turned out great in about 7 minutes!

Results
Taste: Subtle peanut flavor, not too sweet.

Texture: Not exactly chewy. More on the crumbly side.

Peanut Butter Cookies
Recipe from Gale Gand
Ingredients
1/2 cup butter
1/2 cup sugar
1/2 cup brown sugar
1 egg
1/2 teaspoon vanilla
1 1/2 cups flour
3/4 teaspoons baking soda
1/4 teaspoon salt
1/2 cup peanut butter
Grape jelly ice cream, recipe follows

Directions
Preheat oven to 400 degrees.

Cream the butter well in a mixer with a paddle attachment. Add the sugars and continue to mix well. Add the egg and vanilla and mix well. Sift the flour with the baking soda and the salt then add it to the mixer and blend. Add the peanut butter and mix well. Roll into 1/2-inch balls and place on a greased sheet pan 1-inch apart. Press a fork down on the surface lengthwise then crosswise to make a grid pattern. Bake for 5 to 8 minutes at 400 degrees until light golden brown. Let cool on the pan.

Place a small scoop of grape jelly ice cream on the bottom (flat) side of a cookie and top with another cookie to make a sandwich. Place in the freezer and repeat with the remaining cookies.

Grape Jelly Ice Cream
Ingredients
1 quart vanilla ice cream
1/2 cup grape jelly

Directions
Fold grape jelly into vanilla ice cream, leaving some streaks of jelly. Freeze until ready to use in the sandwiches.

Peanut Butter Cookies on Foodista
-Aaron John
My Food Outings: AJ's Food Adventure
Facebook Fan Page

Saturday, October 30, 2010

Devil's Food Cupcakes


As much as I could love to say that I'm finally done studying for midterms for a while, after taking three midterms within the last 2 weeks, I can't. :( Midterms are already back! I essentially have midterms every week until Thanksgiving. Oy Caloy!! Sounds fun, huh? Due to this, I haven't been baking as much, haven't been reading up on the blogs I follow, haven't caught up on my love for reality shows, haven't been watching the Food Network and haven't been eating a whole lot. That's why this week it's all about Devil's Food Cupcakes! I think Midterms are the devil! lol. Well, that and Halloween is tomorrow and I need something kind-of, sort-of, semi-ish Halloween related. ha. It only seems right to do. So, Happy Halloween!

Now I have to go do something scary....Homework and Studying! I bet you jumped right out of your seat just now. hehe.

Tips
-The batter will be quite thin but don't worry about it. It will become a moist cupcake after baking.
-Fill the cupcake liners to about 2/3 of the way up to prevent "stick-age" to the pan
-My Cupcakes baked in about 20 min

Results
Taste: The taste was good, not great. The cupcake itself needs an extra chocolate boost. It had a mellow chocolate flavor instead of a deep intense flavor that I wanted. The frosting needed an extra chocolate boost as well. Perhaps, about a tablespoon more cocoa powder to enhance the cake and about a teaspoon of cocoa powder to enhance the frosting will do the trick. 

Texture: An EXTREMELY MOIST cupcake!! There is definitely no dryness to this cupcake recipe. It's soft and fluffy and with that creamy chocolate buttercream, can you ask for anything more?


Devil's Food Cupcakes with Milk Chocolate Buttercream
Recipe's are Hershey's Perfectly Chocolate Cake and Milk Chocolate Buttercream by Anne Thornton
Ingredients
For the cake:
2 cups sugar
1¾ cups all-purpose flour
¾ cup cocoa powder
1½ teaspoons baking powder
1½ teaspoons baking soda
1 teaspoon salt
2 eggs
1 cup whole milk
½ cup vegetable oil
2 teaspoons vanilla extract
1 cup boiling water

Frosting:
5 sticks (2 1/2 cups) butter, cut into tablespoon pieces and softened
1 teaspoon fine sea salt
5 cups confectioners' sugar
2 1/2 cups milk chocolate, melted and cooled
1/2 cup unsweetened chocolate, melted and cooled
2 teaspoons vanilla extract

Directions
Preheat the oven 350 degrees F. Grease and flour two 9-inch round baking pans.

Whisk together the sugar, flour, cocoa powder, baking powder, baking soda and salt in a large bowl. Add eggs, milk, oil and vanilla; beat on medium speed of mixer for 2 minutes. Stir in boiling water (batter will be thin). Divide batter between the two prepared pans.

Bake 30 to 35 minutes or until thin knife inserted into center comes out clean. Cool 10 minutes; remove from pans to wire racks. Cool completely.

Frosting: In a standing mixer fitted with a whisk attachment, combine the butter, salt, and 2 cups of the confectioners' sugar until light and fluffy. Add the melted chocolate, vanilla, and remaining sugar. Whisk on medium-high until smooth and fluffy.

Once the cupcakes are cool, frost the cupcakes.

-Aaron John
My Food Outings: AJ's Food Adventure
Facebook Fan Page

Saturday, October 23, 2010

Palmiers


Forget all the times I've said a recipe is the "easiest ever!" because this one is by far the easiest of all! haha. Why is it this easiest? Well, it only uses TWO ingredients (Not counting a pinch of salt)!! Say Whaaaa?! TWO ingredients is all you need for this "dessert". What is it you ask? Palmiers aka Elephant Ears!! While we're on the subject of Elephant Ears, when I was younger my brother used to call me Dumbo after the elephant named Dumbo in the Disney movie. The reason behind this? Well, I had huge ears and I was able to wiggle (more like flap) them just like Dumbo. To this day, I still can wiggle/flap them! They are not as huge as before though. hehe. Can you even believe I was able to win a mini laptop at UW with this hidden talent? It's TRUE!! Enough of my random tangents. haha. Like I said, this is the easiest recipe ever. Take sugar and puff pastry, roll out the puff pastry with sugar, fold , slice and bake. Believe me now? You can change up the flavor by adding different spices such as cinnamon. A perfect cookie to whip up in no time. Here's my results, tips and the recipe!

Results
Taste: Simply sweet and buttery

Texture: Crisp and crunchy with an outer layer of sugar

Tips
-No time to bake Palmiers after rolling and folding the dough? Freeze it for later use! I actually slice them prior to freezing to make it even easier

-I found that baking the sliced Palmiers pretty close together prevents excessive unraveling.

-Don't try to work in all the sugar. If there's too much sugar when baking, it creates a caramel which I had.

Palmiers
Recipe from Ina Garten

Ingredients
2 cups granulated sugar
1/8 teaspoon kosher salt
2 sheets puff pastry, defrosted (recommended: Pepperidge Farm)

Directions
Preheat the oven to 450 degrees F.

Combine the sugar and kosher salt. Pour 1 cup of the sugar/salt mixture on a flat surface such as wooden board or marble. Unfold each sheet of puff pastry onto the sugar and pour 1/2 cup of the sugar mixture on top, spreading it evenly on the puff pastry. This is not about sprinkling, it's about an even covering of sugar. With a rolling pin, roll the dough until it's 13 by 13-inches square and the sugar is pressed into the puff pastry on top and bottom. Fold the sides of the square towards the center so they go halfway to the middle. Fold them again so the two folds meet exactly at the middle of the dough. Then fold 1 half over the other half as though closing a book. You will have 6 layers. Slice the dough into 3/8-inch slices and place the slices, cut side up, on baking sheets lined with parchment paper. Place the second sheet of pastry on the sugared board, sprinkle with the remaining 1/2 cup of sugar mixture, and continue as above. (There will be quite a bit of sugar left over on the board.) Slice and arrange on baking sheets lined with parchment.

Bake the cookies for 6 minutes until caramelized and brown on the bottom, then turn with a spatula and bake another 3 to 5 minutes, until caramelized on the other side. Transfer to a baking rack to cool.

Palmiers on Foodista
-Aaron John
My Food Outings: AJ's Food Adventure
Facebook Fan Page

Friday, October 22, 2010

And The Winner Is.....


The winning number is 16. That means that Michael wins the $55 Gift Certificate to CSN Stores. Congrats!! I will contact you about your prize.  This is the second time Michael has won so he will not be eligible to enter the next TWO giveaways. Seriously, what are the chances for winning twice?! I'm in shock just as much as you are! Anywho, I guess that's about it for this post. Thank you to everyone who entered and thanks to CSN Stores for allowing me to do this giveaway. Who knows what other surprises are in store?

Thursday, October 21, 2010

Giveaway Entrants And Your Numbers

Here we go. I numbered the entries myself again. Look for your name and numbers and Good Luck!! The winner will be announced shortly!

J_feng: 1

Blake: 2

Domestic Diva: 3

Mamipdx: 4, 5, 6, 7

An Open Book: 8

Elaine: 9

Dee: 10, 11, 12, 13

Daphne: 14

Michael: 15, 16, 17

Liz: 18, 19, 20, 21

Debbie: 22, 23, 24

Meeyeehere: 25, 26, 27

Saturday, October 16, 2010

Coconut Cupcakes


These last couple of weeks, I've been bombarded with a plethora of school work! (Don't you just love my sophisticated language? ha). From readings, to assignments, to labs and post labs and now midterms, I have been super busy. I've been SOOOO determined to do extremely well in my full load of classes though so hopefully it will be worth it. Also, I have narrowed my major down to two choices! Either Biochemistry/Pharmacy or Pre-Nursing. I guess we'll find out what I choose by the end of the year! :)

Back to this week's post for Coconut Cupcakes. If you have a facebook account, you may have noticed, in the last couple of weeks, that your friends may be posting a status that says 'I like it on the ___(Fill In The Blank)___". In addition, you may have noticed that only females were posting this. I'm about to de-mystify what this means! So what was this about? Breast Cancer Awareness Month..Duhhhh! lol. How this status relates to Breast Cancer Awareness, I have no clue, but the message does have us ask "Why the status?" and thus, it brings awareness. To bring awareness to Breast Cancer, I made Coconut Cupcakes with a Pink Buttercream. I only felt it would be right to do something for Breast Cancer Awareness since it is this month. Plus, since it is Breast Cancer Awareness Month, you definitely have to have something Pink inspired. ha. How will you honor Breast Cancer Awareness?

Also, if you still haven't entered my giveaway for a $55 Gift Certificate for CSN Stores, just check out my post for "Love Potion #31 Cookies". You can enter until October 20th.

Results
Taste: The cake had a distinct almond-vanilla flavor which brings out the flavor of the coconut. I wasn't able to test out the cream cheese frosting however...

Texture: Not exactly a soft and fluffy cake. More dense than a regular cupcake but not as dense as a pound cake. The coconut that was mixed into the batter gave a nice textural difference to the cake. 

Tips
-I did not fill the cupcake liners to the top as the recipe says. If you do, your cupcakes will rise too much and bake onto the cupcake pan. I filled mine with about 3 tbsp of batter so about 2/3 to 3/4 of the way up.

-Other people have variations of this recipe. I even saw some using toasted coconut instead! :)


Coconut Cupcakes (Makes 24 Cupcakes)
Recipe by Ina Garten
Ingredients
3/4 pound (3 sticks) unsalted butter, room temperature
2 cups sugar
5 extra-large eggs at room temperature
1 1/2 teaspoons pure vanilla extract
1 1/2 teaspoons pure almond extract
3 cups flour
1 teaspoon baking powder
1/2 teaspoon baking soda
1/2 teaspoon kosher salt
1 cup buttermilk
14 ounces sweetened, shredded coconut

For the frosting:
1 pound cream cheese at room temperature
3/4 pound (3 sticks) unsalted butter, room temperature
1 teaspoon pure vanilla extract
1/2 teaspoon pure almond extract
1 1/2 pounds confectioners' sugar, sifted

Directions
Preheat the oven to 325 degrees F.

In the bowl of an electric mixer fitted with the paddle attachment, cream the butter and sugar on high speed until light and fluffy, about 5 minutes. With the mixer on low speed, add the eggs, 1 at a time, scraping down the bowl after each addition. Add the vanilla and almond extracts and mix well.

In a separate bowl, sift together the flour, baking powder, baking soda, and salt. In 3 parts, alternately add the dry ingredients and the buttermilk to the batter, beginning and ending with the dry. Mix until just combined. Fold in 7 ounces of coconut.

Line a muffin pan with paper liners. Fill each liner to the top with batter. Bake for 25 to 35 minutes, until the tops are brown and a toothpick comes out clean. Allow to cool in the pan for 15 minutes. Remove to a baking rack and cool completely.

Meanwhile, make the frosting. In the bowl of an electric mixer fitted with the paddle attachment, on low speed, cream together the cream cheese, butter, and vanilla and almond extracts. Add the confectioners' sugar and mix until smooth.

Frost the cupcakes and sprinkle with the remaining coconut.

-Aaron John

LinkWithin

Related Posts with Thumbnails